Tag Archives: PrintedSolid

Slides for 3D Printing and Crafts Presentation

Last Thursday night, I had the delight of participating in a Meetup with the Delaware 3D Printing Group. The event was hosted by Printed Solid. The group was kind enough to let me yammer on about my 3D Printed Crafts. 🙂 I very much enjoyed chatting with other printing enthusiasts and left the event invigorated. I should make it a point to do an event like this every November when the fatigue that accompanies Cyber Week looms in my brain. 🙂

For those who missed it, I do have all my slides up on SlideShare.

What in the World Has Vicky Been Up To?!!?

I’m back with 3D Printings after a bit of a hiatus and I have a lot to catch you up on!

Printed Solid Grand Opening!
A freaking wonderful, invigorating event. Joel Telling’s overview of the event can be found at https://www.youtube.com/watch?v=qnZqMnokjpw

What does TGAW stand for? That is answered in Joel’s interview with me:
https://www.youtube.com/watch?v=REvIWbER_Gc

Anglerfish
Blog post with more details on the creation of my bronzeFill/GlowFill Anglerfish. I do have one more if you happen to covet one. 😉
http://tgaw.com/wp/?p=307

Bow Ties!
I’ll work on a video about their design in Blender and the attachment design in OpenSCAD. It’ll use words like “Texture”, “Baking”, “Displacement Maps” and “Boolean Intersection”. In the meantime, I do have some listed on Etsy at https://www.etsy.com/shop/VickyTGAW

Land’s End Gazebo
The real live gazebo in Sayville, NY can be found here http://www.landsendweddings.com/

Geocoin
Check out the AMAZING family I am designing for. You couldn’t get better inspiration than that!
https://www.youtube.com/watch?v=znnSSlJF79w

Make Your Empty Filament Spools into a Shelf
As promised, the model is up on Thingiverse as well as the original OpenSCAD code.
http://www.thingiverse.com/thing:1677024

Print in Place Gyro Cube!
Wanna beta test my version of the Gyro Cube on YOUR printer? Lemme know!

Thanks for watching! Happy Printing!

Print Diary – Anglerfish in colorFabb BronzeFill and GlowFill

After months of craft shows and custom orders, my very last design and print for 2015 was something for me! As soon as I received my first spool of ColorFabb GlowFill, I wanted to do an anglerfish. I’m almost done with that roll, so this seemed to be the time. And as luck would have it, PrintedSolid and reddit were running a mixed material use contest. Destiny! I designed and printed my anglerfish in BronzeFill and GlowFill on my MakerGear M2. The GlowFill parts were actually inserted into the fish and sealed in as the BronzeFill printed.
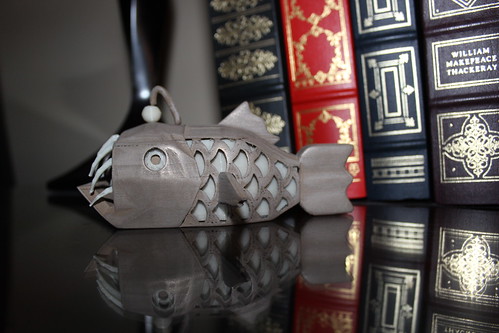
3D Printing - Anglerfish - From Side By Books
Tada! Anglerfish!

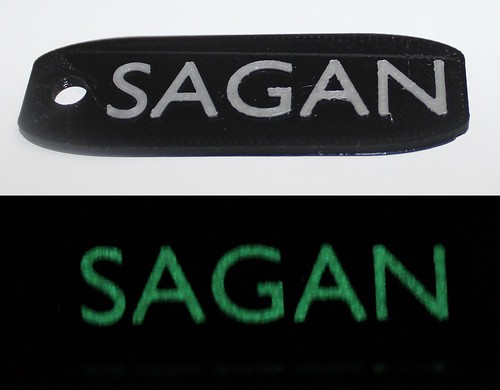
As you may expect, the GlowFill parts glow in the dark and the blacklight.
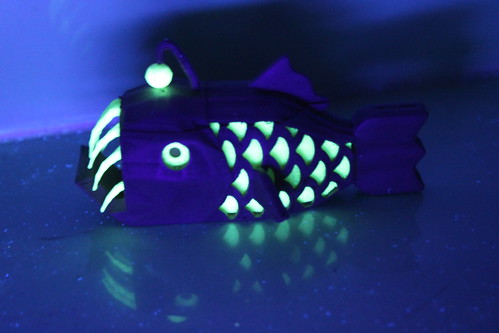
3D Printing - Anglerfish - Glowing in Blacklight 2
Glowing Anglerfish

Material Choices
I chose two materials for my anglerfish, both were mainly selected for aesthetic reasons:

  • colorFabb BronzeFill – The bulk of my print was in bronzeFill. To me, bronzeFill elevates designs. It’s heavy, so it feels expensive. It gets a sheen with sanding so it also looks expensive. I have found it to be a forgiving material as it is so easy to sand afterwards and redeem. I only had time for one print of my design before leaving for vacation. I needed a forgiving material. : ) I’ve also seen it bridge and do overhangs well, so I knew it was a good fit for my fish.

    Semantics also play a little bit of a role. Bronze pulls with it connotations of the Bronze Age– gladiators and warriors. Bronze is a material of badasses. Anglerfish withstand immense pressures down there at the bottom of the ocean. They warrant a badass material.

  • colorFabb GlowFill – And GlowFill was a no brainer. To really do justice to an anglerfish, I needed him to glow. : )

Design
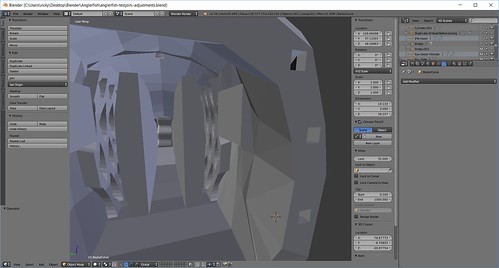
I designed my angerfish in Blender. I designed cavities and supports inside the fish to hold our GlowFill pieces. That way, I could insert the pieces and let the rest of the print seal them in.
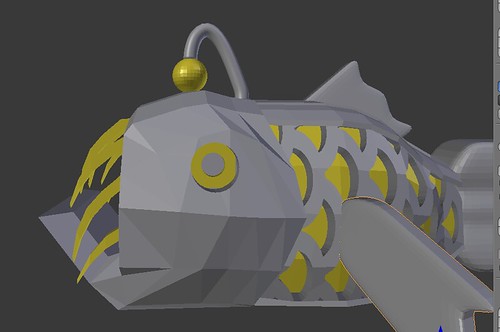
3D Printing - Anglerfish - Laying Out Both Colors in Blender
Model in Blender

3D Printing - Anglerfish - Visual of the Innards in Blender
Cavities Inside the Fish to Hold GlowFill Details.

So for example, the glowing eye detail. Inside the head of the fish, I have a little rectangular holder to keep that detail in place. I wanted the pupil of the eyes to remain dark, however, so that glowing eye detail had a circle cut out so the BronzeFill behind it could show through.
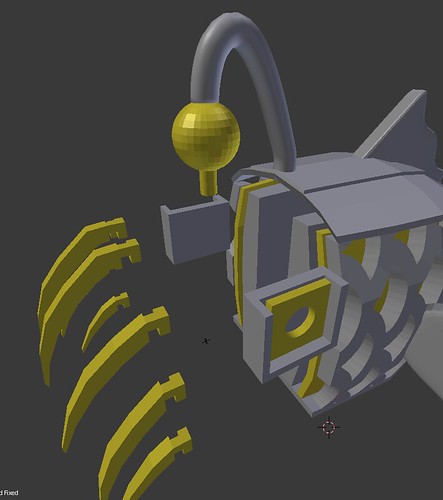
3D Printing - Anglerfish - Illustration of the Glowfill Part Placement in Blender
A View To Show the Relationship of How the GlowFill Eye Would Be Supported

Printing – GlowFill
I printed all the GlowFill pieces first. Very straight forward– 0.25mm layers, nothing super special.
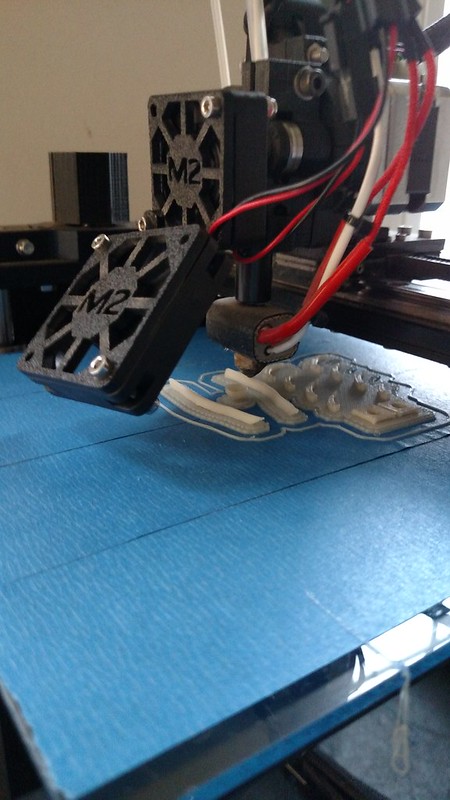
Anglerfish - GlowFill Parts

Printing – BronzeFill
BronzeFill is where the thinking came in. I still printed at 0.25mm layers. Using Simplify3D, I set up nine separate processes for the BronzeFill. At the end of each process, the print would stop, the Z bed would drop 100mm allowing me to insert in the appropriate GlowFill piece(s) before starting the next process.
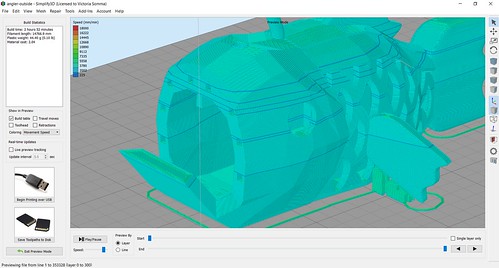
3D Printing - Anglerfish - Different Starting Points in Simplify3d
Preview in Simplify3D, the Blue Lines Illustrate Stopping Points
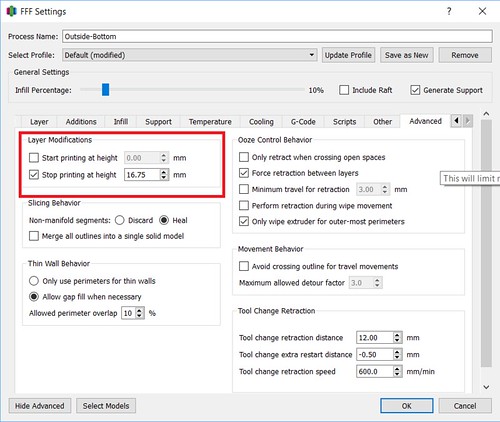
3D Printing - Anglerfish - Layer Modifications in Simplify3d
Using Layer Modifications in Simplify3D
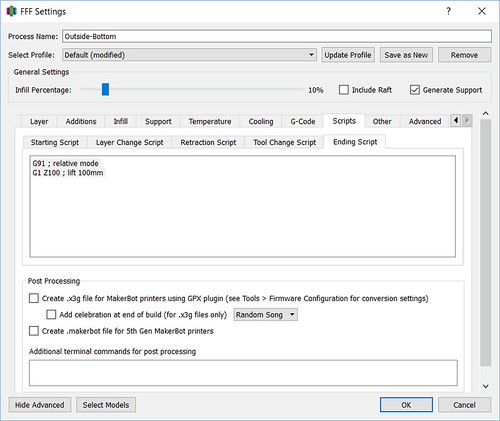
3D Printing - Anglerfish - Custom Ending Script in Simplify3D
Custom Ending Script in Simplify3D to Just Drop My Bed At the End of the Process
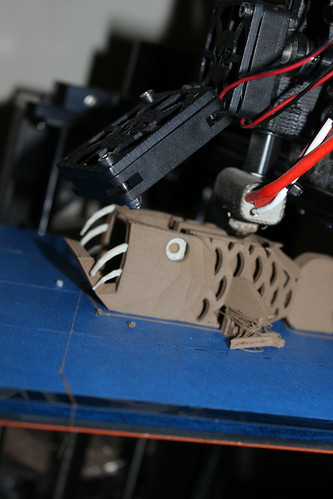
3D Printing - Anglerfish - Printing After Eye Inserts
After Eye Detail Was Inserted

I did have a bobble. When I inserted my side panels, I noticed they were a little higher than the BronzeFill layers around it. I thought it would be safe… but it knocked my nozzle and offset the X a bit. The seam you see in the pictures is the product of that shift. Lesson learned — better safe than sorry. : )
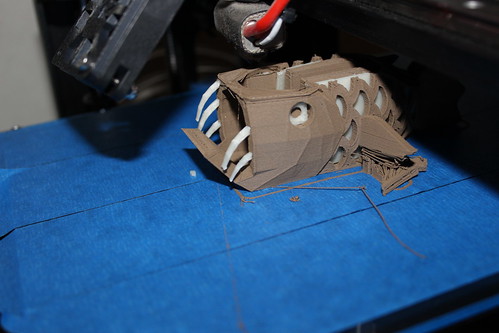
3D Printing - Anglerfish - Side Inserts
The Bobble

I did also end up printing the little dangly do-dad on the top of the fish separately. That was unplanned, but serendipitous as the fish would have been a pain to sand with that delicate detail in the way.

Finishing
I sanded the fish with three separate grades of sand paper and I finished him off with super fine steel wool.

Lessons
I only had time for one print and I do have adjustments I would make for my next run. First off– the teeth are not worth installing during the print. It was a lot of stops in the print to insert the teeth and the sanding. My gawd, the sanding. Those teeth were just a nuisance during sanding. I did get a little thrill each time I installed a tooth and had the print seal it in, but it wasn’t worth it. Next time, I’m just going to glue the teeth in after the fact.

Secondly, I learned to decrease the height of those side GlowFill panels slightly so I don’t get my nozzle knocked. : )

Even with my little bobble, I am thrilled with my anglerfish. Love!
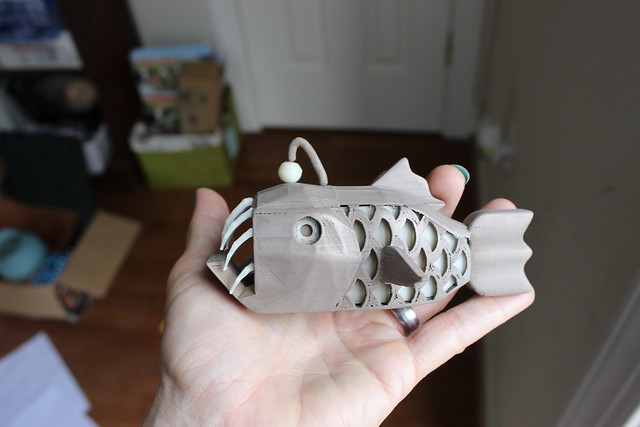
3D Printing - Anglerfish - In Hand
I Did It!

More photos of my Anglerfish and its process can be found on my Flickr site.

More Proof 3D Printing is Hands-On

When I was preparing for Occoquan Arts and Craft Fair, behind the scenes I was somewhat worried the organizers wouldn’t perceive my work as handmade. I had these preemptive unspoken arguments queuing up in my head. I collected up examples (and photos) of all the hands-on work– the modeling, the trial and error, the bed prep, the filament changes, the sanding (my gazebo ornament– I have to sand in between each and every slat in the railing- 70 in total), the painting, the sealing, adding split rings and keychains. I had a point all lined up at how Etsy considers 3D printing handmade.

This whole process was quite similar to all the practice arguments and the State Code passage I memorized in case anyone ever gave me flak about breastfeeding. In both cases, I never had any hassle (which doesn’t mean people aren’t hassled).

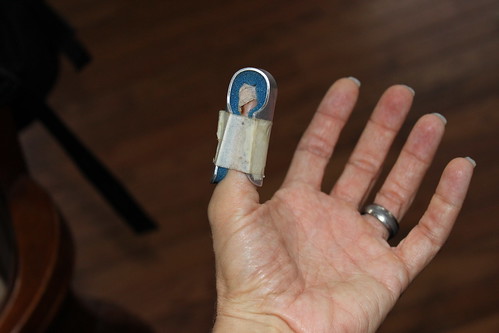
But should the tide ever turn, I had thought the giant gash in my thumb would be another good testament to the hands-on nature of 3D Printing.

3D Printing - Injury

If it wasn’t hands-on, how did I get that injury, huh? Huh? Huh? : )

And this tweet from PrintedSolid shows that I’m not an anomaly. Heads up– his picture includes the blood.

Horrors of #3dprinting #ouch #thefilamentbitme pic.twitter.com/FWN9k3y0a2

— Printed Solid (@PrintedSolid) October 4, 2015

3D Printing is most definitely a hands-on craft… and apparently dangerous for thumbs. : )

Print Diary – July 23, 2015 – The Orphaned Swans and the Lost Mobius Strip

One of the things I started designing this summer was for my cousin’s wedding. Like me, he is a computer programmer and like my husband and I, his nuptials also celebrated geek culture. Need proof? Final Fantasy was part of his wedding music and he wore Star Wars crocs during the ceremony.

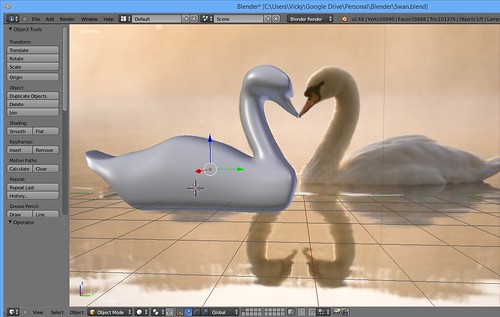
I had tossed around numerous projects. His wedding was in held in The National Aviary. I love “Hearts in Nature” and have seen stunning photographs of two swans making a heart. It seemed like a perfect thing. I pulled up my Blender and started modeling my swans. My process was very similar to what you would find in
Jjannaway3D’s Modeling A Velociraptor in Blender Series.

3D Modeling - Swan

And then… I had a tough question… “Okay, now what do I make out of these swans?” Napkin rings (and the swans did look great curved)? Napkin holder? Hook for oven mitts?

Then I thought, “Oh, he’s into computers, how about I make them into a USB/Sandisk holder.” But then I closed my eyes and really tried to picture my cousin with these swans on his desk. I just couldn’t see it. I loved the swans– I was happy with where they were going, but they no longer seemed to be a good fit.

What *did* seem to be a good fit was a Möbius Strip. And how cool would that be? A Möbius Strip USB holder! *I* want one! My process of modelling the strip itself was very similar to John Malcolm’s Modeling a Mobius Strip Pendant In Blender 2.73. My cross section was a little more stylized (instead of a straight square). After I applied the Bend Simple Distort, I made placeholder cubes for my USB slots (I did that afterwards as I wanted them to retain their measurements and not get distorted during the bend) and voila! I had my model!!!

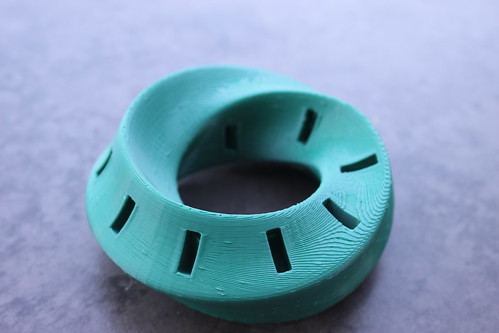
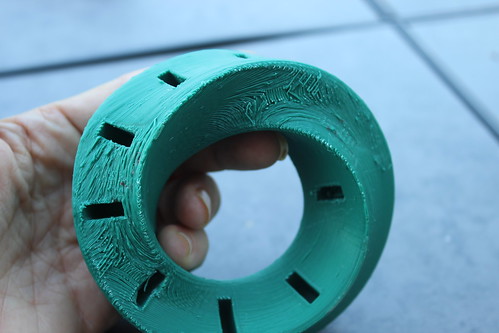
All along I intended this to be a Shapeways order, but I decided to give it a go on the MakerGear M2. I printed with 0.25 layers and 30% infill in my fabulous new Mint Turquoise Filament from ColorFabb (via PrintedSolid).

Six hours later, I had my print.

I was really digging the print lines on the top. I thought they were neat and added an additional pattern to the mix.

Holy crap, I thought, Maybe this isn’t a Shapeways order!

Mobius USB Holder- Top

Then I turned it over, removed the supports, and looked at where the supports were.

Yikes— Maybe it *is* a Shapeways order

Mobius USB Holder - Bottom (Before Sanding)

Some quick sanding with 120 grit paper, however, changed my mind completely. I didn’t even get to the 220 or 400 grit. After just that first sanding, my husband and I had to concentrate to figure out which was the top and which was the bottom. AMAZING.

“Where are the ‘after’ pictures,” you may ask. “Document your claim!” You may say.

Well, there aren’t any.

I let my kids play with it… outside…in the yard… where there is all this green shrubbery.

They lost it. Three adults scoured the yard and that Mint Turquoise filament has done an excellent job of concealing itself. Interrogations of the two year old and the four year old, “Do you know where Mommy’s green toy is?” was just as much of a dead end. I suspect it’ll be winter before I find it again.

A reprint is in my future (an advantage of 3D printing– you can always print another one). Regarding the reprint, ColorFabb has an amusing suggestion:

This is How I Become A Hoarder

So I’m not much of a shopper. I rarely buy clothes. I’m typically at the mercy of whatever garments various relatives give me as gifts. Luckily, I have found they tend to have better taste than I. All my nice clothes come from other people.

When I started 3D modeling and 3D printing, there was a bit of a paradigm shift. Suddenly I had things I coveted– prints from Shapeways… of my own design. And now that we have the MakerGear M2, there is a new phylum of purchases in the mix.

Filament.

I’m really into filament at the moment. At the National Maker Faire, I was helping out the Shapeways booth and it just so happened Printed Solid was nearby with the bronzeFill I had been coveting…on sale…with no shipping fees. I bought it, just in time to print a bust of my father-in-law for Father’s Day. I was instantly in love with the material.

My fate was further sealed when I learned to do two colored prints on our single extruder machine.

Well now I wanted MORE colors for the ideas brewing in my head. And as luck would have it, Printed Solid had a big sale to celebrate their new website. Well I couldn’t just let that pass me by. “Oh I’ll just order one,” I thought to myself. I decided to get the GlowFill my son and I had tried out the week before. Just like bronzeFill. Instant love.

3D Printing - Fun with GlowFill
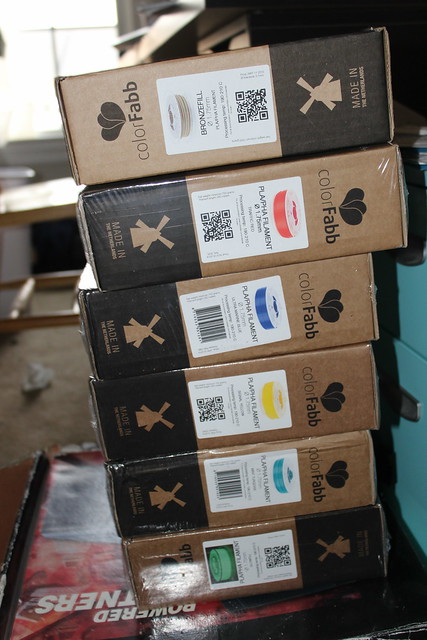
I placed an order for GlowFill. And then like five minutes later, I placed another order. That’s how fast I found more things (4 more things to be exact) that I coveted. That shipment has arrived, but I still yearn for NinjaFlex, WoodFill, a wider nozzle to better work with WoodFill, hdGlass, green PLA, purple PLA, on and on. I Still Want MORE!

The comedian Amy Schumer aptly described how she eats popcorn— the progression from “oh, I’ll just have a little” to “Gah!” and shoveling it in your mouth en masse.

That can easily become me and filament. : )