Tag Archives: OpenSCAD

What in the World Has Vicky Been Up To?!!?

I’m back with 3D Printings after a bit of a hiatus and I have a lot to catch you up on!

Printed Solid Grand Opening!
A freaking wonderful, invigorating event. Joel Telling’s overview of the event can be found at https://www.youtube.com/watch?v=qnZqMnokjpw

What does TGAW stand for? That is answered in Joel’s interview with me:
https://www.youtube.com/watch?v=REvIWbER_Gc

Anglerfish
Blog post with more details on the creation of my bronzeFill/GlowFill Anglerfish. I do have one more if you happen to covet one. 😉
http://tgaw.com/wp/?p=307

Bow Ties!
I’ll work on a video about their design in Blender and the attachment design in OpenSCAD. It’ll use words like “Texture”, “Baking”, “Displacement Maps” and “Boolean Intersection”. In the meantime, I do have some listed on Etsy at https://www.etsy.com/shop/VickyTGAW

Land’s End Gazebo
The real live gazebo in Sayville, NY can be found here http://www.landsendweddings.com/

Geocoin
Check out the AMAZING family I am designing for. You couldn’t get better inspiration than that!
https://www.youtube.com/watch?v=znnSSlJF79w

Make Your Empty Filament Spools into a Shelf
As promised, the model is up on Thingiverse as well as the original OpenSCAD code.
http://www.thingiverse.com/thing:1677024

Print in Place Gyro Cube!
Wanna beta test my version of the Gyro Cube on YOUR printer? Lemme know!

Thanks for watching! Happy Printing!

Personalized Glowing Valentines for Kids

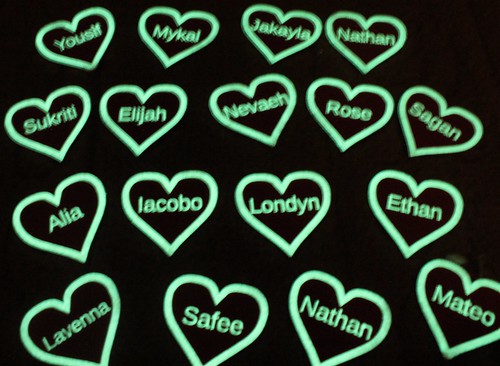
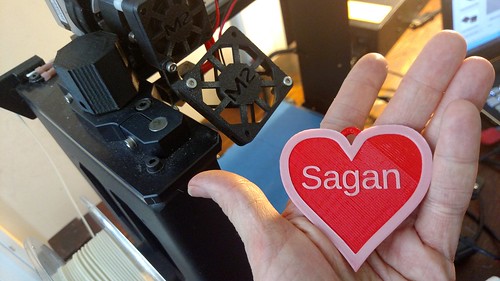
My son is named Sagan, after Carl Sagan.  Over here in the U.S., that’s a unique name.  As a result, he won’t be going into gas stations or souvenir shops and finding mass produced keychains and trinkets with his name on it.

Luckily, I have the MakerGear M2. I am not bound to get what someone else has decided to design and make.  I can make it myself!

3D Printing Valentines - Sagan

In my son’s pre-K class, a vast majority of the students are in the same boat– most of them have unique names. This seemed like a great use for the flexibility of a 3D Printer.

The Design
The design is not especially ground breaking. Hey, it’s a little heart pendant/medallion with a name on it. I printed most of it in ColorFabb Traffic Red PLA/PHA (duh) and then the detailing and the name are in GlowFill. One thing I have noticed with my kids is they LOVE glowing things. They love taking it into the bathroom and turning off the lights to see it glow.

Glowing Valentines

Modeling – Blender
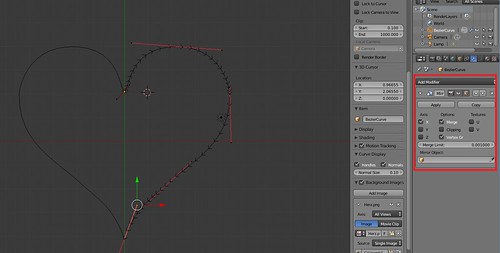
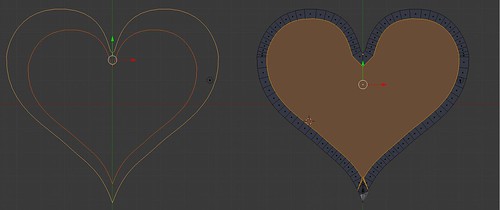
The base model I did in Blender. I started with a Bezier Curve. I used the Mirror modifier to make it symmetrical.

Modeling a Heart - Bezier Curve - Mirror

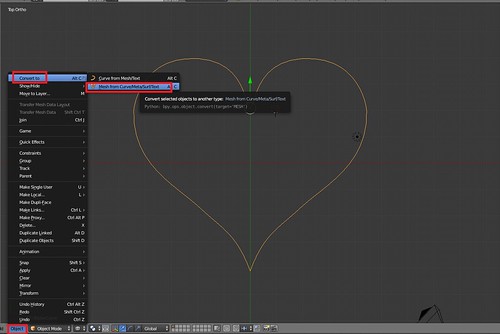
I converted the curve to a Mesh. Modeling a Heart - Convert to Object

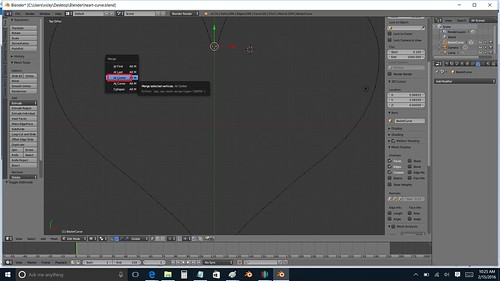
I did a little cleanup of the Vertices, by Merging a couple of oddly mirrored vertices to the center.
Modeling a Heart - Merge Vertices at Center

The detailing of my design, I wanted an outline of a heart in GlowFill. I’ve worked with hearts in the past and I knew that just scaling another heart down wasn’t going to do the trick. Inset is key to that!
MOdeling a Heart - Scale VersusInset
Scaling Versus Inset – Inset Will Give You Consistent Widths

I did an Inset of my face and did some manual cleanup of the vertices.

After that, it was just straight Extrusion to the heights I wanted.

The hook was just a cylinder subtracted from another cylinder (courtesy of the Boolean Modifier). I decided to keep the hook separate in case anyone wanted to print just straight up hearts.

At the end of my Blender session– I had two .STL files — my heart and my hook to make it a medallion.

Modeling – OpenSCAD
Although I had experimented with Python scripting for Blender roughly a year ago, OpenSCAD seemed easier and quicker for me. There is an Import command in OpenSCAD where you can pull in STL files. I went ahead and brought my Blender STL files into my OpenSCAD project and set a variable name for the “Child’s Name”. I was then able to rapidly run through and create 17 models for all my son’s classmates.

child_name = "Adela";
font_size=10;
y_offset=-4;

union()
{
 translate([30,10,0])
   import("heart.stl", convexity=10);

  
 translate([30,10,0])
  import("hook.stl", convexity=10);  


translate([30,y_offset,2])
linear_extrude(height=0.7)
    text(child_name, halign="center", size=font_size);
}


Slicing and Printing – Simplify3D and MakerGear M2
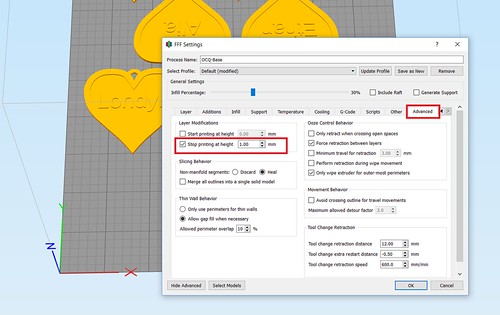
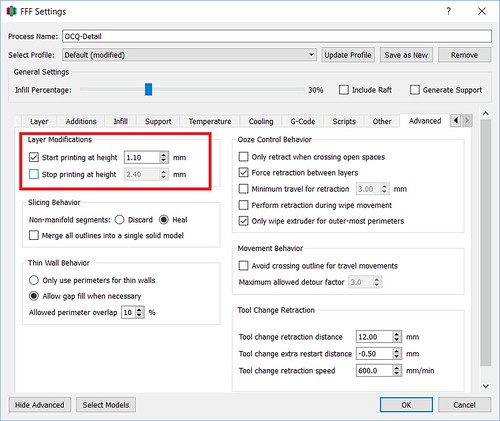
I printed on my trusty MakerGear M2. Since I have a single extruder machine, I used Simplify3D to set up two processes to print my heart:

Red
From 0.0 – 1.0mm, I printed in ColorFabb Traffic Red PLA/PHA. I printed in 0.25mm layer heights.
Slicing a Heart - First Process in Simplify3D

GlowFill
From 1.1 – 1.7mm, I printed in ColorFabb GlowFill. I printed those in 0.10mm heights. Usually I have found with detailing 3 or 4 layers were sufficient. In this case, because the GlowFill was a little translucent, going up to 6 and 7 layers made sure the text appeared more crisp and white. (It also gave me a little more leeway to recover if an edge came unstuck from the build plate).
Slicing a Heart - Second Process in Simplify3D

Quick Tip
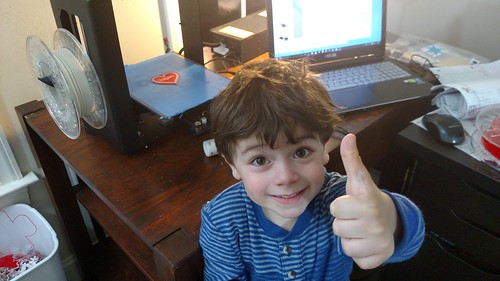
And a quick tip. Sometimes parenting is harder than 3D Printing. When I printed my first batch of hearts, I was quite pleased. I showed my son and was ready for a positive response. It did not go well. I..uh… I kinda didn’t include his name in the first batch of hearts. He can read and he was quite miffed when he did not see his name. Luckily, I started an emergency print and was able to get back on his good side. But you can avoid such drama. Make sure to print your kids’ in the first batch. : )

Forgiven

On Thingiverse!
If you covet a heart for Valentine’s Day or a special occasion, I was able to make a Customizer on Thingiverse. Feel free to make your own.

Print Diary – Experiments in Pumpkin Carvings

Occoquan Arts and Craft Show – September 26th and 27th!
First off, I’m in! My application to the Fall Occoquan Arts and Crafts Show has been accepted (with multiple explanation marks from the show director). It’s official– TGAW 3D is the show’s very first 3D Printing Booth! Hopefully, we’ll be setting a trend for future shows.

Even better news– our booth is going to be adjacent to my brother’s shop, which means we’ll have access to power. Weather permitting, Ryan and I will be bringing the MakerGear M2 down and have it running. We’ll also have our Kinect on hand in case anyone wants to get themselves scanned. 🙂

If you are in the area, stop by and see us!

Acceptance-Highlighted

Automating Pumpkins
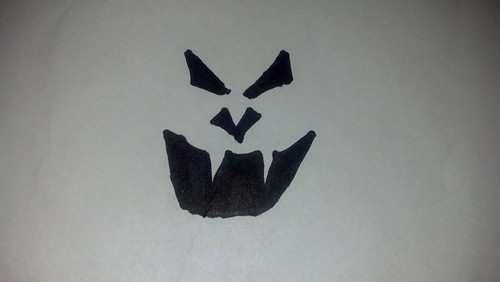
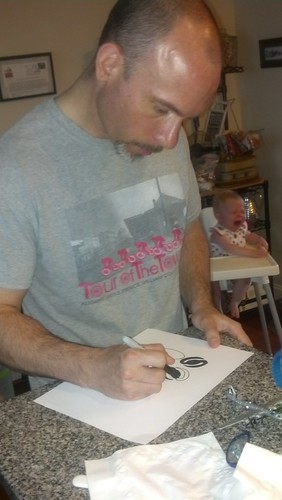
My ultimate game plan with the Glowing Pumpkin Pendants is to take advantage of one of the great perks of 3D printing– customization. I want people to draw/design their own pumpkin faces. I have my base pumpkin model. I would just need to make their face into a model and subtract it from my pumpkin. Thinking ahead, I did some experiments. I grabbed a Sharpie, drew a face and scanned it as a black and white image.
3D Printing

Now what?

OpenSCAD?
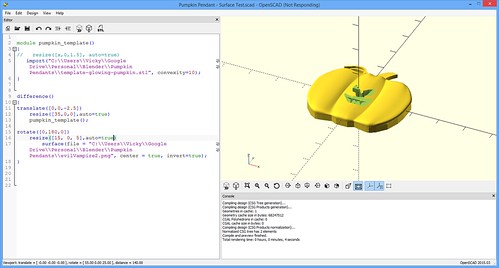
Looking over the OpenSCAD documentation, it looked like I might be able to use the Surface feature to achieve my goal. It uses the greyscale values of an image to determine the various heights of a surface. Since my image was Black and White, it should give me a template to carve out of my pumpkin.

It did make my face surface as planned… but it had a bottom plane underneath it. No worries, I rotated it 180 degrees. At this point, all I would need to do is position it, size it, and subtract it from my pre-existing pumpkin template.
OpenSCAD-Surface

I got it carved out, albeit a lot smaller than I wanted. At this point, I had to abort. I do truly believe OpenSCAD could be a viable option. But the rendering times were sooooo long. And then anytime I wanted to scroll or examine my object, I would have to wait again.

Disclaimer- It very well could be my old laptop from 2010 that has dwindling harddrive space…courtesy of all my 3D modeling.

If you’d like to explore this option further, my OpenSCAD code is below for reference and you may also want to refer to CubeHero’s Emboss and Impress Images onto a Surface in OpenSCAD article.

[js]
module pumpkin_template()
{
//This is me importing in my base pumpkin template
//what I want to carve the face out of.
import(“C:\Users\Vicky\Google Drive\Personal\Blender\Pumpkin Pendants\template-glowing-pumpkin.stl”, convexity=10);
}

//This difference command is me subtracting my
//face surface from my base pumpkin .STL
difference()
{
translate([0,0,-2.5])
resize([37.275,0,0],auto=true)
pumpkin_template();

//This is me making my surface file based on my PNG
//of my face. I rotate it 180 degrees so the solid
//plane base is on top (and out of the scope of my carving
rotate([0,180,0])
resize([30, 0, 5],auto=true)
surface(file = “C:\Users\Vicky\Google Drive\Personal\Blender\Pumpkin Pendants\evilVampire2.png”, center = true, invert=true);
}

[/js]

InkScape?
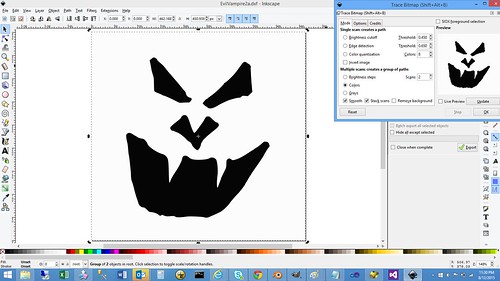
Inkscape seems to be a very powerful way of turning images, logos, and patterns into scalable vector graphic images that you can import into Blender or other modeling software. I’ve seen many people having success with it on the Internet.

One of those people just isn’t me. : (
Inkscape - TraceBitmap in Action

I’ve tried using it for three different projects over the last 18 months. Each time, I’ve ended up with a model that is cumbersome to edit and full of mismatched face normals. It just seems like I have an awful lot of cleanup to do. And not fun, “I’m learning more about 3D modeling” cleanup– tedious, demoralizing cleanup (“What– now I have even MORE non-manifold edges? #@(*&$I*!”)

Disclaimer- This could end up being user error– something like I should export to a different SVG format instead of the Inkscape SVG.

ShapeJS
Interestingly enough, the tool I found I liked the most is Shapeway’s JavaScript-based library, ShapeJS. Just like OpenSCAD’s surface, you can upload an image and the colors in that image is used to make your model.

I stole code from their Absinthe Spoon example, uploaded my Black and White image and very quickly I had a model.
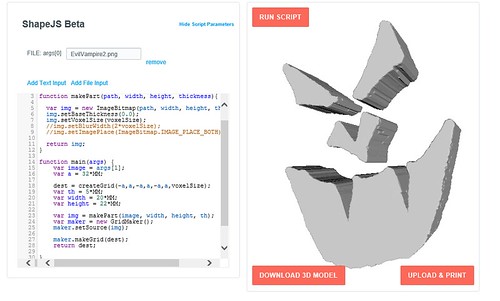
ShapeJS- Pumpkin Face

They have a Download 3D Model button, but I couldn’t seem to get that to work in Internet Explorer or Chrome.

My workaround was:

  1. Click on Upload & Print button.
  2. When the new Model details came up, I clicked on the Download button near the top and saved the file to my desktop.
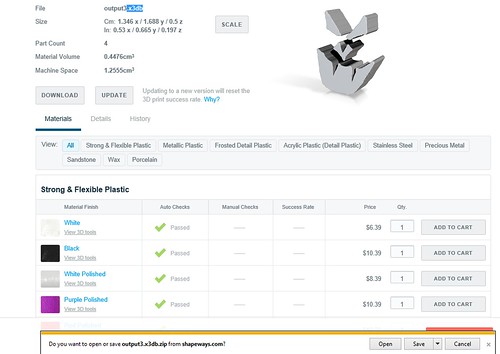
    Shapeways - Export to x3db
  3. This downloaded a zip file, so I extracted the inside
  4. D’oh. This file was in x3db format. I wanted .STL. I had the free version of NetFabb Basic on my machine. I opened that up, added my x3db part and then went to Part->Export Part->as STL. (Hat Tip, StackOverflow!) NetFabb Basic - Export Part - as STL
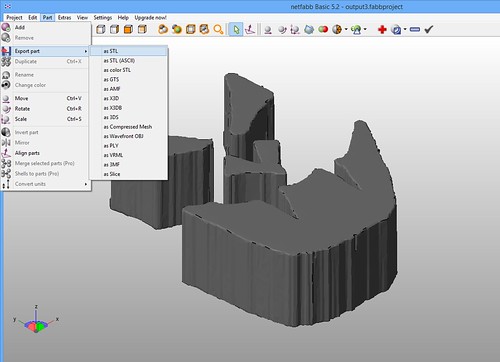
  5. Yay! I had my .STL

Yes– that is indeed a lot of steps. But guess what– I found it still better than Inkscape cleanup. : )

If you wish to follow in my footsteps, here’s my ShapeJS code. To compliment the code, you’ll want to click on Add File Input at the top of the code editor and then upload the file you wish to use.
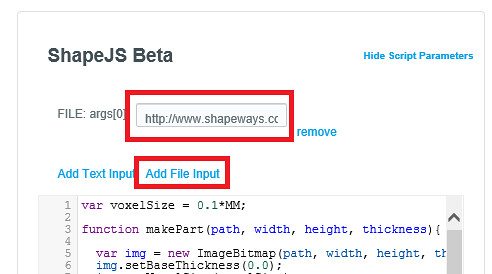
ShapeJS - Adding a File Argument

[js]
var voxelSize = 0.1*MM;

function makePart(path, width, height, thickness){

var img = new ImageBitmap(path, width, height, thickness);
img.setBaseThickness(0.0);
img.setVoxelSize(voxelSize);

return img;
}

function main(args) {
//This argument (arg[0]) is our PNG file.
//I add by clicking on the “Add File Input”
//and then I upload the file I want to use
var image = args[0];
var a = 32*MM;

dest = createGrid(-a,a,-a,a,-a,a,voxelSize);
var th = 5*MM;
var width = 20*MM;
var height = 22*MM;

var img = makePart(image, width, height, th);
var maker = new GridMaker();
maker.setSource(img);

maker.makeGrid(dest);
return dest;

}
[/js]

3D Printing

Other Options
There are most definitely other options out there. I’m sure my learning and experimenting will continue. Last night, for example, I was just reading an article by Chris Gerty about using Online-Convert to do the same thing. H.G. Dietz’s Trace2SCAD looks interesting as well.

But for now, the ShapeJS method has served me well. My husband drew me two new faces that we were able to model and print quickly this past weekend.
3D Printing

Beta Testing OCQ Keychains and the Merit of Simple Designs

Okay, don’t laugh. Sometimes the simplest designs is what resonates with people. My breastfeeding pendant, for example. It’s such a simple model– I could make it in minutes now, but that doesn’t keep it from drawing the attention and appreciation from breastfeeding mothers. My favorite example is Erin (below) who I got to meet at the National Maker Faire. She bought a breastfeeding pendant from me right after pumping. : )

Two Breastfeeding Mothers at National Maker Faire

So, I made these quick little OCQ keychains to represent my hometown–Occoquan and maybe even raise some money for the Occoquan Historical Society (though they don’t know those aspirations yet). Super easy– I just adapted some OpenSCAD code I had for some Virginia Tech wine stoppers. I used white text on blue background to match our new stunning town signs. They looked nice, but design-wise, nothing ground breaking or special.

“I want one,” my mother said as I sprayed some gloss on my day’s prints out on the deck.

Out of all the things I’ve printed, I believe this is the first time she’s wanted something for herself.

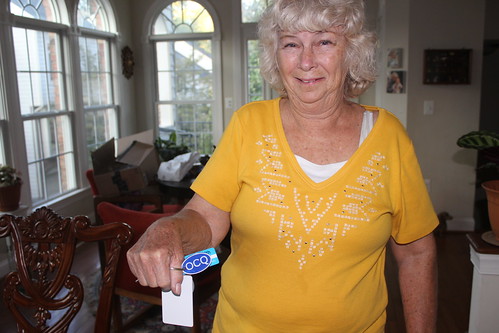
“I want one,” she repeated later as I stacked and counted prints on the dining room table. She even volunteered to take one of my rejects. “The one with the weird C.” So I gave her one (ahem… the one with the weird C).

She promptly put it on her keychain and it fit perfectly. And there you have it. Sometimes simple designs can make people happy.

3D Printing - OCQ Keychain - Anne's New Keychain

For those so inclined, my OpenSCAD code is below:
[js]
//
// This is our module that will create a base
// cylinder which we stretch out for aesthetic
// purpose.
//
// We pass in the dimensions and a flag whether
// we want an embossed outline outside of the cylinder
//
module base_cylinder(x,y,z, withOutline)
{
resize([x,y,z])
rotate([0,90,-90])
difference()
{

cylinder(r=30, h=22, $fn=100);

//If we want to do an outline, we are
//going to subtract out a smaller
//cylinder so we have an inlay.
if (withOutline==true)
{

//front
translate([0,0,17])
cylinder(r=28, h=5, $fn=100);
}
}

}

difference()
{
union()
{

base_cylinder(50,3,30, true);

//My OCQ Text
translate([-18,-1.5,-5])
{
rotate(a=[90,0,0]) {
linear_extrude(1.5)
text(“OCQ”, size=12, center=true);
}
}

}

//Keychain Hole
translate([-20,1,0])
rotate(a=[90,0,0])
cylinder(r=2, h=5, $fn=100);
}
[/js]


Print Diary – July 13, 2015

Today in my printing adventures. Most of my endeavors were focused on printing multiple colors on the single extruder machine.

Victory Pictures of VT Logo
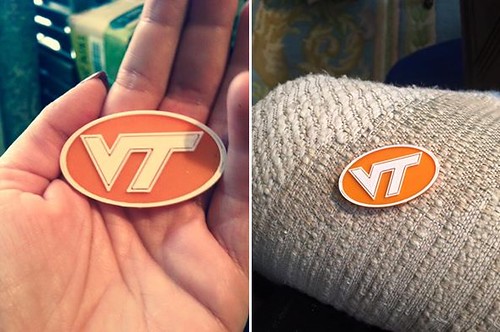
My first practice run was right before the July 4th holiday, I made a quick VT medallion in OpenSCAD using GlennLo’s awesome Virginia Tech Logo model. A couple of my Facebook friends commented positively on the item so I mailed a few out over the weekend.

Today, my friends were kind enough to post pictures of their new arrivals. It made me smile to see.

VT Arrivals

Modelling a Cardinal
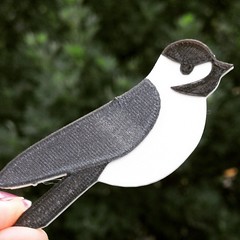
Another multi color project I took on was making myself a chickadee. It was simple and cute and I’m smitten with it (I do have a version with legs that I printed last Thursday).

Now that I know how to do multicolor prints on our MakerGear M2, I'm plotting ways to make myself a chickadee (I'm thinking 3 colors - white, black and grey) #3DPrinting #3DModeling My 3 Color Chickadee Experiment on the MakerGear M2- Take 1.  My silver filament is a little translucent so I think I need to add some extra layers there.  Overall, pleased!  #3DPrinting

My Chickadee– Three Colors on the MakerGear M2

I decided I need some other birds to keep it company. I have aspirations of making a variety of species and maybe making a wreath. Over the weekend, I went through my Mom’s bird book and I have a bunch I’m eyeing. Since last week, I just got a shipment from PrintedSolid of new filament and one of the colors is Traffic Red, the cardinal seemed like a good option. It’s not the most intricate modeling, so I squeezed a little of bit of Blender work in here and there while the code for my day job compiled.

I’m excited about the wing detail. I’ve carved out some feather detail to show a peek of the black underneath. I think it’s going to look mighty fine.

Work in Progress - Cardinal