Tag Archives: halloween

First Thingiverse Remix!

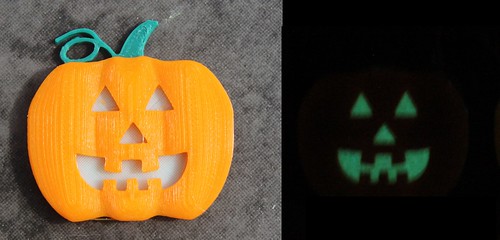
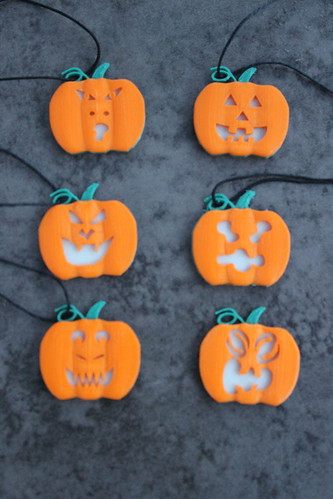
Last week, thinking about how much I have gained from the generous licensing of Thingiverse designers (such as RosieCampbell, Liz Havlin, EHM), I decided to pay it back a little bit and I made my Glowing Pumpkin Pendant/Pin available on Thingiverse. I even marked it as good for Remix and Commercial use.

3D Printing - Glowing Pumpkin Pendant - Face Options

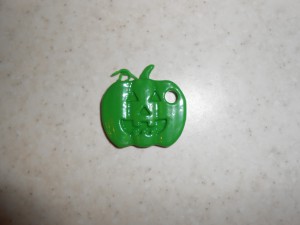
A week later, my design has its first Remix! A gentleman from the Ukraine adapted it into a keychain! And interestingly enough, he printed it in a single color… and it looks fantastic!

Ukraine Pumpkin

Just like the Mill House Museum Ornament, I’m glad to see my colored design translates well to a single color! : )

P.S. If you don’t have a printer, I do have prints of the original Glowing Pumpkin Pendant/Pin listed on Etsy.

Get TGAW 3D Halloween Designs….with FREE Shipping

Shapeways Free Shipping

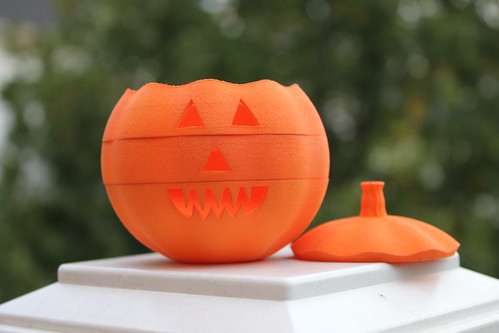
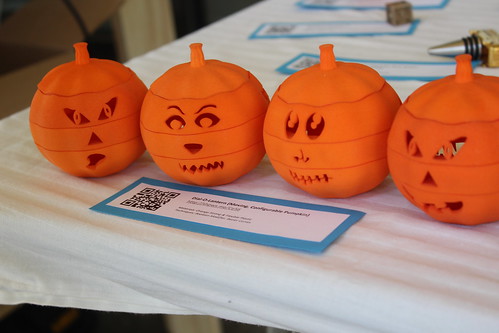
Shapeways is offering FREE shipping this weekend (October 3rd and 4th, 2015). Know what that means? You can get my Glowing Cthulhu Jack-O-Lantern or my moving part Dial-O-Lantern (pick between 27 face combinations) in time for Halloween… and with FREE shipping.

Cthulhu Pumpkin - Glowing Orange
Glowing Cthulhu Pumpkin

3D Printing - Dial O Lantern - Example Face
Moving Part – Dial-O-Lantern

Happy Shopping! : )

Carving My Pumpkins In Blender

We’ve done a number of faces now for my Glowing Pumpkin Pendants for the Fall Occoquan Arts and Craft Show. I thought I would go ahead and document my carving process in Blender.

Quick background– with the pumpkins, I print 1.5mm of ColorFabb Green. I next switch over the ColorFabb GlowFill for another 1mm. Finally, I end with Translucent Orange filament from MakerGear.
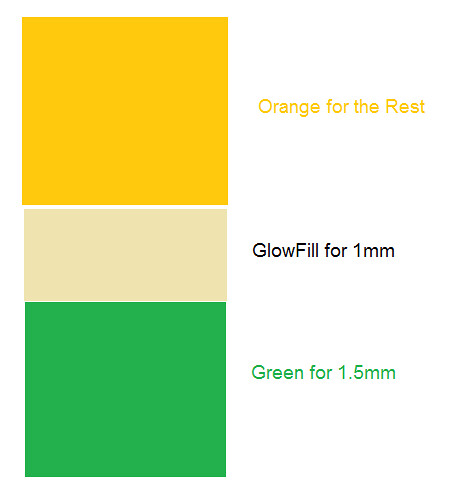
Cross Section of Pumpkin

What this all means is whatever face I’m using to carve out of my pumpkin template (be it through OpenSCAD, Inkscape, ShapeJS, or any other means)– I want the bottom to be right at the 2.5 mm mark. I want the hole to extend all the way down through the orange to the top of my GlowFill.

Although, not intuitive, this is pretty easy in Blender.

First I import my face (in .STL format) from the File->Import menu option. If necessary, I resize it to fit more appropriately on the pumpkin. Now the fun part– what’s the easiest way for me to make sure my face carving goes all the way to the 2.5mm mark?

  1. I switch to Edit mode.
  2. I click on one of the vertices that is at the bottom of my face.
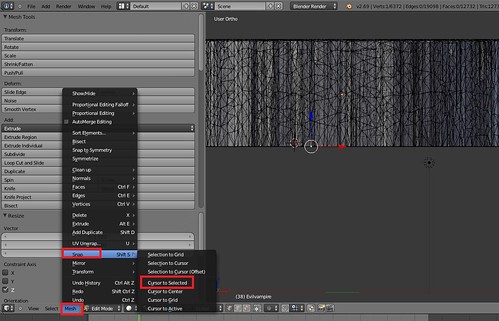
  3. I go to Mesh->Snap->Cursor to Selected
    Blender - Positioning
    This moves my 3D cursor to that selected vertex.
  4. I switch to Object mode
  5. I go to Object->Transform->Origin to 3D Cursor
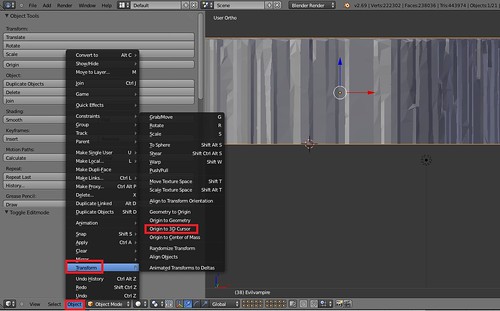
    Blender - Changing Origin
    This makes the point of reference for that object that very same vertex. This means when I am filling in coordinates for that object, it is using that vertex for the placement.
  6. Finally, at this point, I just change the Z position of my object (assuming I’m on Global) to 2.5mm.
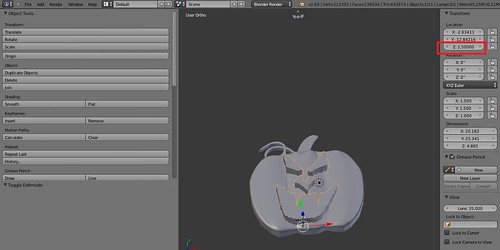
    Blender - Setting Exact Coordinates

And there you have it— the bottom of my face I wish to carve out of the pumpkin is down at the 2.5mm mark, the top of my GlowFill layer. At this point, I can proceed with going to the Modifiers, adding a Boolean modifier and doing a Difference Operation on my pumpkin template and my face. (The difference allows me to subtract an object from another object).

Just to be sure, I do double check in Simplify3D that my orange process looks we expected. In particular, I don’t want to see a solid layer of orange covering up my GlowFill.
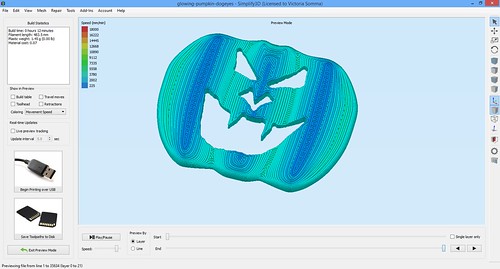
Simplify3D - Previewing Orange Layers

I haven’t had any trouble with ShapeJS and my Black and White PNG images. However, if I were ever to be concerned my pumpkin face did not have an even bottom, I could make sure the bottom was consistent by:

  1. Go into Edit mode
  2. Select all the vertices on the bottom of my face (I typically take advantage of Select->Border Select)
  3. Hit S (for Scale) and then Z for the Z-axis and then 0. This sets ALL the selected vertices to the exact same Z height, so I’m thoroughly ensured if one vertex is at 2.5mm, they all are.
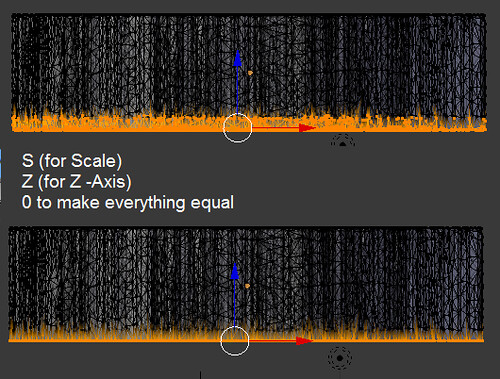
    Blender - S Z 0

And there you have it— how I carve my pumpkins (for now).
Print Diary Catch Up – Business Trip

Phew. I was on a business trip to Wisconsin last week and I returned home to a two year old with strep throat. Needlesstosay, 3D Modeling and 3D Printing were not on the forefront of my mind. But here’s what I’ve been up to:

Business License!
I got my business license from the Town of Occoquan. The Town Clerk confirmed my suspicion. I’m the first 3D Printing business in Occoquan. : ) Now to submit my application for the Fall Craft Fair!

Etsy
I’ve slowly been getting an Etsy site ready to go. My goal is to have everything I’m selling at the Craft Fair, also on Etsy. This is probably going much slower than necessary. I suspect I’m being overly picky about pictures. :/

Glowing Pumpkin Medallions
I have this awesome moving part product on Shapeways – The Dial-O-Lantern. It prints assembled and allows people to configure their Jack-O-Lantern face. It was a hit with children at the Maker Faires. And six children got to design faces for the Dial-O-Lantern (via a contest).

National Maker Faire - Army of Dial-O-Lanterns

The price point is super high though ($50), particularly for children. I want to do something specifically for children at the Craft Fair. I grew up in Occoquan. I remember being a little girl perusing the vendor booths looking for kid stuff.

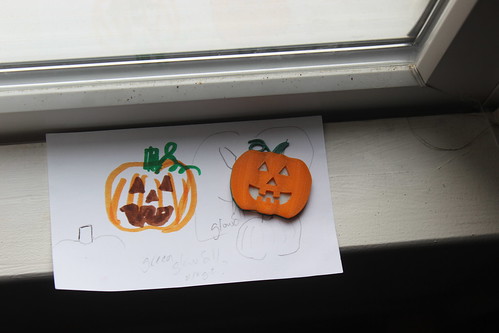
So I tried to brainstorm something that would be fun for kids at the craft fair at a much lower price point, a kid-friendly price point. I came up with glowing pumpkin medallions.

3D Printing - Glowing Pumpkin Pendant - Sketch and Final (Far)

Without moving parts, they don’t need the fancy SLS printers of Shapeways. I print them on my MakerGear M2. The bottom in green, the middle in ColorFabb GlowFill, and the top in orange. The facial features are carved out of the orange, so the GlowFill shines through in all its glory. I could print a whole plethora of face combinations and still invite kids to customize them at the Craft Fair. It would be easy to have them draw faces and carved them out of the pumpkin.

3D Printing - Glowing Pumpkin Pendant - Standard Face - Before And After

Best part– I think I can price it in the single digits and still make a good margin. : )

Redwing Blackbird (Agelaius Phoeniceus)
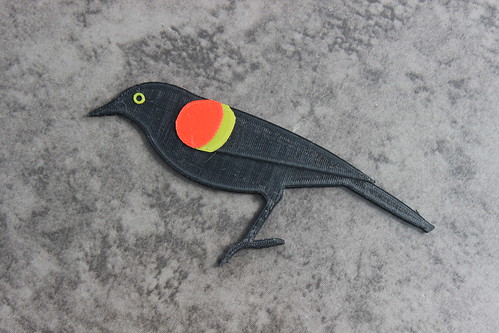
A fan of my Baltimore Oriole requested a Redwing Blackbird. I managed to model that during my business trip and print it when I returned home.

3D Printing - Redwing Blackbird