After months of craft shows and custom orders, my very last design and print for 2015 was something for me! As soon as I received my first spool of ColorFabb GlowFill, I wanted to do an anglerfish. I’m almost done with that roll, so this seemed to be the time. And as luck would have it, PrintedSolid and reddit were running a mixed material use contest. Destiny! I designed and printed my anglerfish in BronzeFill and GlowFill on my MakerGear M2. The GlowFill parts were actually inserted into the fish and sealed in as the BronzeFill printed.
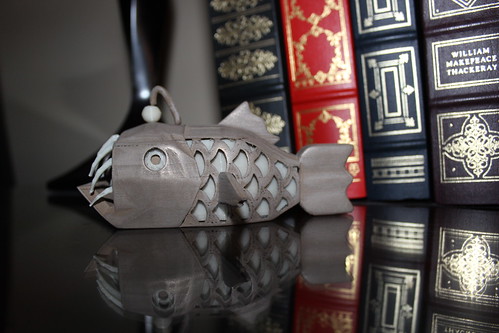
Tada! Anglerfish!
As you may expect, the GlowFill parts glow in the dark and the blacklight.
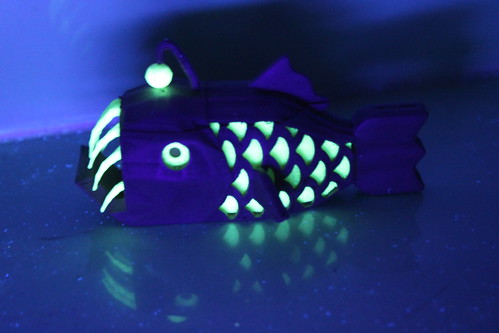
Glowing Anglerfish
Material Choices
I chose two materials for my anglerfish, both were mainly selected for aesthetic reasons:
Design
I designed my angerfish in Blender. I designed cavities and supports inside the fish to hold our GlowFill pieces. That way, I could insert the pieces and let the rest of the print seal them in.
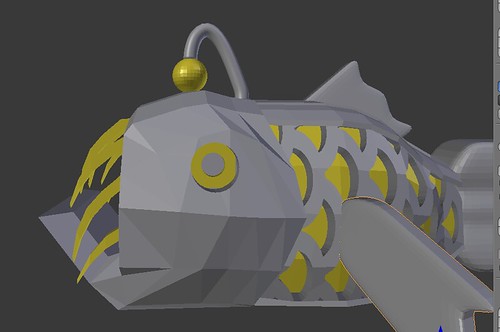
Model in Blender
Cavities Inside the Fish to Hold GlowFill Details.
So for example, the glowing eye detail. Inside the head of the fish, I have a little rectangular holder to keep that detail in place. I wanted the pupil of the eyes to remain dark, however, so that glowing eye detail had a circle cut out so the BronzeFill behind it could show through.
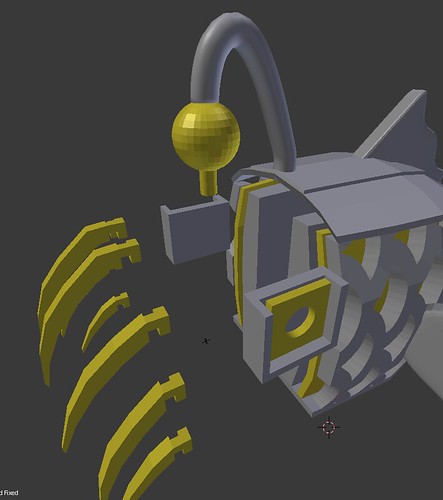
A View To Show the Relationship of How the GlowFill Eye Would Be Supported
Printing – GlowFill
I printed all the GlowFill pieces first. Very straight forward– 0.25mm layers, nothing super special.
Printing – BronzeFill
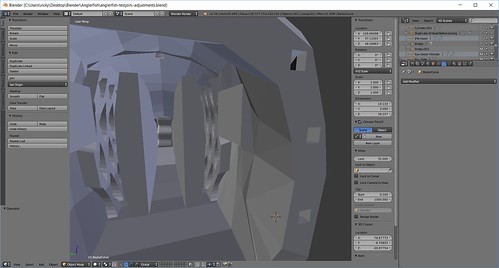
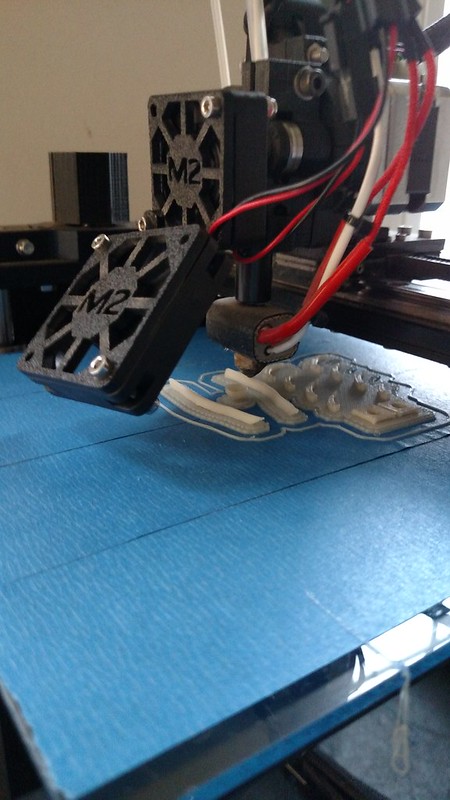
BronzeFill is where the thinking came in. I still printed at 0.25mm layers. Using Simplify3D, I set up nine separate processes for the BronzeFill. At the end of each process, the print would stop, the Z bed would drop 100mm allowing me to insert in the appropriate GlowFill piece(s) before starting the next process.
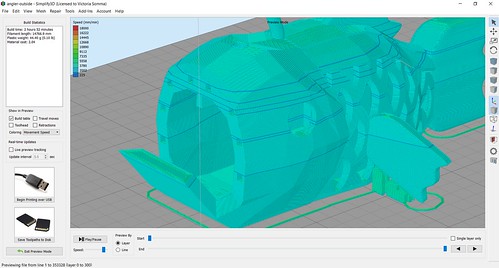
Preview in Simplify3D, the Blue Lines Illustrate Stopping Points
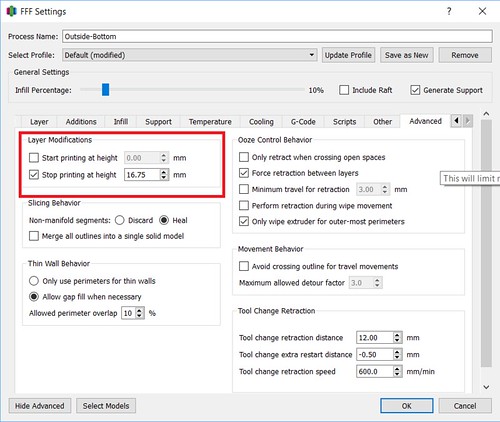
Using Layer Modifications in Simplify3D
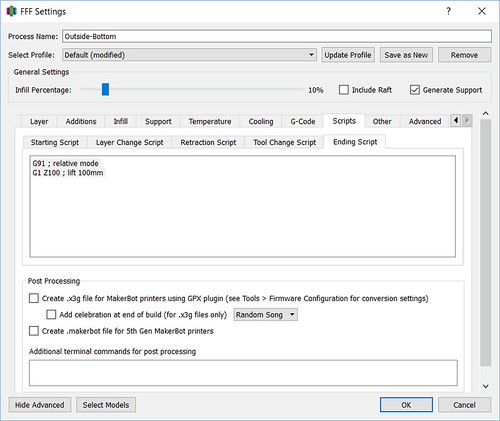
Custom Ending Script in Simplify3D to Just Drop My Bed At the End of the Process
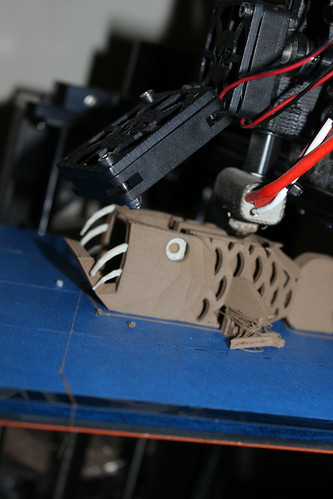
After Eye Detail Was Inserted
I did have a bobble. When I inserted my side panels, I noticed they were a little higher than the BronzeFill layers around it. I thought it would be safe… but it knocked my nozzle and offset the X a bit. The seam you see in the pictures is the product of that shift. Lesson learned — better safe than sorry. : )
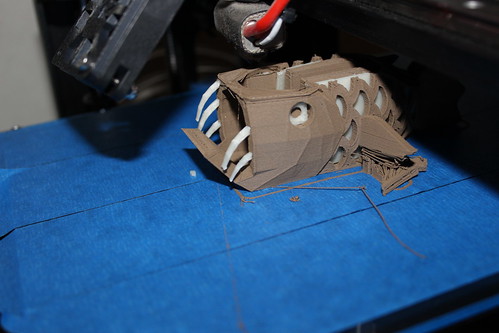
The Bobble
I did also end up printing the little dangly do-dad on the top of the fish separately. That was unplanned, but serendipitous as the fish would have been a pain to sand with that delicate detail in the way.
Finishing
I sanded the fish with three separate grades of sand paper and I finished him off with super fine steel wool.
Lessons
I only had time for one print and I do have adjustments I would make for my next run. First off– the teeth are not worth installing during the print. It was a lot of stops in the print to insert the teeth and the sanding. My gawd, the sanding. Those teeth were just a nuisance during sanding. I did get a little thrill each time I installed a tooth and had the print seal it in, but it wasn’t worth it. Next time, I’m just going to glue the teeth in after the fact.
Secondly, I learned to decrease the height of those side GlowFill panels slightly so I don’t get my nozzle knocked. : )
Even with my little bobble, I am thrilled with my anglerfish. Love!
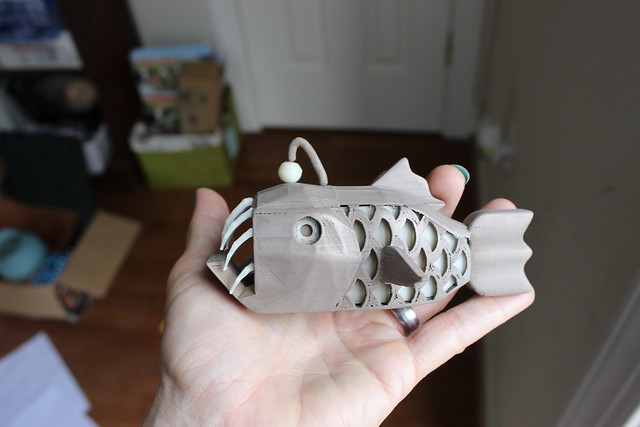
I Did It!
More photos of my Anglerfish and its process can be found on my Flickr site.