Well a hat tip to the impressively, eagle-eyed Joel Telling for noticing this. One of my models, the Spinning PokeStop Ornament, was one of the showcase prints at a booth at CES. I’m not sure if they followed the attribution clause of my Creative Commons Licensing…. but I’m still excited that a model of mine was used.
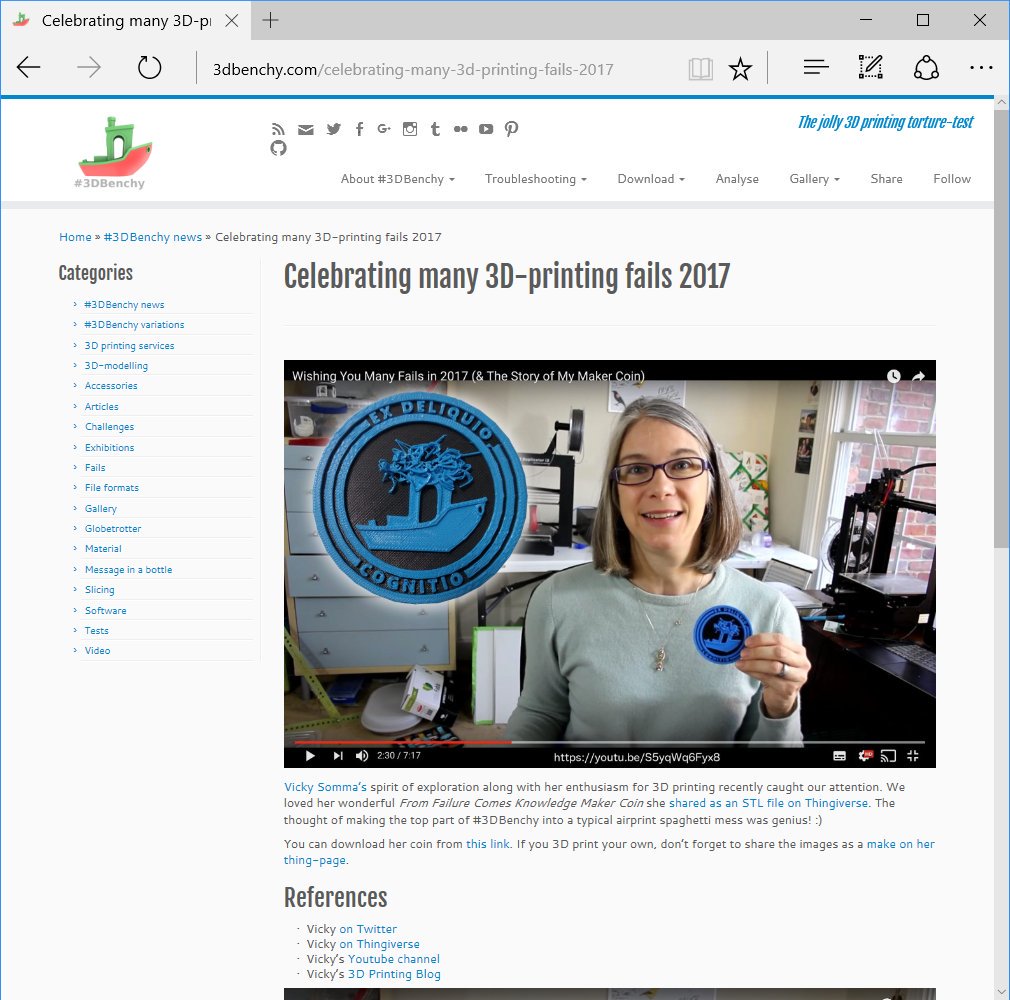
When we are pushing the limits, we are going to encounter fails. But through failure comes knowledge and at times, it even brings about extra creativity. On that note, I hope 2017 brings you many fails!
In December, I did a last minute contribution to the A Pyro Design Maker Coin Holiday Tree. In my coin, I wanted to celebrate the failures that comes along with learning 3D Printing. I call it, “From Failure Comes Knowledge“. This video details the inspirations behind the coin, a little taste of the modeling in Blender, and the [embarrassing] two fails I had printing it.
Happy Global 3D Printing Day! 3D Printing Industry reached out to a few content creators on YouTube to see how they were celebrating the day. I still consider my YouTube channel in its infancy, but I was still happy to answer some questions.
Last Thursday night, I had the delight of participating in a Meetup with the Delaware 3D Printing Group. The event was hosted by Printed Solid. The group was kind enough to let me yammer on about my 3D Printed Crafts. 🙂 I very much enjoyed chatting with other printing enthusiasts and left the event invigorated. I should make it a point to do an event like this every November when the fatigue that accompanies Cyber Week looms in my brain. 🙂
My very first Thingiverse upload was glowing pumpkin pendants/pins for kids. This video hits briefly on how I print these via Multi-processes in Simplify3D (Spoiler alert – they are three separate prints). It will also show you how you can import in the pendant template into TinkerCAD and quickly make your own customizations. Finally, have a drawing you want to use? I’ll go over using Inkscape to make a SVG file from a black and white image/photo/scan that you can also pull into TinkerCAD to “carve” your pumpkin.
Yeah, yeah. I’m slow at making my own videos. Luckily there are content creators out there who are on their A-game. Such is the case of Michael Phelps. He not only printed my Spinning PokeStop. He not only made a video on the model… but he also modeled and printed a companion piece for it. He designed a stand to make my PokeStop ornament into an actual PokeStop. Please check out his video!
As some background information, the way the MakerGear M2 Homes its Z axis is it has a bolt on the platform that raises and lowers your bed.
Above it, just beneath the X-axis rail, is a switch that triggers when there is contact.
When the printer is homing its Z axis, it raises the bed until the bolt triggers that switch. At that point, the printer considers itself a Z-Home.
MakerGear has some great videos for the maintenance and setup of your machine, including how to do your Z Endstop calibration! Basically you raise your bed until a business card can just fit under the nozzle and then you raise the bolt to ensure it trips the switch at that exact height.
Disclaimer– I love my MakerGear M2 profusely and I will continue to love it profusely. That said, I find the bolt awkward and tough to raise.
One day I needed to update my Z Endstop application and I struggled getting that bolt to do my bidding.
“If only…if only I had something to stick on top of this bolt to make it taller.” I thought.
It turns out I did have something, something that was already a part of my 3D Printing arsensal– Painter’s Tape!
I cut out little squares of painters tape, made a tower, put it on top of my bolt. I fine tuned the tower’s height until my nozzle was a business card height above my bed. BAM! ZEndstop calibration!
Honestly, I never expected this solution to have the staying power it has, but I continue to use it to this day! I was worried about the repeatability of the Z-Home, that there would be variances in run to run in how the painter’s tape compresses, but it has proven to be consistent and reliable. I have also been shocked (SHOCKED) that it weathers travel well.
I have found this painter’s tape hack to help speed up my process of switching nozzles. When I switch to my 0.5mm nozzle for woodFill, I just have to add or remove squares of painter’s tape and I am ready to print.
A “Print in Place” version where all the spheres print in position and work as soon as you remove support material.
A “Snap in Place” version where all the spheres print directly on the bed and you snap them into position after printing.
All the OpenSCAD code for future remixes.
My version is a remix of smorloc’s Big Nippled Parametric Gyro Cube (http://www.thingiverse.com/thing:40760) which in turn is a remix of whosawhatsis’s Parametric Gyro Cube (http://www.thingiverse.com/thing:19304). A remix of a remix!This video hits on a bunch of things:
1) Using Simplify3D’s Mesh-Separate Connected Surfaces to preview and get a feel for the connections of the existing Gyro Cube models.
My modifications to the Big Nippled Gyro Cube , my thought process behind my new connections, and printing the spheres in place.
Using Simplify3D’s Cross Section View to determine good stopping points for embedding the spheres within each other and
using Multiple Processes to achieve a five color Gyro Cube on my single extruder machine.
Since my family is completely in love with Pokémon Go, I also go over using Multiple Processes and the Print-in-Place version of in Simplify3D to make a Pokeball Gyro Cube.
Passing on a tip from TimeFramed from the Big Thick Gyro Cube V2 (http://www.thingiverse.com/thing:165424) and incorporating a vertical lift to my retractions.