Despite some earlier blog posts on the matter, I have become fond of using Inkscape to make SVG files for my 3D Models. (My breakthrough came when I started saving as a “Plain SVG” format instead of an “Inkscape SVG” format).
I figured I should document my process at pulling and prepping those files in Blender.
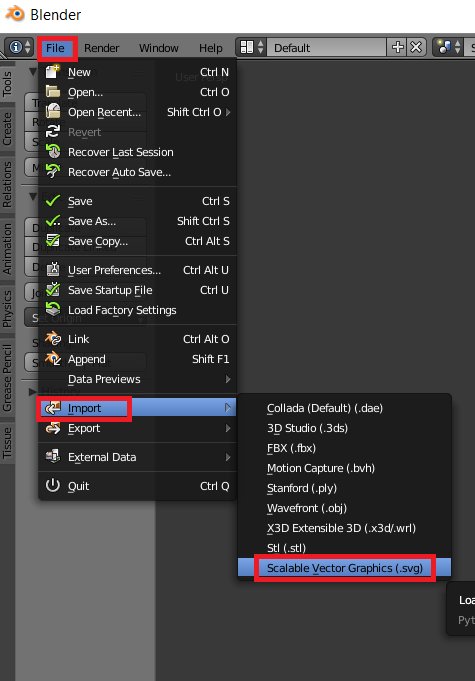
- Import the SVG file. File->Import->Scalable Vector Graphics (.svg)
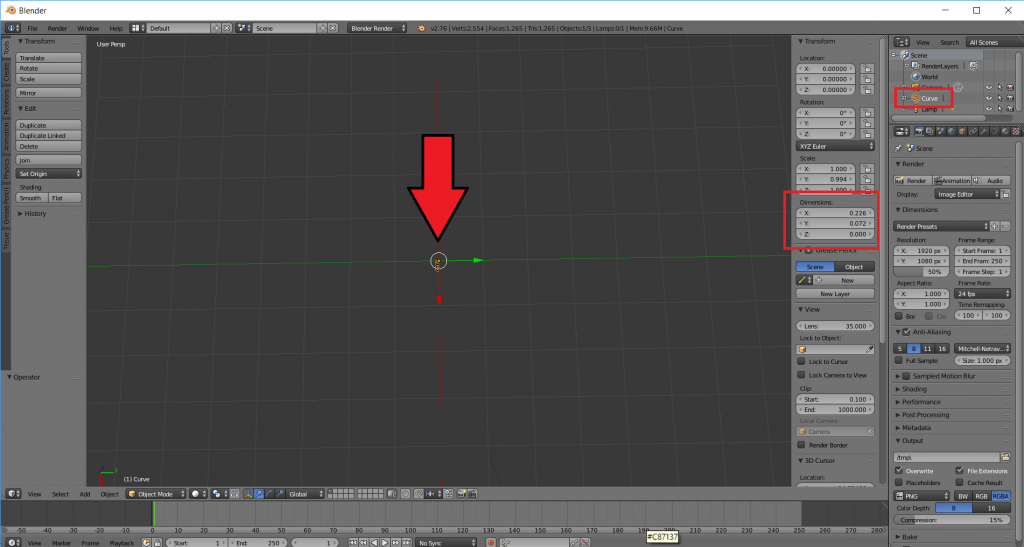
- It looks like nothing happened, but your SVG is there. It’s just really really really small. If you look to the right in your Objects listing, you can see a new “Curve” that was not there before.
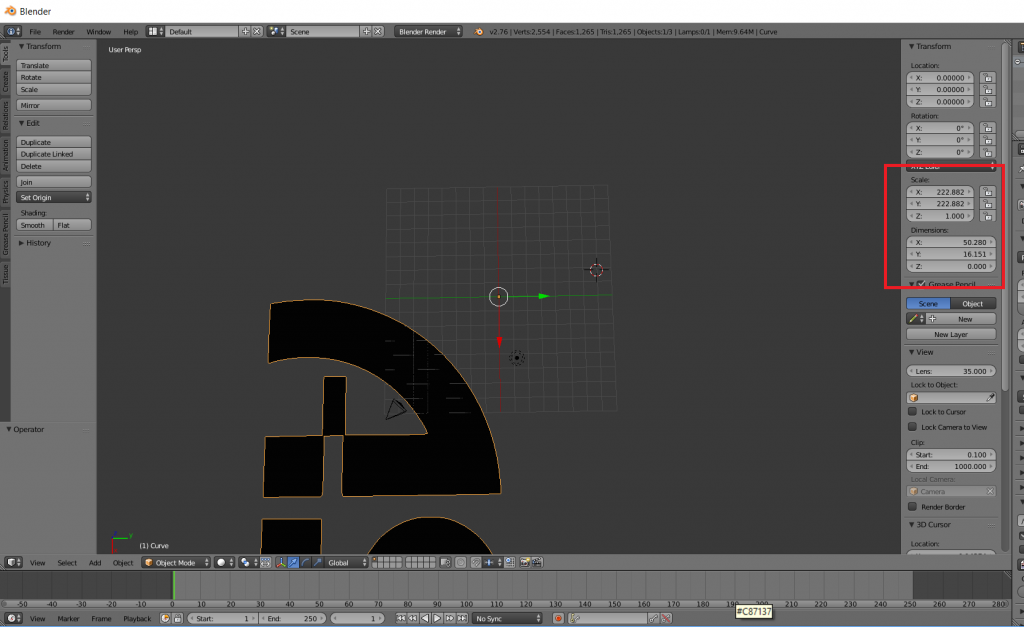
- Resize the object so you can see it better.
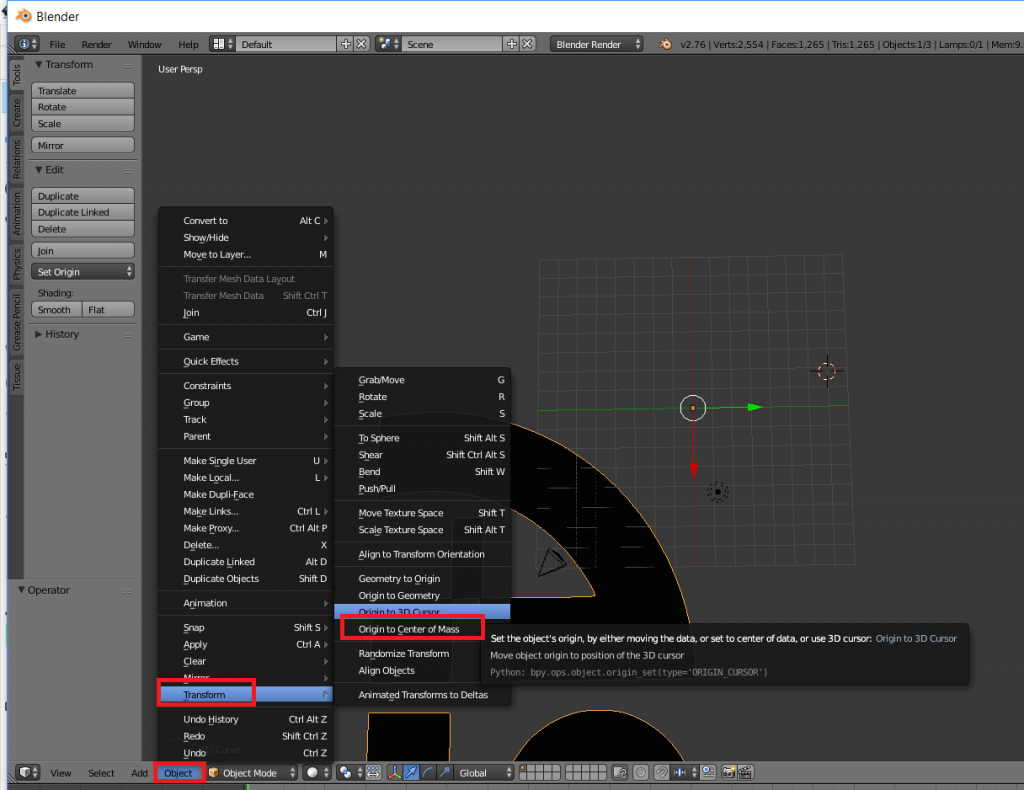
- Sometimes resizing it takes it off the screen and the Object’s Origin is not very intuitive For that, I change the Object’s Origin to the Center of the Mass. I do that by going to Object->Transform->Center of Mass
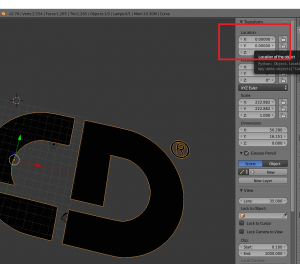
- Then I can change all the Transform coordinates to 0,0,0 to center my new SVG
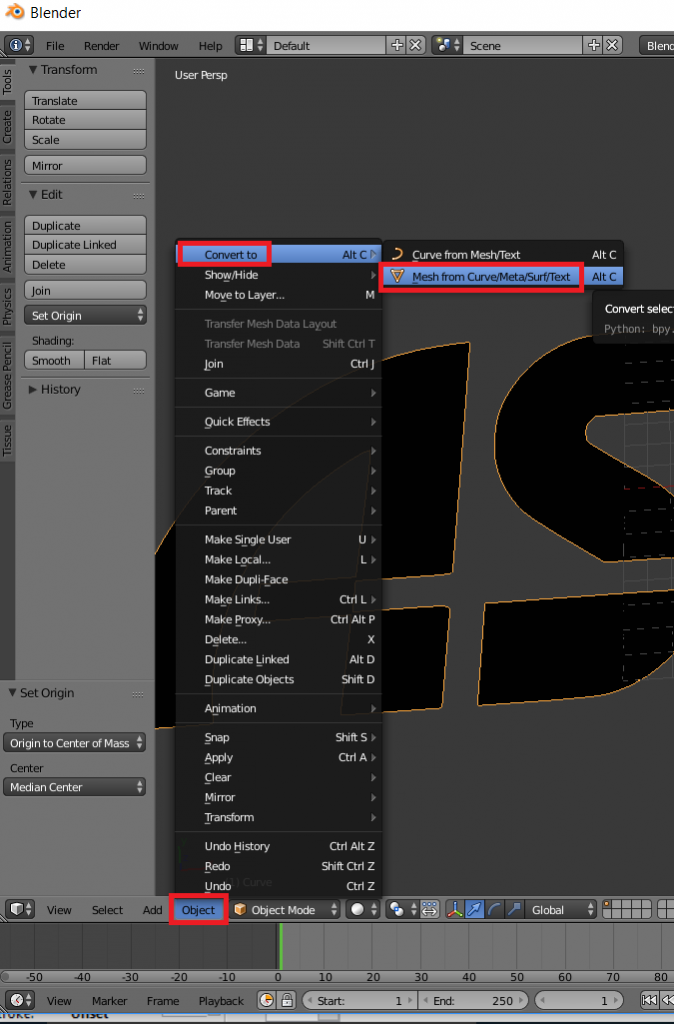
- SVGs pull in as Curves. You’ll want to convert it to a Mesh before doing anything with it. You can do that by going to Object->Convert to->Mesh from Curve/Meta/Serf/Text
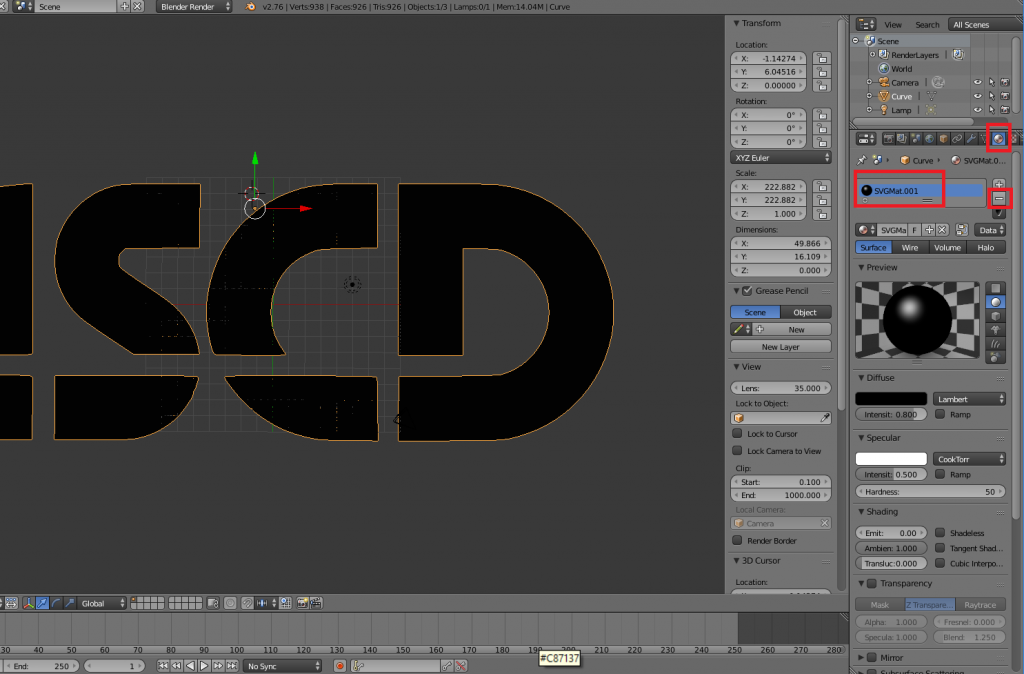
- OPTIONAL – Get Rid of Black Color
When I was new to Blender and Inkscape, I could not figure out why my Inkscape SVGs were all black… and I just did not know enough to find the right keywords to Google. Later when I learned about Materials, it will started to click. The SVGs import in with a Default Material. If you want to get rid of that, click on the Materials icon for your object, click on the black material and hit – to get rid of it.
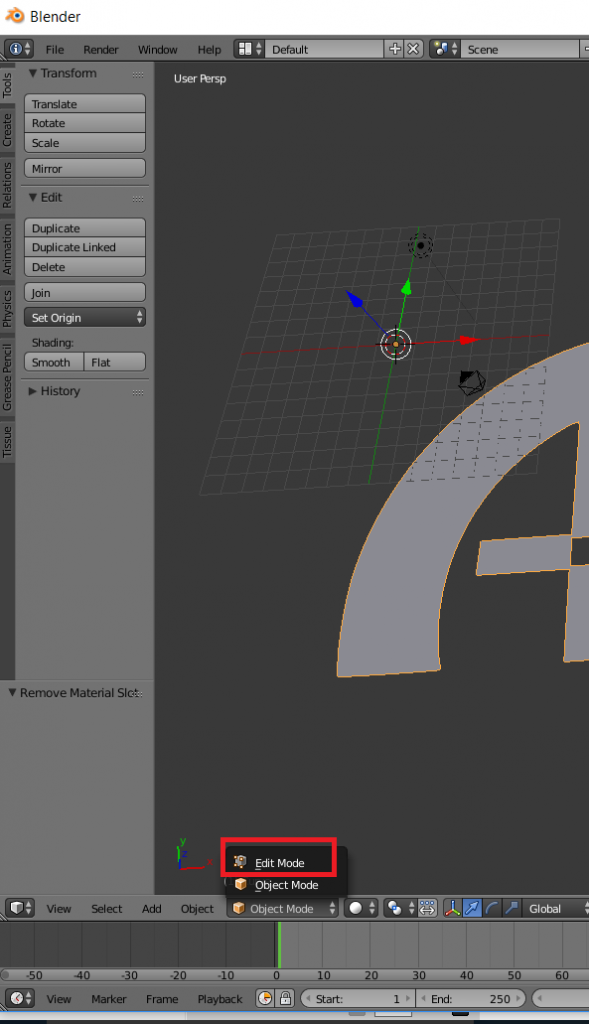
- With your newly converted Mesh selected, switch to Edit mode.
- Click A to select all vertices.
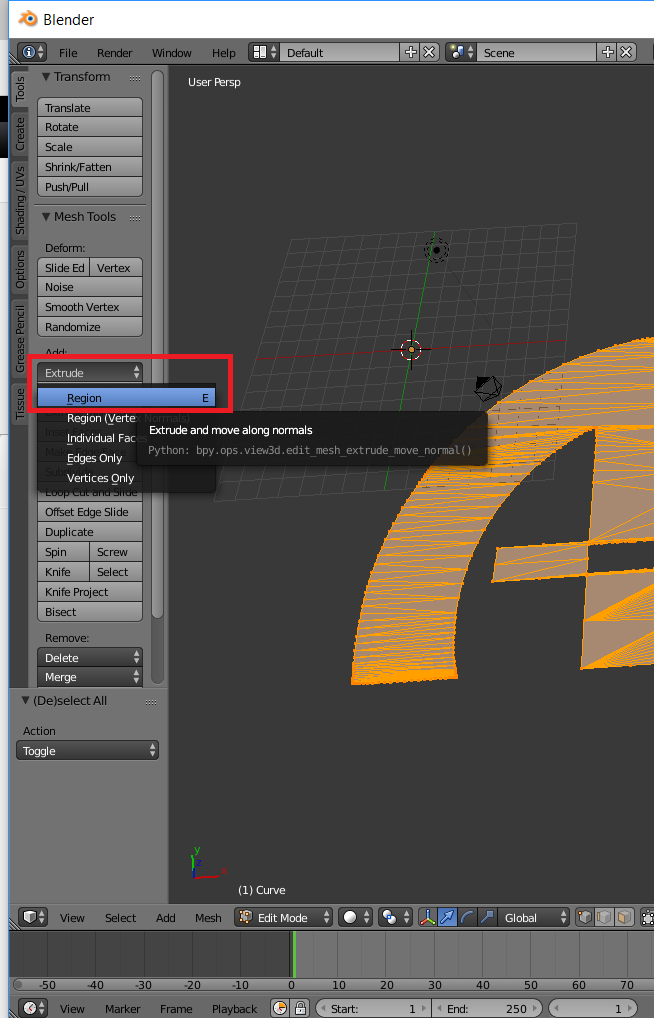
- Go to Extrude->Region to give your 2D Object some Depth. If you can you the mouse to size or type in a measurement– for example 0.5 for 0.5mm.
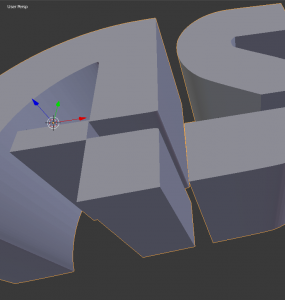
- And then you have a 3D Object in Blender from an SVG file.
Help! I’m a complete novice at Blender. Ver 2.79
Followed all steps to 5, no problem, but step 5 itself, transform co-ordinates? My screen does not look like that! I have scene etc
Moved to step 6, followed all the instructions. Step 7, had to skip, I could not find anything that said materials.
Step 8, fumbled around trying to get to EDIT, right clicked on the image and there it had appeared under OBJECT.
Did as instructed and no depth to my mesh. What am I doing wrong?
Greetings Simon! Thanks for commenting!
I’m suspecting that maybe with the issues for Step 6 and 7, maybe you need to right click on the Curve to make sure it is selected? The menus do change depending on what is selected. Perhaps that is why the Object->Convert To option was missing.
If it is easier, you can send me your .blend file to Vicky[at]tgaw[dot]com. I could take a mini video of what I do– the video might be easier to follow.
Either way, thanks again for commenting and have a great day!
Vicky