Category Archives: 3D Printing

Print Diary – Experiments in Pumpkin Carvings

Occoquan Arts and Craft Show – September 26th and 27th!
First off, I’m in! My application to the Fall Occoquan Arts and Crafts Show has been accepted (with multiple explanation marks from the show director). It’s official– TGAW 3D is the show’s very first 3D Printing Booth! Hopefully, we’ll be setting a trend for future shows.

Even better news– our booth is going to be adjacent to my brother’s shop, which means we’ll have access to power. Weather permitting, Ryan and I will be bringing the MakerGear M2 down and have it running. We’ll also have our Kinect on hand in case anyone wants to get themselves scanned. 🙂

If you are in the area, stop by and see us!

Acceptance-Highlighted

Automating Pumpkins
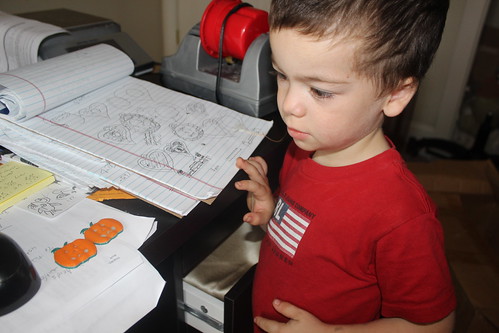
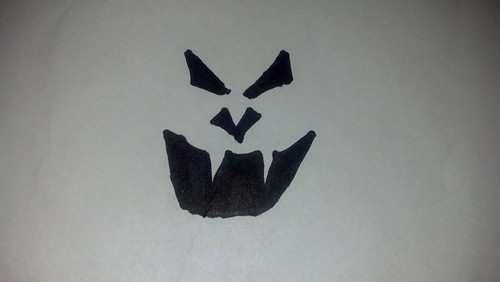
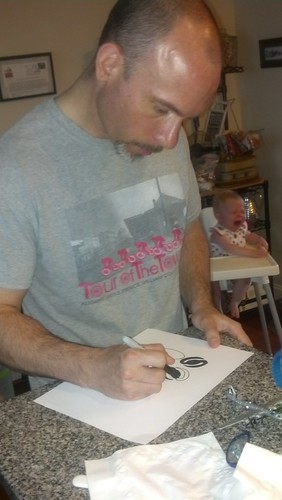
My ultimate game plan with the Glowing Pumpkin Pendants is to take advantage of one of the great perks of 3D printing– customization. I want people to draw/design their own pumpkin faces. I have my base pumpkin model. I would just need to make their face into a model and subtract it from my pumpkin. Thinking ahead, I did some experiments. I grabbed a Sharpie, drew a face and scanned it as a black and white image.
3D Printing

Now what?

OpenSCAD?
Looking over the OpenSCAD documentation, it looked like I might be able to use the Surface feature to achieve my goal. It uses the greyscale values of an image to determine the various heights of a surface. Since my image was Black and White, it should give me a template to carve out of my pumpkin.

It did make my face surface as planned… but it had a bottom plane underneath it. No worries, I rotated it 180 degrees. At this point, all I would need to do is position it, size it, and subtract it from my pre-existing pumpkin template.
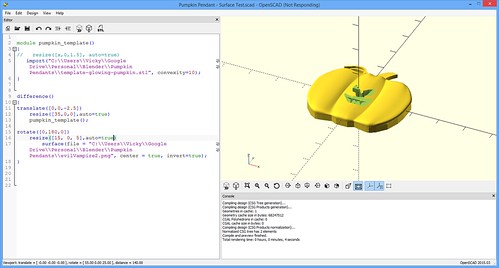
OpenSCAD-Surface

I got it carved out, albeit a lot smaller than I wanted. At this point, I had to abort. I do truly believe OpenSCAD could be a viable option. But the rendering times were sooooo long. And then anytime I wanted to scroll or examine my object, I would have to wait again.

Disclaimer- It very well could be my old laptop from 2010 that has dwindling harddrive space…courtesy of all my 3D modeling.

If you’d like to explore this option further, my OpenSCAD code is below for reference and you may also want to refer to CubeHero’s Emboss and Impress Images onto a Surface in OpenSCAD article.

[js]
module pumpkin_template()
{
//This is me importing in my base pumpkin template
//what I want to carve the face out of.
import(“C:\Users\Vicky\Google Drive\Personal\Blender\Pumpkin Pendants\template-glowing-pumpkin.stl”, convexity=10);
}

//This difference command is me subtracting my
//face surface from my base pumpkin .STL
difference()
{
translate([0,0,-2.5])
resize([37.275,0,0],auto=true)
pumpkin_template();

//This is me making my surface file based on my PNG
//of my face. I rotate it 180 degrees so the solid
//plane base is on top (and out of the scope of my carving
rotate([0,180,0])
resize([30, 0, 5],auto=true)
surface(file = “C:\Users\Vicky\Google Drive\Personal\Blender\Pumpkin Pendants\evilVampire2.png”, center = true, invert=true);
}

[/js]

InkScape?
Inkscape seems to be a very powerful way of turning images, logos, and patterns into scalable vector graphic images that you can import into Blender or other modeling software. I’ve seen many people having success with it on the Internet.

One of those people just isn’t me. : (
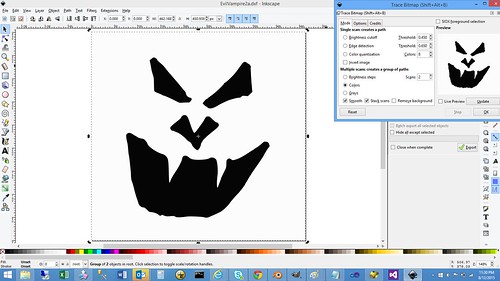
Inkscape - TraceBitmap in Action

I’ve tried using it for three different projects over the last 18 months. Each time, I’ve ended up with a model that is cumbersome to edit and full of mismatched face normals. It just seems like I have an awful lot of cleanup to do. And not fun, “I’m learning more about 3D modeling” cleanup– tedious, demoralizing cleanup (“What– now I have even MORE non-manifold edges? #@(*&$I*!”)

Disclaimer- This could end up being user error– something like I should export to a different SVG format instead of the Inkscape SVG.

ShapeJS
Interestingly enough, the tool I found I liked the most is Shapeway’s JavaScript-based library, ShapeJS. Just like OpenSCAD’s surface, you can upload an image and the colors in that image is used to make your model.

I stole code from their Absinthe Spoon example, uploaded my Black and White image and very quickly I had a model.
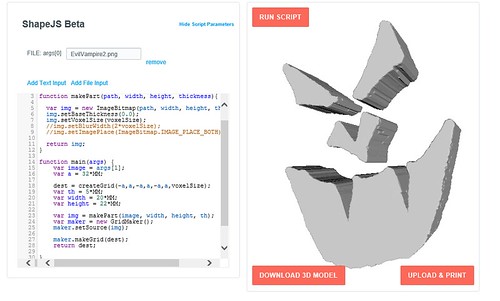
ShapeJS- Pumpkin Face

They have a Download 3D Model button, but I couldn’t seem to get that to work in Internet Explorer or Chrome.

My workaround was:

  1. Click on Upload & Print button.
  2. When the new Model details came up, I clicked on the Download button near the top and saved the file to my desktop.
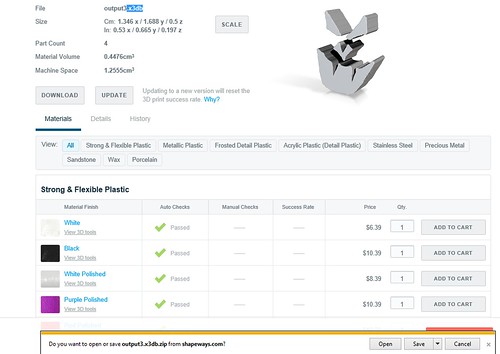
    Shapeways - Export to x3db
  3. This downloaded a zip file, so I extracted the inside
  4. D’oh. This file was in x3db format. I wanted .STL. I had the free version of NetFabb Basic on my machine. I opened that up, added my x3db part and then went to Part->Export Part->as STL. (Hat Tip, StackOverflow!) NetFabb Basic - Export Part - as STL
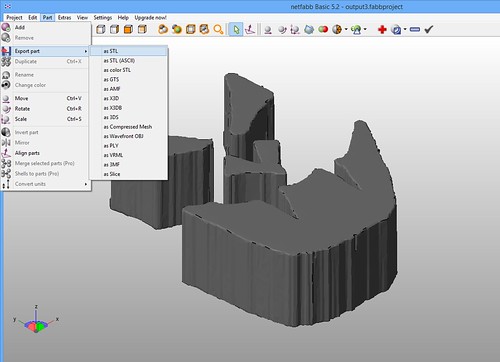
  5. Yay! I had my .STL

Yes– that is indeed a lot of steps. But guess what– I found it still better than Inkscape cleanup. : )

If you wish to follow in my footsteps, here’s my ShapeJS code. To compliment the code, you’ll want to click on Add File Input at the top of the code editor and then upload the file you wish to use.
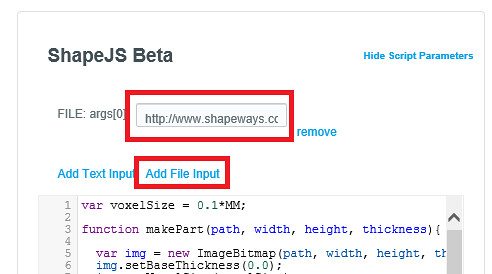
ShapeJS - Adding a File Argument

[js]
var voxelSize = 0.1*MM;

function makePart(path, width, height, thickness){

var img = new ImageBitmap(path, width, height, thickness);
img.setBaseThickness(0.0);
img.setVoxelSize(voxelSize);

return img;
}

function main(args) {
//This argument (arg[0]) is our PNG file.
//I add by clicking on the “Add File Input”
//and then I upload the file I want to use
var image = args[0];
var a = 32*MM;

dest = createGrid(-a,a,-a,a,-a,a,voxelSize);
var th = 5*MM;
var width = 20*MM;
var height = 22*MM;

var img = makePart(image, width, height, th);
var maker = new GridMaker();
maker.setSource(img);

maker.makeGrid(dest);
return dest;

}
[/js]

3D Printing

Other Options
There are most definitely other options out there. I’m sure my learning and experimenting will continue. Last night, for example, I was just reading an article by Chris Gerty about using Online-Convert to do the same thing. H.G. Dietz’s Trace2SCAD looks interesting as well.

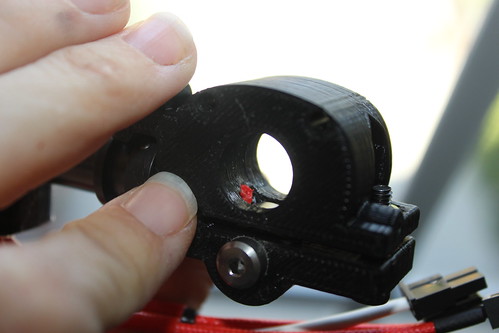
But for now, the ShapeJS method has served me well. My husband drew me two new faces that we were able to model and print quickly this past weekend.
3D Printing

Beta Testing OCQ Keychains and the Merit of Simple Designs

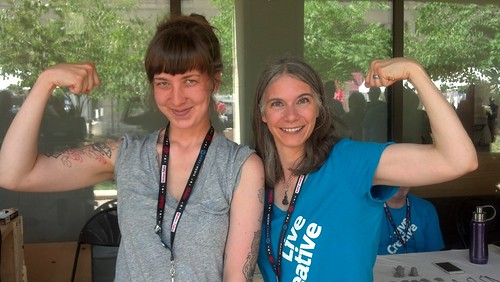
Okay, don’t laugh. Sometimes the simplest designs is what resonates with people. My breastfeeding pendant, for example. It’s such a simple model– I could make it in minutes now, but that doesn’t keep it from drawing the attention and appreciation from breastfeeding mothers. My favorite example is Erin (below) who I got to meet at the National Maker Faire. She bought a breastfeeding pendant from me right after pumping. : )

Two Breastfeeding Mothers at National Maker Faire

So, I made these quick little OCQ keychains to represent my hometown–Occoquan and maybe even raise some money for the Occoquan Historical Society (though they don’t know those aspirations yet). Super easy– I just adapted some OpenSCAD code I had for some Virginia Tech wine stoppers. I used white text on blue background to match our new stunning town signs. They looked nice, but design-wise, nothing ground breaking or special.

“I want one,” my mother said as I sprayed some gloss on my day’s prints out on the deck.

Out of all the things I’ve printed, I believe this is the first time she’s wanted something for herself.

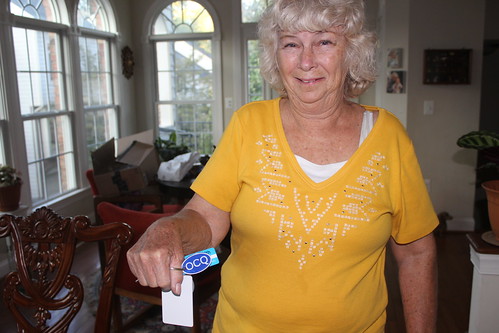
“I want one,” she repeated later as I stacked and counted prints on the dining room table. She even volunteered to take one of my rejects. “The one with the weird C.” So I gave her one (ahem… the one with the weird C).

She promptly put it on her keychain and it fit perfectly. And there you have it. Sometimes simple designs can make people happy.

3D Printing - OCQ Keychain - Anne's New Keychain

For those so inclined, my OpenSCAD code is below:
[js]
//
// This is our module that will create a base
// cylinder which we stretch out for aesthetic
// purpose.
//
// We pass in the dimensions and a flag whether
// we want an embossed outline outside of the cylinder
//
module base_cylinder(x,y,z, withOutline)
{
resize([x,y,z])
rotate([0,90,-90])
difference()
{

cylinder(r=30, h=22, $fn=100);

//If we want to do an outline, we are
//going to subtract out a smaller
//cylinder so we have an inlay.
if (withOutline==true)
{

//front
translate([0,0,17])
cylinder(r=28, h=5, $fn=100);
}
}

}

difference()
{
union()
{

base_cylinder(50,3,30, true);

//My OCQ Text
translate([-18,-1.5,-5])
{
rotate(a=[90,0,0]) {
linear_extrude(1.5)
text(“OCQ”, size=12, center=true);
}
}

}

//Keychain Hole
translate([-20,1,0])
rotate(a=[90,0,0])
cylinder(r=2, h=5, $fn=100);
}
[/js]


Print Diary – August 11 – Archilochus colubris

Ruby-throated Hummingbird
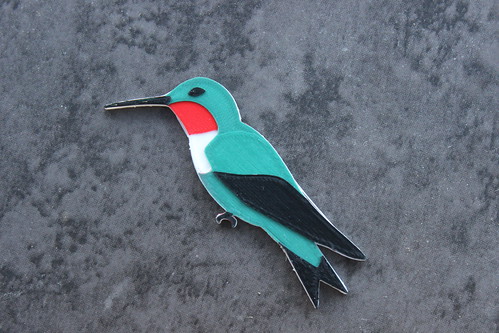
On Tuesday, I welcomed Archilochus colubris (Ruby-throated Hummingbird) to my 3D printed aviary. He was designed in Blender (based off a Creative Commons photo by my husband) and printed in the MakerGear M2. I used four different Simplify3D processes to print four colors– White, Traffic Red, Mint Turquoise, and Black.

3D Printing - Birds - Ruby-Throated Hummingbird

Overthinking the Color Order
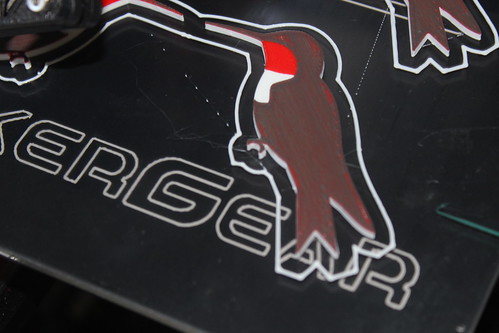
Originally, I was printing Red, White, Green and then Black. My thought process was I wanted that White directly underneath the green, so it could be as bright as possible. I was worried if I printed green right on top of the red, it would appear brown.

So I did Red, White, Green and Black…. and I found myself very distracted by the Red outlines to the whole bird.
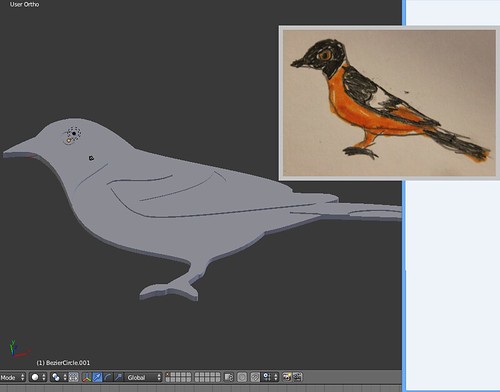
I switched them up. I printed White, Red, Green and then Black. With the first layer, it does look like my worse fears are realized– the bird is a pretty icky brown.
3D Printing - Birds - Green on Red Doesn't Look So Good...At First

But I have four layers of green (at 0.10mm each) and by the time it finishes all those layers, the green layer looks just as green as it does over the white. It made no difference whatsoever… for my ColorFabb Mint Turquoise. It is possible my translucent filaments from MakerGear (Grey and Orange) may be a different story.

Multi-processes to the Rescue!
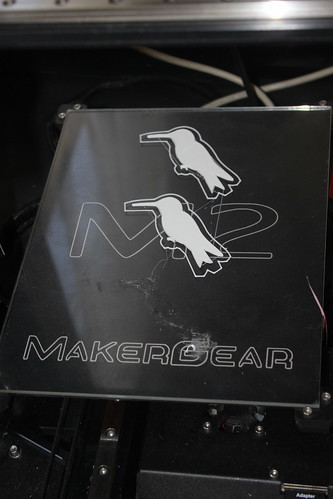
I discovered that running Simplify3D’s multiprocesses one at a time are good for more than changing colors. It does give you an opportunity to recover should a mishap occur. In this case, one of my hummingbirds came unstuck to my bed. My attempts to glue stick him back on failed, so every time my extruder hit that blank spot it was making a nice spaghetti mess of filament (Side note– it is impressive to see how little filament actually goes on a layer– no wonder why my filament spools last forever).

3D Printing - Birds - Lost Hummingbird

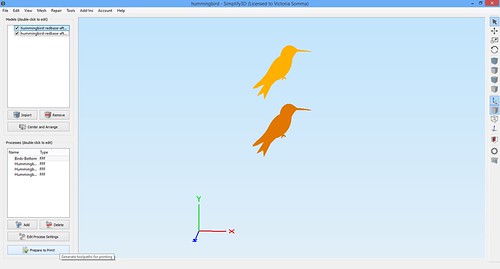
Luckily, since I was running multi-processes, once my base layer of White finished, I had the opportunity to go into Simplify3D and remove the troublesome hummingbird (being VERY careful not to hit that Center and Arrange button). I exported my new processes to my SD card and that allowed me to not have to waste any more time on the MIA hummingbird.

Simplify3D - Saving Filament

Occoquan Craft Fair Preparation
I also got my application in for the Fall Occoquan Arts and Crafts Show on September 26th and 27th! I’m hoping to be their inaugural 3D Printing booth. Although I have no reason to worry about my acceptance into the show, meh, I still do worry a little bit, so I’ll be happy to hear back from the show director.

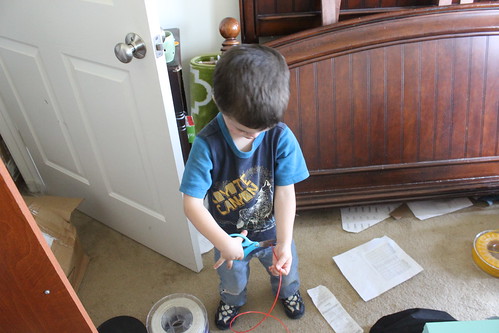
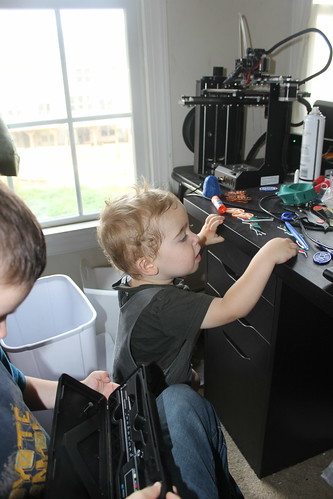
In the meantime, we are still preparing. My entire family is pitching in. Ryan is locating a tent and table and getting us a credit card processing solution. My brother, a small business owner, has been helpful in the business side of things. My Mom, as always, is a huge asset. Even my children are helping! They help with “Market Research” and young Sagan has mastered preparing my filament for color switches. : )

3D Printing - Sagan Preps Filament

3D Printing - Birds - Dyson Plays with Birds

3D Printing - Glowing Pumpkin Pendant - Sagan Helping Me Decide

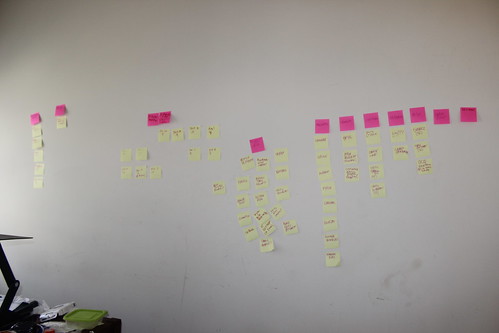
On my end, an entire wall of my office is covered in Post In Notes of ideas and action items. My evenings are spent modeling and slicing, so I can make sure the MakerGear M2 has stuff to do while I work during the day.

3D Printing - Craft Show Planning Wall

And our dining room table is currently a staging area of potential products.

3D Printing - Craft Fair Inventory

It’s going to be a busy fall. 🙂

Print Diary – July 30th – Taking the Plunge!

Going for the Craft Fair
My town has an annual craft fair every September and June. After much discussion with my husband, we decided we are going to try to do the fair’s very first 3D Printed booth this year. If anything, we will be testing the waters for future 3D printing vendors. I applied for an official business license with my town. Yikes! : )

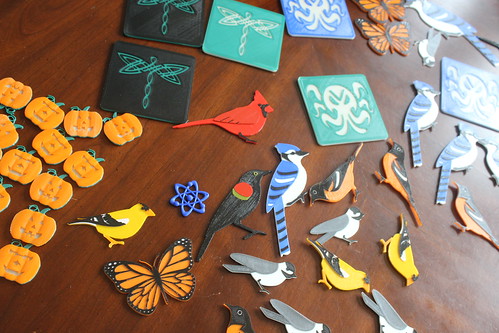
My prints today were some items in preparation for the faire– orioles, coasters, monarch butterflies.

Process Improvement
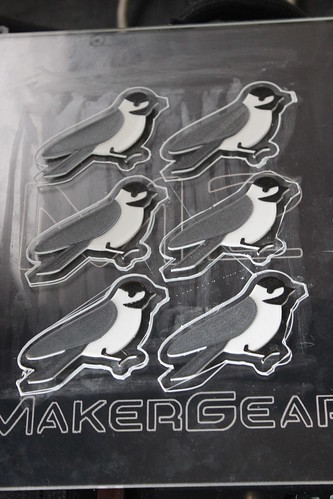
I did improve my bird printing process. Previously, I was printing all the birds at 0.10 layers. This allowed me to get more layers in of colors so they filled in better, but keeping the overall detail small.

Well I realized the backing of the bird didn’t need to be that short. In Simplify3D, I added an additional process where I printed the bottom of my birds at 0.2mm layers and then decreased down to 0.10 when I got to my color switches.

The result– it’s now quite fast to produce out a full bed of birds!

3D Printing - A Whole Slew of Chickadees

Science-Themed Pendant by Rosie Campbell
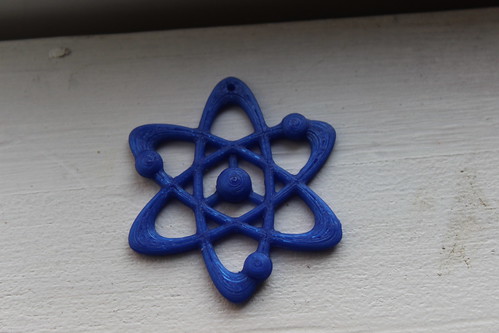
I did also try out the Science Themed Pendant by Rosie Campbell. It’s lovely and licensed Creative Commons (with commercial use). I like it, I’m satisfied with the print. I can see myself wearing it.

But…

Man, that hole is awfully small. It could be done— but you might need one of those needle threaders to do it.

3D Printing - Science Themed Necklace by Rosie Campbell

Nonetheless, it’s lovely!

Print Diary – July 29th – Monarch Butterfly and Glowing Cthulhu

Victory with the Monarch Butterfly
As I mentioned yesterday, I was having some trouble adapting the Public Domain Monarch Butterfly model by Liz Havlin. Although I have been 3D modeling for about 18 months, I was having some trouble achieving what I wanted– I wanted the holes of the butterfly to not be holes. I wanted the sections I wanted to be orange to be 2mm high and the sections I wanted to be white to be 2.3 mm high.
Unfortunately, I was introducing all sorts of manifold issues along the way. One day, I may look back on this and laugh at myself and my “silly ways”, but for now here’s what I ended up doing that actually worked for me.

I was able to easily make a solid butterfly that I extruded up to 2mm high– so I had my orange all set. For the white, I:

  1. Highlighted the vertices of the hole I wanted to fill.
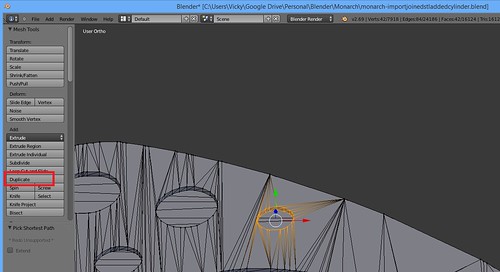
  2. Hit the Duplicate button to make copies of those vertices.
    Monarch Butterfly - Duplicate Vertices
  3. I hit escape (those new vertices were selected).
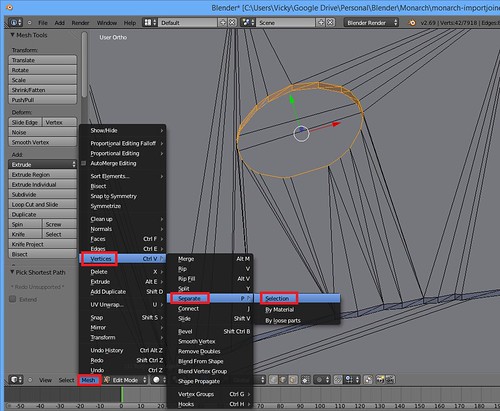
  4. Then I went to Mesh->Vertices->Separate->Selection. This move those vertices to their own object, which I filled in as a face and then extruded up 0.3mm.
    Monarch Butterfly - Seperate Menu Options
  5. I ended up with a bunch of 0.3mm high cylinders that I added to the solid butterfly (that was 2.0 mm high) and the hollow butterfly which was 0.7 mm high (making my black outline 0.4mm high)

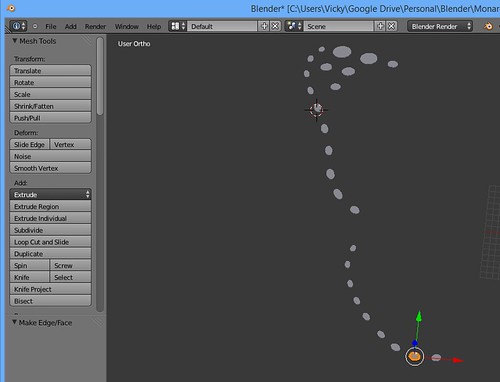
    Monarch Butterfly - New Solid Cylinders

The colors are in the same height and order as the Baltimore Oriole (Orange – 2mm, White 0.3mm, Black 0.4mm), so I can print butterflies and orioles together.

Again, with future modeling knowledge I may look back and scoff at my approach. Nonetheless, I have my butterfly… and he’s beautiful!

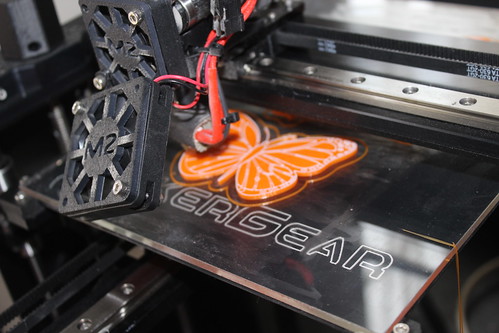
3D Printing - Monarch Butterfly in Action

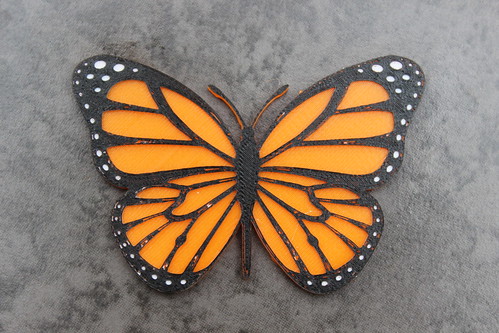
3D Printing - Monarch Butterfly Magnet

Glowing Cthulhu Coaster
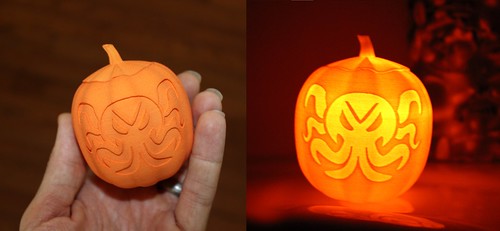
Another project I tackled was a lot easier. I have a little Cthulhu cutout I modelled for my “Glowing Cthulhu Pumpkin” on Shapeways.

Cthulhu Pumpkin in Hand and Glowing

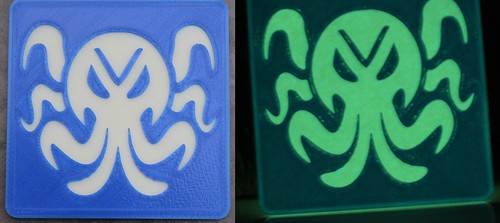
In the case of the pumpkin, an LED inside provides the light. I decided to see what ColorFabb’s GlowFill could do. I went ahead and took that same cut out I drew and modelled and carved it out of a small beveled cube to make a coaster. I printed the first 2mm in GlowFill and then the top in a solid color. I am pleased with the result. Not only does Cthulhu glow, but the border around the coaster glows as well. A win.

3D Printing - Glowing Cthulhu Coaster (Blue) - Before After

Print Diary – July 27th – The Baltimore Oriole and USB Mobius Strip Holder

Today was an eventful day with the printing. I had no slicing or modeling challenges or obstacles. Just straight up printing.

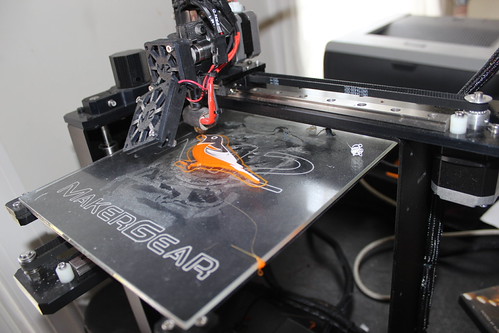
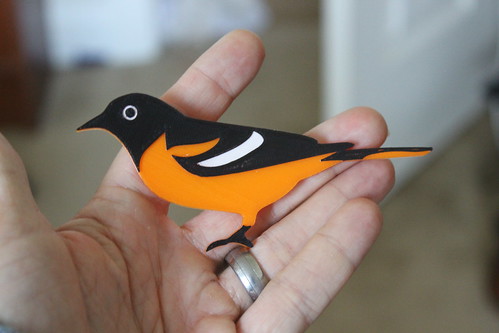
With switching out the filament during the print, I got to see my Baltimore Oriole come to life!

3D Printed Birds - Oriole in Action - After White Layer, the Black is Just Starting

3D Printed Bird - Oriole

And then for a “mindless” print so I can get my day job done, I reprinted my USB Mobius Strip. The only real adjustment I made from the first print was not putting supports with in the USB slots. LOVE. Now hopefully I won’t use my USB keys as frequently. (There are only two pictured because…well… I can only locate two of my USB keys, emphasizing WHY I need this in the first place).

3D Printing - Mobius Strip USB Holder

Print Diary – July 26th – Icterus galbula

On the printing side of things, I did 3 Sharkz and 2 3D Hub Marvin keychains in colorFabb’s GlowFill. I had company over, including a 6 year old, a 9 year old, and a 10 year. Of course, I had to show them the 3D Printer and what’s better for kids than GlowFill?

The 3D Printer was a hit. I knew I was really connecting with the oldest child, but as they were departing, the youngest told me, “I’m going to ask Santa for a 3D Printer… so my Mommy can save her money.”

“Thanks Vicky!” The mom joked when she heard that news.

P.S. I added some new cooling settings and now my 3D Hub Marvins are better than eva!!!

On the modeling side, I do have a working model of a new bird – Icterus galbula, better known as the Baltimore Oriole. I do reside near Maryland, but really I was drawn to this bird because my translucent orange filament is fabulous and I thought the black and the orange color combination was going to translate well to a print. We shall find out if I’m right tomorrow! : )

WIP - Oriole

Print Diary – July 24, 2015 – Fun with Sharkz!

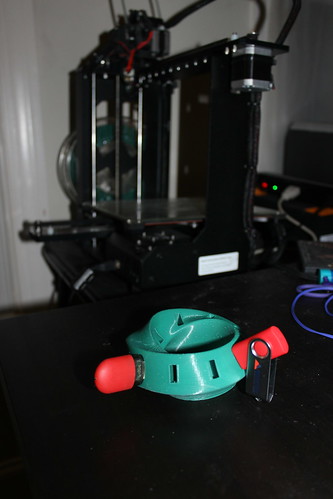
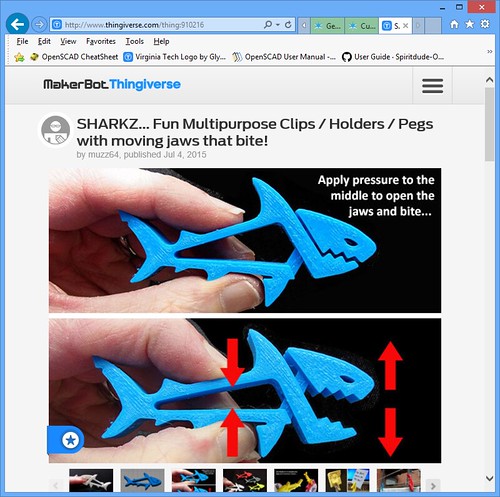
My intent when I woke up in the morning was to do my reprint of the Mobius Strip USB Holder. As I perused reddit over my morning coffee, however, I found a delightful little tangent– Sharkz from Thingiverse user Murray Clark. It’s a small object, so it is a fast print. It prints without supports and it moves. It can function as a little bag clip…or clothes hangers…or I even saw one maker using them as clip on earrings.

Sharkz - Thingiverse Screenshot

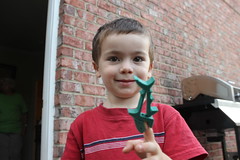
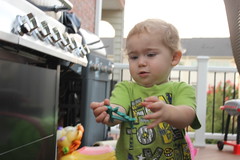
I have a four year old and a two year old and imaging their faces playing with the Sharkz was just too tempting to resist. The four year old in particular. He’s a Sharknado fan. : )

Simplify3D Settings
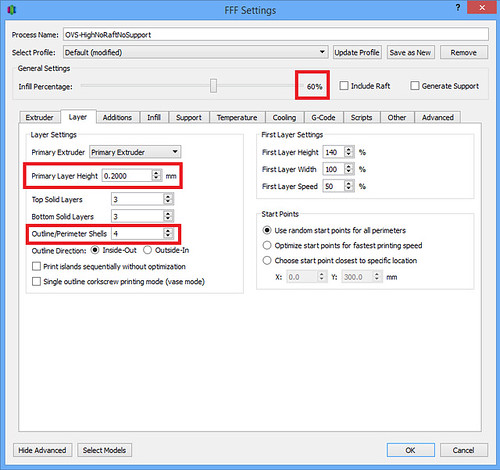
My print settings were really straight forward. Nothing fancy at all. In fact, I pretty much stole everything from the Thingiverse Instructions tab. They recommended 4 perimeters and an Infill of 60% to give the Sharkz a sturdy bite. They also recommended a layer height of 0.2 mm. Easy peasy.

  • Under the Layer tab:
    • Layer Height: 0.20
    • Infill: 60%
    • Outline/Perimeter Shells: 4

    Sharkz - Simplify3D Layer Settings

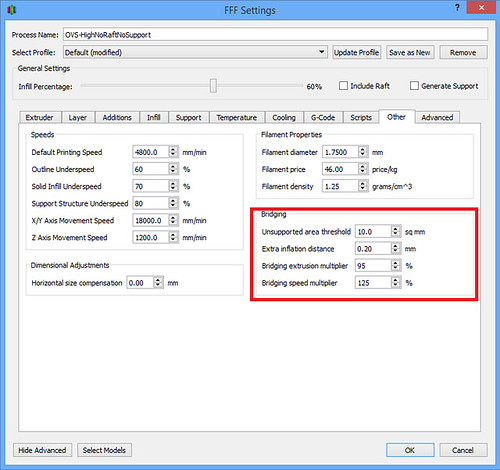
  • Under the Other tab:
    For my bridge speed, I used some tried and true settings I originally got from Ed Nisley’s blog when he printed the Bridge Calibration test.

    • Bridging Speed Multiplier – 125% (This should come out to 6000 mm/min which is 100mm/second)

    Sharkz - Simplify3D Bridge Settings

Confirming Bridging Settings
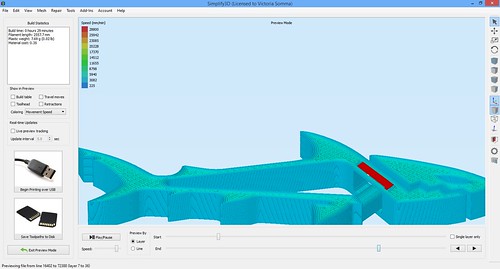
Since bridging was going to be key to the Sharkz’s jaw movement, I used my little hack to make sure my bridge settings were going to take effect. I temporary set my Bridging Speed Multiplier to 600%. I did a preview. The preview color codes by the print speed, so that made my bridge areas bright red. I changed it back to 125% and printed away.

Simplify3D - Bridge Hack on Sharkz

Sharkz = Fun
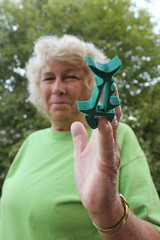
The bridges worked well and our little sharks do have quite a bite. They proved to be fun for the whole family, including my 69-year old mother.

3D Printing - Sagan and Sharkz 3D Printing - Dyson and Sharkz


3D Printing - Anne and Sharkz

A fun, quick little tangent.

Give Up and Use Supports?

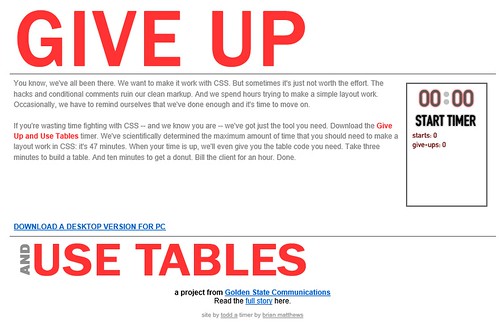
I’m a web programmer by trade and back circa 2007 and 2008, Cascading Style Sheets were becoming mainstream… and had their learning curve and their fair share of frustrations. There was a website that poked fun at the struggle of trying to do your page layout entirely by CSS. It was aptly called GiveUpAndUseTables.com. The site is long gone, but thanks to the Way Back Machine at Archive.org, I can still share a visual. They recommended after 47 minutes you:

GiveUpAndUseTables

I was reflecting on my support-free bridging efforts with the Elements of Harmony Dice. I knew the print could be done without supports, which is why I kept up my experiments. But I do foresee sometime in the future, there will be a need for me to:

GiveUpAndUseSupports

Future Experiment – Filament Coloring

I seem to have a never-ending supply of things I want to print and try. Here’s another one for my formidable list!

Today I read a Make magazine article entitled “Automating a Filament Colorizer to a 3D Printer” (via the 3D Printing reddit). As soon as the article loads, you see a lovely piece of 3D Printed art by Tom Burtonwood that is sporting gradients of multiple colors.

Make Screenshot - Automating a Filament Colorizer to a 3D Printer

I marveled at the piece, scrolled down and was shocked to see how he did it. He used Sharpies! We have a ton of Sharpies in the house! I’m quite familiar with their vast array of colors as I have to routinely confiscate them from my four year old (and try my best to convince him he wants to use “kid markers” instead).

And although I once doodled with a Sharpie on a 3D Benchy print, it never occurred to me to take that Sharpie to the filament before it goes through the printer. It’s an interesting notion. I might have to give it a whirl one day.

One day. : )