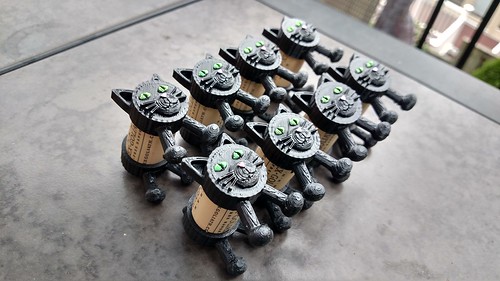
Now that Maker Faire Nova is behind me, I am aiming to get my Upcycling models up and available to download for the community. This model preexisted my recent Maker Faire Nova efforts. I designed this Cork Kitty as a companion piece to EHM’s Cork Puppy back in the summer of 2015. They have been popular at Craft Fairs and black cats are particularly popular at Halloween.
For me, I found the model to be an unintimidating way to ease into painting prints. The raised details of the face lend themselves well to painting. I find brushes geared for miniature painting to work well. I use Majestic Royal and Langnickel Short Handle Paint Brush Set, Detail, 11-Piece (Affiliate link).
I typically make the eyes green and the nose and ears pink. You can add paint to the whiskers. A dark grey looks particularly striking on black cats. I have done custom orders on Etsy where we mimick the markings to real cats.
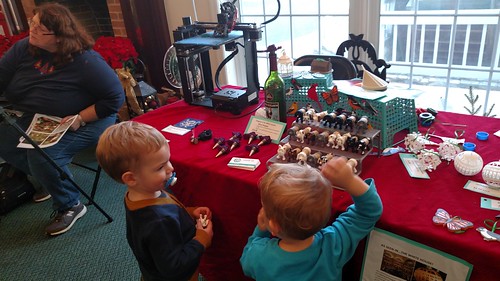
I had a friend put a slice through the cork to hold labels describing all the dishes at a Halloween party.
A Friend Used a Set of Black Cats as Buffet Labels for a Halloween Pot Luck
Although they are made from wine corks, I have found them to have appeal to children. They love playing for them! Happy making!
A friend of mine who is a drone-enthusiast recently starting dabbling in Fusion 360. He designed himself a GoPro Mount for his SpaceOne 220x which I printed over here on the Wanhao Duplicator i3. It ended up being a pretty darn sweet deal for me. Quick easy print and I got a free sushi dinner out of the gig (not to mention great company over the meal).
Now that the weather is warm, my friend is flying more frequently and I’m finding it delightful to see the print in action… or rather what the print helps records while in action. The latest video is below. You can also check out his channel at Pokey FPV.
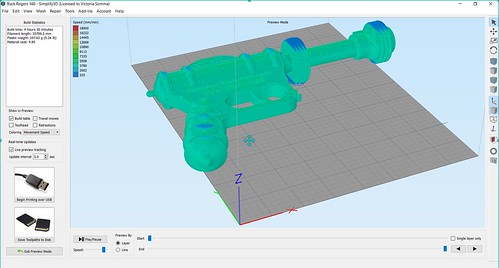
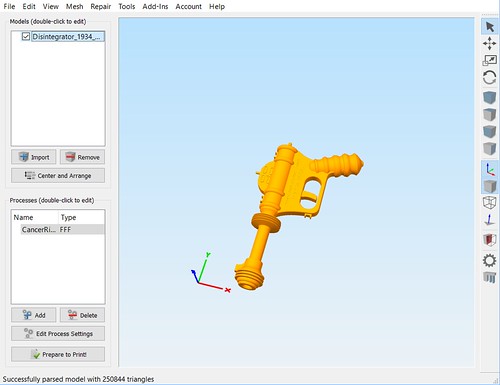
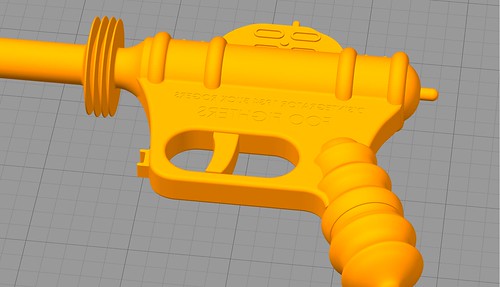
After a recent trip the Air and Space Museum’s Udvar-Hazy Center, my husband had a 3D Printing request for me. He wanted a 1934 Buck Rogers Disintegrator Gun.
The Model
Thanks to the great community up on Thingiverse, I didn’t have to do any modeling. I had THREE Buck Rogers Guns to choose from. The one that caught my eye and seemed to most resemble what my husband wanted was “Disintegrator 1934 Buck Rogers Gun” by user bluesroq.
The designer recommended printing the model with supports and there is indeed a lot of overhangs with how the gun is positioning now.
Avoiding Supports
Even though Simplify3D has top notch supports that are easy to remove and easy to control, I wanted to try to avoid supports in this case for a few reasons:
As great as Simplify3D supports are, they would still leave some scarring or souvenirs on the faces– in this case– an entire side of my gun would be subject to that and not look as pretty and finished as the other side.
Supports increase your printing time AND your material usage. In the case of an adult-sized Buck Rogers gun, the print time would have gone from 4 hours 30 minutes to 7 hours 12 minutes!
If it were in half, this particular model would be an easy, straight forward print without any troubling overhangs.
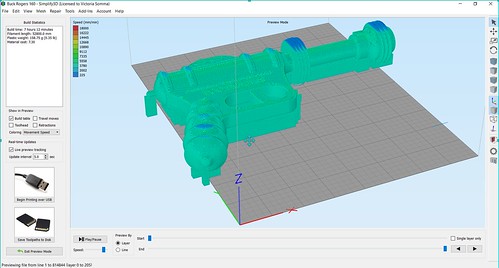
Looking over the Buck Rogers Gun, the model itself was very symmetrical. It would be a great model to print in two halves and glue together. As a 3D Modeler, I could easily pull this model into something like Blender and break in half that way. But, I could also save time and just do it through my slicer! : )
Cutting in Half – Simplify3D
In Simplify3D, anything that is below your build plate will get ignored by the printer. So in the case of this gun, I would want to lower it down so half of it is above the build plate and half is below. The steps would be:
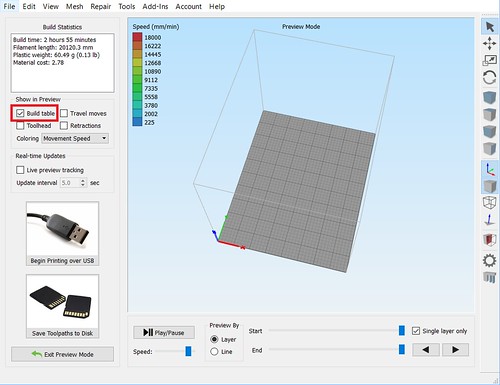
First off, it is helpful to see the build plate while you are working. If yours is not displaying in your Simplify3D, click on Prepare to Print and check the Build Table under Show In Preview.
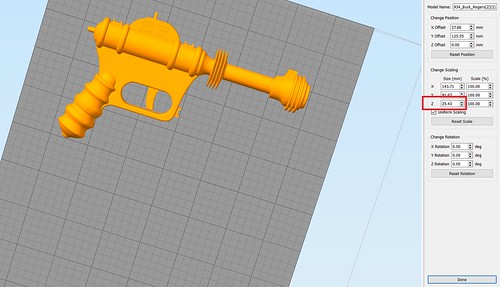
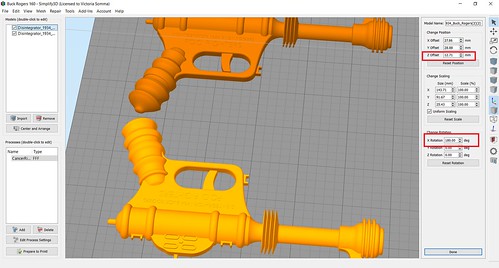
Next we need to figure out how far we want to lower our model. Simplify3D makes that easy for us as well. Double click on your model and in the information panel under the Change Scaling section, we will get a reference of the exact measurements. In this case, we are interested in the height of the model, the Z value.
Now we have some simple math. We want to lower the model so only half of it is above the print bed. That means we want to divide the height by 2. In this example– 25.43 divided by 2 is 12.71. In our Change Position section, we want to change the Z offset to -12.71 (aka Lower the model 12.71 mm).
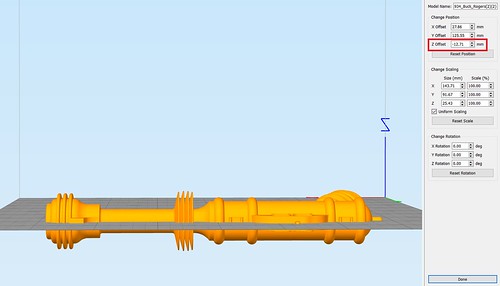
At this point, half of our model is under the print bed! If we click on Prepare to Print, you’ll see that only half of the model is going to be printed.
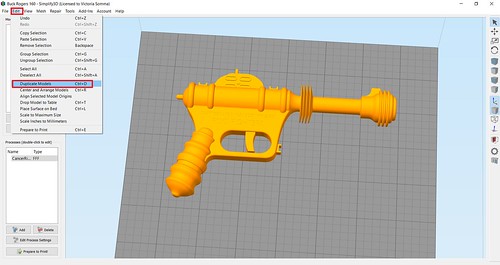
Getting the Second Half – Simplify3D
To make a whole gun, we obviously want to print two halves of the gun.
Click on your model to select it and then go to Edit->Duplicate Models and make one more copy. You may have to move it around to a better spot on the build plate. (You can also click on the Center and Arrange— but you’ll have to reset your Z Offset again for the original model).
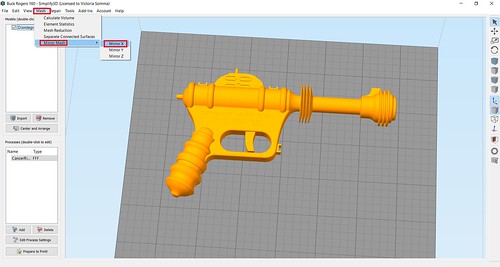
Now we have to flip our new part. Gotcha– Watch Out for Mirroring! My first inclination was to go Mesh->Mirror Mesh and mirror my second half over the X or the Y axis. That could work for some models, but in the case where there is text on your model (like this), then that also mirrors your text and it too would be backwards. Mirroring should also be avoided if your model isn’t exactly symmetrical and has different detailings on each side.
D’oh – Backwards Text
In lieu of mirroring, you can rotate it! Double click the object and then in the Change Rotation section, rotate the model 180 over the X or Y axis. Don’t be alarmed if your object suddenly “disappears”. It’s actually underneath your print bed. You just have to adjust the Z Offset now to move the new one 12.71 above the print bed.
Slic3r
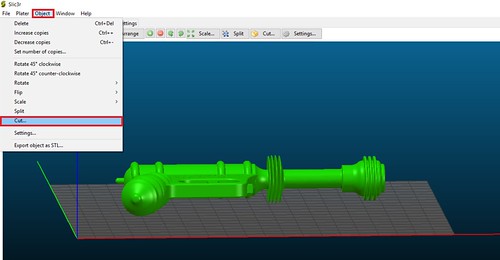
I have found Simplify3D to be absolutely 100% worth my money, but if it is not for you or your budget, you are not out of luck. You may be able to do the same thing in your slicer. As an example in open-sourced (and free) Slic3r, once you had your object on your plater, you would go to Object->Cut…
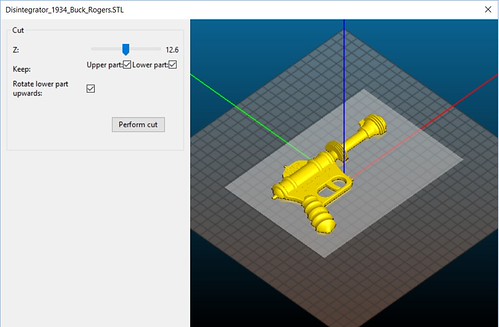
And you can pick the cutting height (and you have options to get both sides and rotate one)
And there you go, you can break your model up without modeling software like Blender. This technique’s applications are not limited to merely cutting objects in half. You can use it anytime you want to isolate out a particular section of a model to print. Say you got a 3D Hubs order and you are worried about a tricky section near the top. You don’t have to waste the time and material to run the whole print to find out that section is going to fail. Instead, you can lower your object down and do a quick print on just the troublesome section to see how it performs.
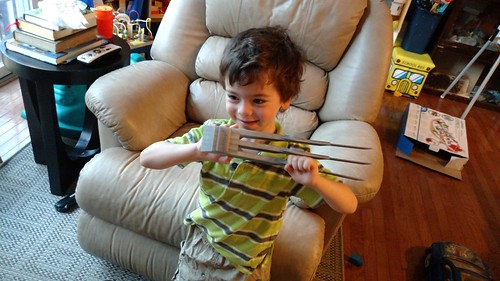
The le FabShop’s Wolverine Claws were making the rounds on the Internet and they looked amazing, but I did not feel compelled to print them. My husband saw them and instantly wanted some… but still I hadn’t quite worked it into my 3D Printing schedule. And then…. The 3D Printed Nerd nonchalantly mentioned in a VLOG that he printed them.
Suddenly I was swayed. And I already have grey filament in my printer from the Fun Police Sheriff’s Badge. It was destiny. So I went ahead and gave it a whirl. This was before The 3D Printing Nerd’s full video on the claws, so I was still blissfully unaware it took 3 tries to get them right. That might have deterred me, but luckily I didn’t see the video yet and luckier, my first print was a huge success.
I printed at 0.25mm layers with 10% infill. The Thingiverse instructions recommend rafts. I forgot to turn rafts on in Simplify3D, BUT knowing the brutal overhang was coming, I did glue stick the absolute heck out of my bed. That was sufficient to keep the claws stuck on the bed. I did have a minor first layer issue, so the very first layer of one of the claws was fused together in my print. I freed that up with Exacto Knife and SHEBAM. We were in business.
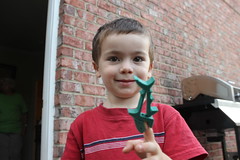
Sadly, my husband STILL doesn’t have the wolverine claws he desires. My four year old took one look at those things and yeah, now they are his. : )
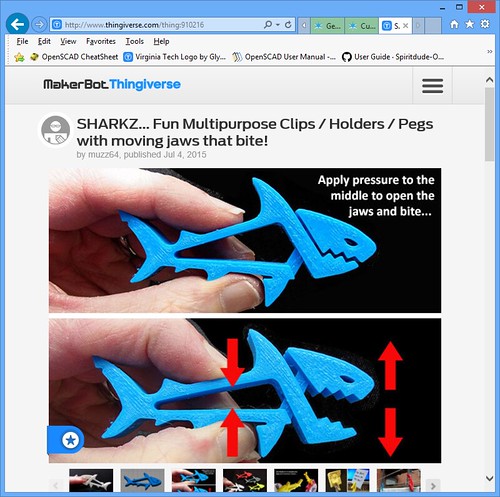
My intent when I woke up in the morning was to do my reprint of the Mobius Strip USB Holder. As I perused reddit over my morning coffee, however, I found a delightful little tangent– Sharkz from Thingiverse user Murray Clark. It’s a small object, so it is a fast print. It prints without supports and it moves. It can function as a little bag clip…or clothes hangers…or I even saw one maker using them as clip on earrings.
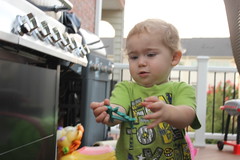
I have a four year old and a two year old and imaging their faces playing with the Sharkz was just too tempting to resist. The four year old in particular. He’s a Sharknado fan. : )
Simplify3D Settings
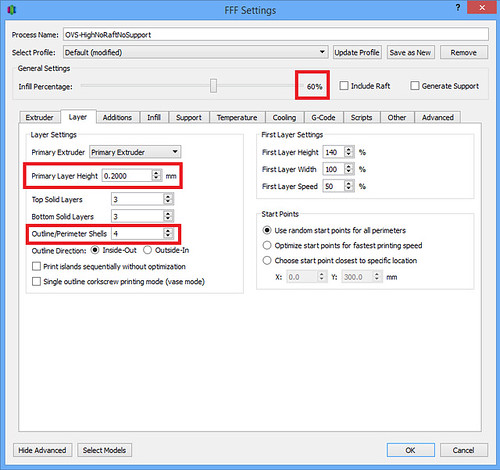
My print settings were really straight forward. Nothing fancy at all. In fact, I pretty much stole everything from the Thingiverse Instructions tab. They recommended 4 perimeters and an Infill of 60% to give the Sharkz a sturdy bite. They also recommended a layer height of 0.2 mm. Easy peasy.
Under the Layer tab:
Layer Height: 0.20
Infill: 60%
Outline/Perimeter Shells: 4
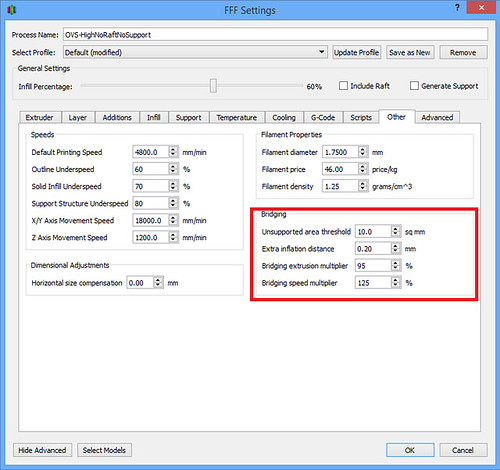
Under the Other tab:
For my bridge speed, I used some tried and true settings I originally got from Ed Nisley’s blog when he printed the Bridge Calibration test.
Bridging Speed Multiplier – 125% (This should come out to 6000 mm/min which is 100mm/second)
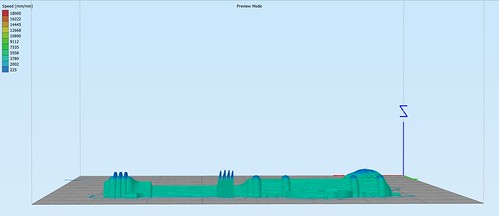
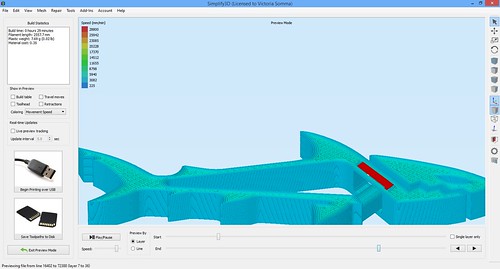
Confirming Bridging Settings
Since bridging was going to be key to the Sharkz’s jaw movement, I used my little hack to make sure my bridge settings were going to take effect. I temporary set my Bridging Speed Multiplier to 600%. I did a preview. The preview color codes by the print speed, so that made my bridge areas bright red. I changed it back to 125% and printed away.
Sharkz = Fun
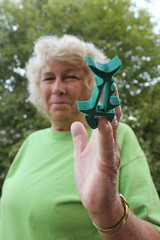
The bridges worked well and our little sharks do have quite a bite. They proved to be fun for the whole family, including my 69-year old mother.