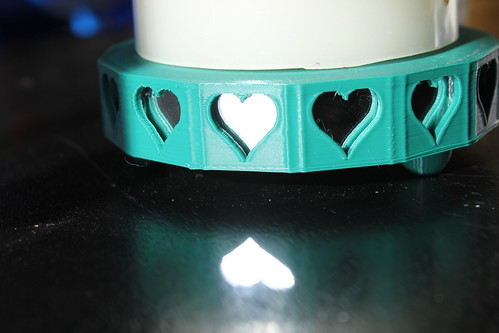
My sister turned 40 this month and get this– I have never, ever, ever printed her anything. I printed something for her husband, but not her. Bad Vicky! That definitely needed to change. Her house is a very visually stimulating house. They have a variety of lighting and effects– think blacklights, giant flatscreens with screensavers dancing to the music, lasers making patterns on the walls, lava lamps. I wanted my design to fit in and interact with the lighting in her house. I wanted something with mirrors.
Designing
At Michael’s I bought little mosaic mirrors– 35 of them for $1.99.
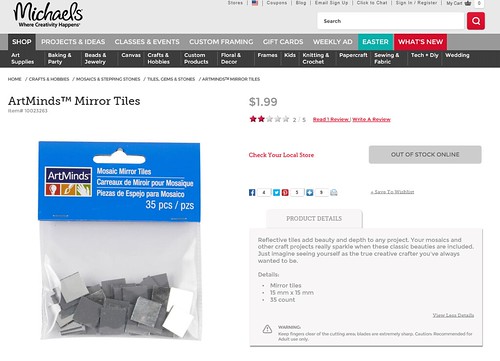
Then I got out the trusty calipers. There was some variance in the measurements, but the mirrors were pretty much 15 millimeters by 15 millimeters and 1.75 thick. I designed in cavities into my model for the placement of the mirrors. I used 0.5 millimeter clearance– which meant my “hole” came out to 16 x 16 millimeters and 2.25 thick.
All my design work was in Blender. I decided my design was going to built out of a series of 18 x 18 millimeters squares– each ready to hold a mirror. I used some simple math to figure out how many mirrors I would need to be a good stand for a 3″ pillar LED candle and the ultimate radius of my final product.
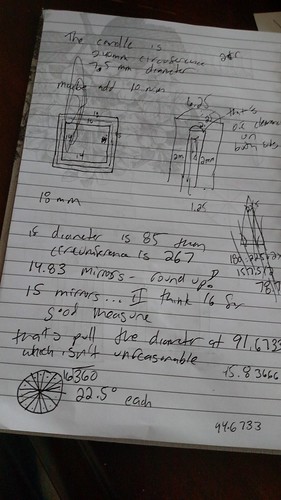
I made one template square and put in the proper placement of where it would be in the final holder. Another simple math equation told me how many degrees I would have to angle each piece.
360 degrees / # of Mirrors
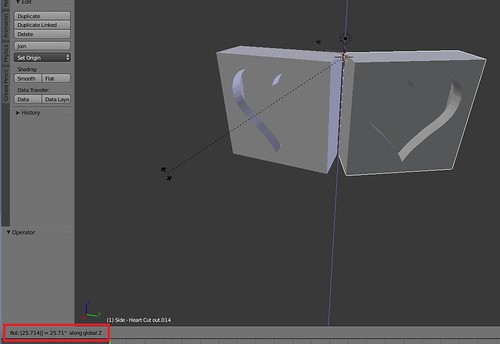
So for example, in a design with 15 mirrors, each piece would be angled 24 degrees from the previous one. If I did 14 mirrors, each piece would be angled 25.714 from each other.
In Blender, when you rotate items, you are rotating around the Point of Origin of that object (where the little yellow dot appears when you select the Object).
Usually this is the Center of Mass of the object, but guess what! You can control it and the origin doesn’t have to be in the object itself. Once I had my template square in its proper position in the final candle holder, I placed my 3D Cursor at 0,0,0.
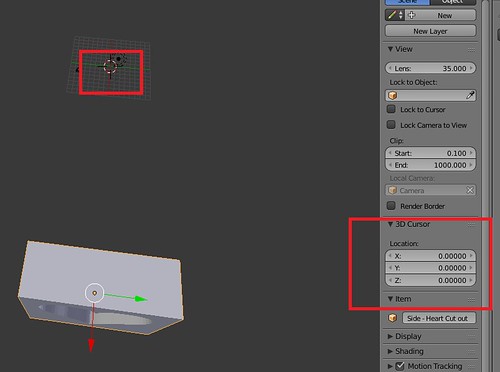
I went to Object->Transform->Origin to 3D Cursor.
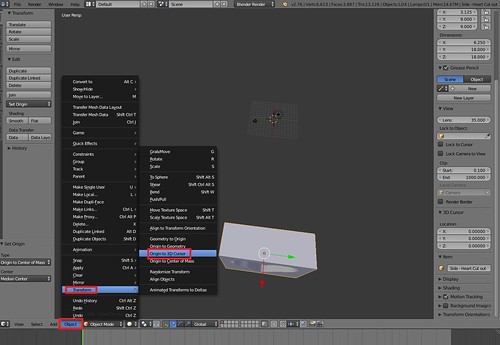
This meant the origin was right smack in the middle of my candle holder. It also meant, when I rotate, I rotate around that point.
So I proceeded to Duplicate the square, hit R (for Rotate), hit Z (for around the Z axis) and then type in my angle (25.714).
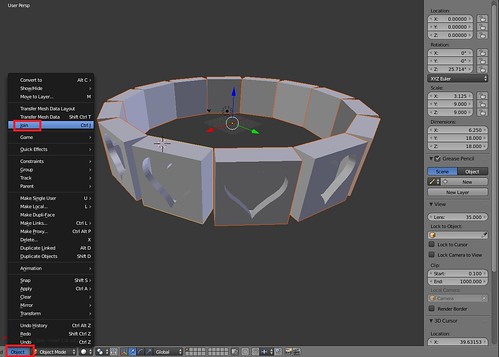
I would then Duplicate that square and Rotate it and so on until I had my entire ring. I did Object->Join to merge all my panel pieces into a single object.
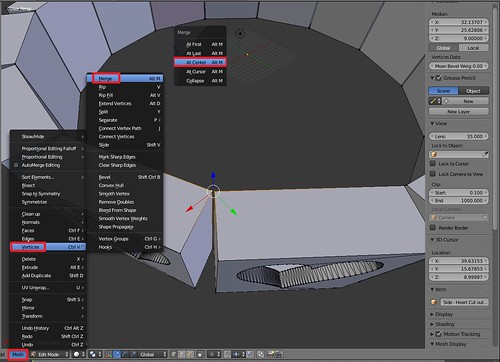
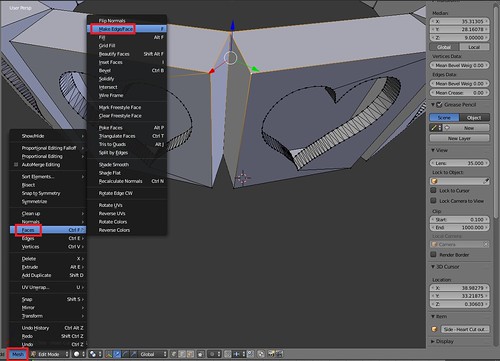
I switched to Edit mode and did some cleanup. I Merged Vertices that were close together and then added in new Faces to fill in the gap.
The inside of the candle holder is a 14-sided Cylinder. When you add a new Cylinder, you can specify the Number of Sides. I made it match the number of mirrors.

I cheated with the placement of the three feet. I added a 3-sided Circle and used that to help me determine where the place my feet.
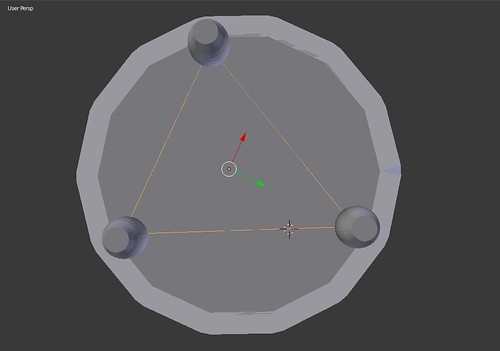
Under Modifiers I did a Boolean Union on my panel piece, my inside cylinder and my feet and voila– I had a model!
Slicing – Simplify3D
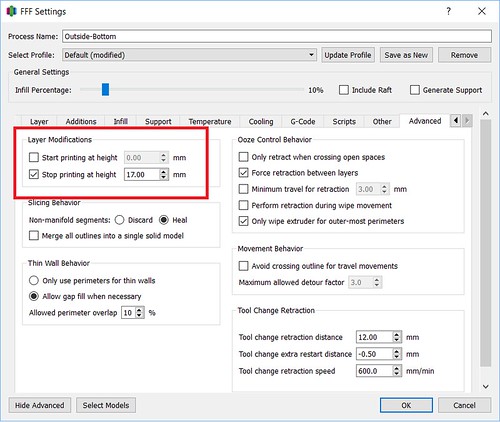
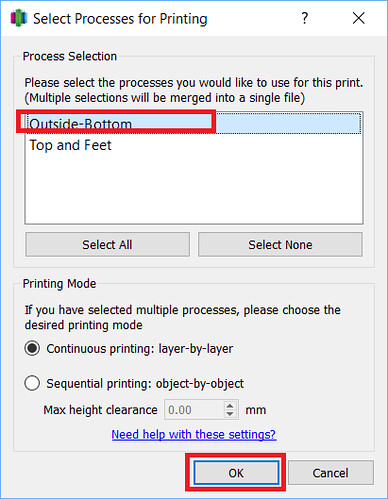
In Simplify3D, I set up two separate processes. The first process ran from the 0.00mm – 17.00mm (You can set that up in the Advanced tab under Layer Modifications). That is the point right before my mirror cavities would get sealed up.
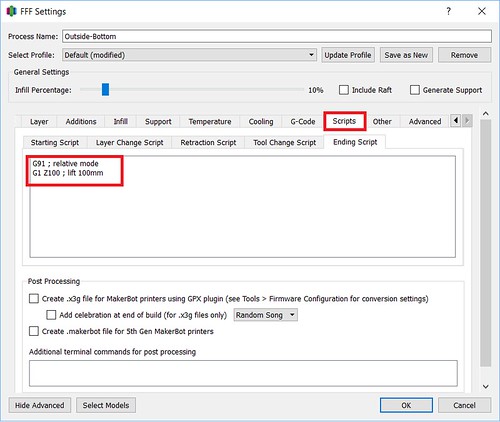
Usually when a process finishes, it’ll run a default ending process– turning off the extruder and disabling the motors, completely dropping the bed. I didn’t want that to happen. In this case, I just wanted the bed to drop down enough for me to put those mirrors in without burning myself and more importantly, get that hot nozzle off my print so it isn’t melting and deforming it and making it hard for me to slide my mirrors in. I went under Scripts and customized my Ending Script. Instead of the usual process, I did two simple steps:
1) I changed it to Relative mode, so my next instruction would use the nozzle’s current position as it’s starting point
2) I told it to move the nozzle up 100mm.
G91 ; relative mode
G1 Z100 ; lift 100mm
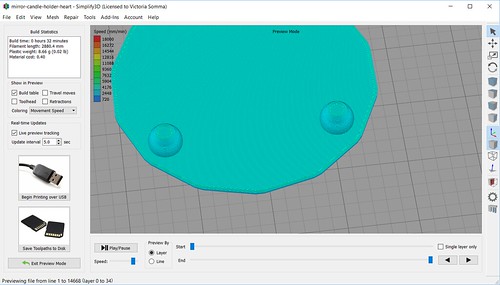
When I prepared just that process for printing, you could see how it was going to stop while I still had openings for my mirrors.
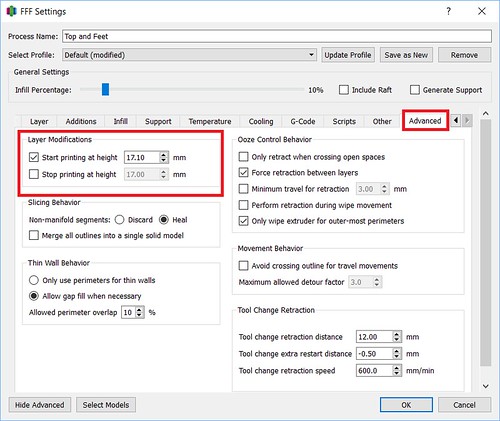
My second process was set up to run from 17.10mm on (again under the Advanced tab)
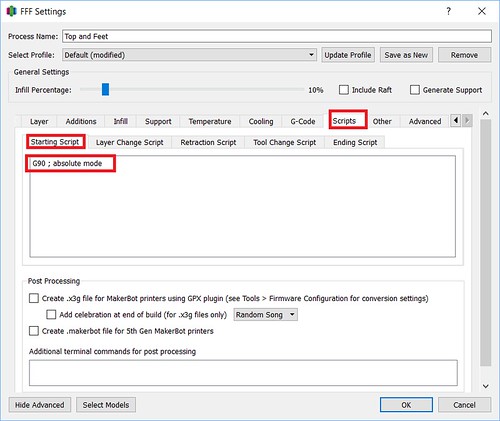
When a process begins, there are a number of things the printer typically does at the beginning such as turning on the extruder, turning on the fans, homing the axis’s, running off the side of the bed and oozing some filament. I didn’t want to do this for my second process. My axis’s are already homed, my extruder is already heated up, my filament is already flowing. All I had to do was set my printer back to Absolute mode and go. So for this second process, I went under Scripts and customized the Starting Script.
G90 ; absolute mode
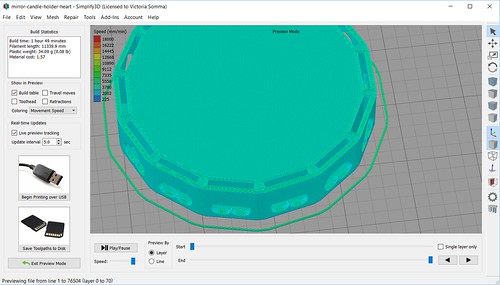
A preview of the second process, illustrates how the mirrors will get sealed in by the print.
The process worked out fantastically (Watch it in Action in the YouTube video above– starting at about 7 minutes in).
All in all I did three different designs for my sister.
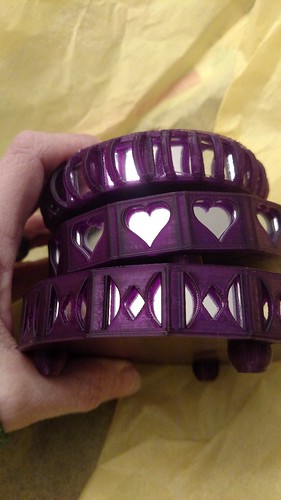
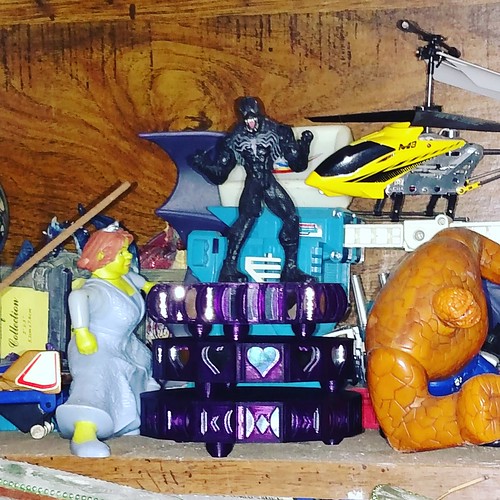
I loved the final product so much I had to make another for myself.
They ended up looking fantastic stacked. My sister used them as a platform for her Venom action figure. : )