Tag Archives: craftshow

What in the World Has Vicky Been Up To?!!?

I’m back with 3D Printings after a bit of a hiatus and I have a lot to catch you up on!

Printed Solid Grand Opening!
A freaking wonderful, invigorating event. Joel Telling’s overview of the event can be found at https://www.youtube.com/watch?v=qnZqMnokjpw

What does TGAW stand for? That is answered in Joel’s interview with me:
https://www.youtube.com/watch?v=REvIWbER_Gc

Anglerfish
Blog post with more details on the creation of my bronzeFill/GlowFill Anglerfish. I do have one more if you happen to covet one. 😉
http://tgaw.com/wp/?p=307

Bow Ties!
I’ll work on a video about their design in Blender and the attachment design in OpenSCAD. It’ll use words like “Texture”, “Baking”, “Displacement Maps” and “Boolean Intersection”. In the meantime, I do have some listed on Etsy at https://www.etsy.com/shop/VickyTGAW

Land’s End Gazebo
The real live gazebo in Sayville, NY can be found here http://www.landsendweddings.com/

Geocoin
Check out the AMAZING family I am designing for. You couldn’t get better inspiration than that!
https://www.youtube.com/watch?v=znnSSlJF79w

Make Your Empty Filament Spools into a Shelf
As promised, the model is up on Thingiverse as well as the original OpenSCAD code.
http://www.thingiverse.com/thing:1677024

Print in Place Gyro Cube!
Wanna beta test my version of the Gyro Cube on YOUR printer? Lemme know!

Thanks for watching! Happy Printing!

St. Paul UMC Fall Fair – Recap

On Saturday, I did a little “mini” show at a nearby church for four hours.  Since the booth fee was only $10, that gave me the luxury to do some experimenting with lower prices– particularly with the Cork Kitties and the Cork Puppies!  My experiment for this show as setting them up at $2.25 (that’s including the sales tax).

I left my more expensive products at home and only set up one 5′ table.  TGAW 3D “Lite”, if you will.

St. Paul UMC Fall Fair -  "Lite" Booth

Now, the foot traffic at this show was pretty minimal– I think most of the people there were other vendors, but I still managed regular sales.  My sample size is small, but I’m feeling like there was more conversion from admiration to actual purchase.  🙂  Oh, and I sold my very first Standing Cancer Ribbons.  Yay!

Cancer Ribbon - Pink

Other misc observations:

  • All the sales this time around were cash (At the Occoquan Craft show it was about 60% cash, 40% credit).
  • If I keep up with the magnet boards, I need a better way to brace them– it flew over in the wind!
  • Not all glue is equal.  I’m still filtering out bird magnets whose magnets are loose. : (

Finally, I discovered there is a perk to a slow show.  I got to sneak in some quality time with my boys and it was a fun place to do so.  They had a moon bounce, a pumpkin patch… and the local fire station even brought over a fire truck and an ambulance for the kids to explore.

St. Paul UMC Fall Fair - Dyson on Moon Bounce

St. Paul UMC Fall Fair - Dyson with Pumpkin Patch

St. Paul UMC Fall Fair - Amy and Sagan Decorate Pumpkin

St. Paul UMC Fall Fair - Sagan Drives Firetruck

As for grown up stuff, I got to visit with an old classmate from elementary school.  We had a lot to catch up on.

It wasn’t an especially lucrative show, but I had a most fabulous time.

Fall Occoquan Arts and Craft Show

Well, it was a whirlwind, but we had a phenomenal time at the Fall Occoquan Arts and Craft Show! Everything clicked into place so we could relax and enjoy the show. We had steady enough sales that we didn’t have to worry about not selling anything…. but the sales paced in a way that we didn’t have to worry about running out of everything on Saturday.

When I step back, it is crazy we accomplished in just eight weeks. Eight weeks ago, I may have had some designs up on Shapeways, but for all practical purposes I was just a girl with a 3D Printer. I had NO inventory. NO tent. NO tables. Nothing! So in eight weeks, we (I say we, because from my husband to my mother to my brother to my sister-in-law to a battery of friends– it was a big group effort) pulled off a little business.

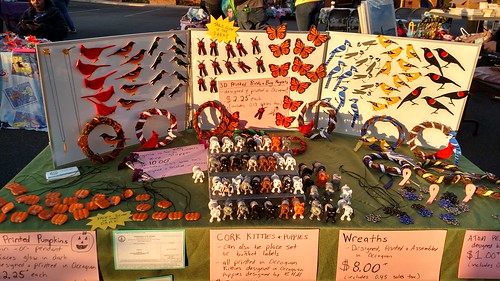
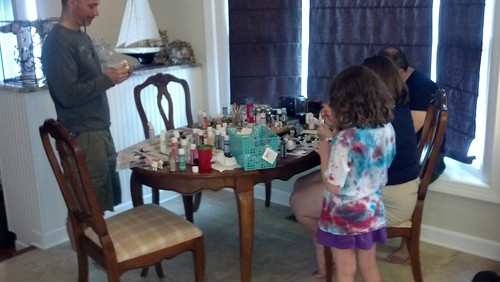
19 new designs, over 400 prints, a business license, tax IDs, a logo and signage, infrastructure for display and credit cards reading.

Whew! No wonder I’m so tired.

3D Printing - Occoquan Craft Show - Vicky and Booth
This All Did Not Exist Eight Weeks Ago!

Surprise Strong Sellers
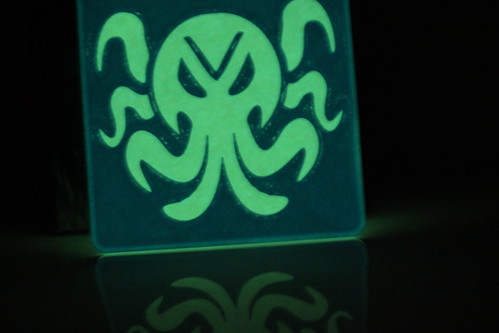
The most surprising seller was the Glowing Cthulhu Coaster. The Glowing Cthulhu Coaster was actually our first sale, a mere minute after the bells rung to start the show. We ended up selling out of Cthulhu Coasters the very first day. The second morning, we printed more…which was good because in the afternoon we sold another one!

3D Printing - Glowing Cthulhu Coaster (Lit Up)

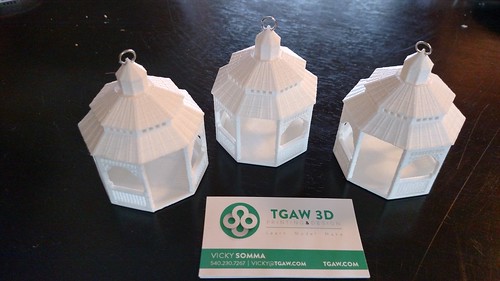
The other great surprise was my Mamie Davis Gazebo Christmas Ornament. I didn’t blog about it yet. That was my very last design for the show- done in a marathon 16 hour design session and then printing the very last week before the show. After a handful of gazebos, I was thinking of switching back to other products. My husband convinced me to print more gazebos and I’m glad I did. By the end of the show, they were all spoken for!

3D Printing - Mamie Davis Park Gazebo Ornament

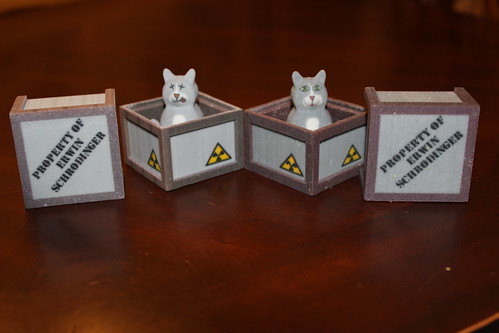
I was also pleased to sell a Schrodinger’s Cat and Box! He is definitely a niche product.

Schrodinger Cat - Two in Boxes

Surprise Slow Sellers
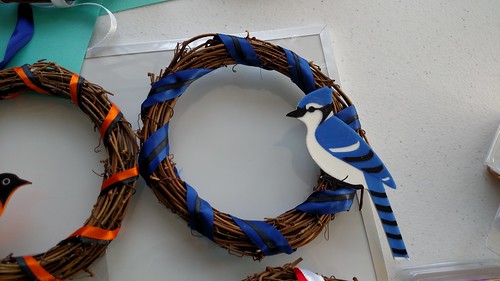
On the other hand, the bird magnets and wreaths did not do as well as I had anticipated. Possible variables- I had that in the back of the booth. I also suspect I mucked up the pricing and made them too high (More on that below).

3D Printing - Blue Jay Wreath

Leads!
I left the show with a half dozen custom design requests to follow-up on. In Episode 89 of the WTFFF Podcast, Tom and Tracy Hazzard said for them, if they left a tradeshow with just one lead, the show was worth it. I left with multiple leads plus SALES. So yeah, totally worth it.

Beyond Sales
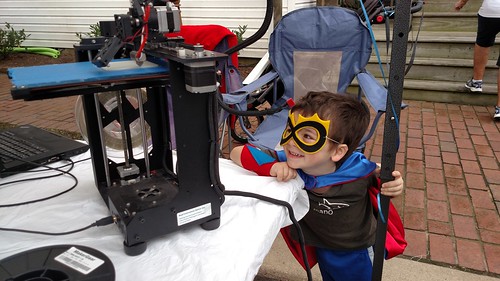
We had a best case scenario. Even if we missed a sale, we still got our egos stroked with compliments to the designs and then the best part- we got to introduce 3D printing to the masses! Visitor after visitor came in and told us, “This is the first time I’ve laid eyes on a 3D Printer. I’ve read about it, but I’ve never seen one.” They would call others over to mob around the printer. That was very satisfying.

Occoquan Fall Arts and Craft Show

Occoquan Craft Show 2015 - Dyson Plays with Hot End

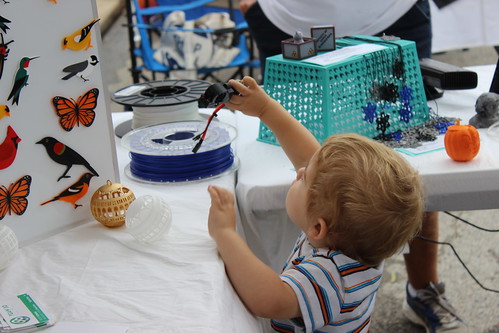
One lady admired all my birds and said, “I heard about 3D Printing, but I had no idea you could use it to make beautiful art work.” Beautiful art work! That’s the term she used!

And I got to do something I really do revel in– talking about 3D Printing and showing people how it is within their grasp right now. They can start designing and printing right now!

Surprising Another 3D Printer
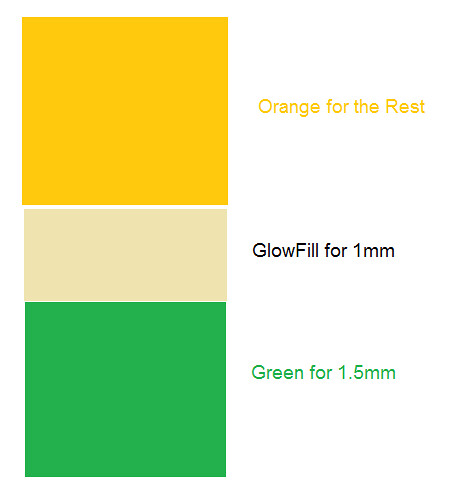
Okay… so yeah, maybe it is easy to wow the layman with 3D Printing. But what about people who have 3D printers of their own? Sunday, a local man with a 3D Printer stopped by my booth. We talked about nozzles and NinjaFlex and slicing. All of a sudden his wife interrupted, pointing to one of my glowing fireflies and asking how I did the different colors.

3D Printing - Firefly Magnet

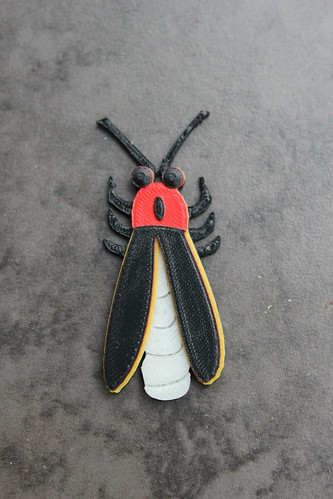
“That’s painted, baby.” the man quickly said.

And I got to correct him, “No, it’s different color filaments.”

He looked at the firefly again. “Ooooh, I see. You print the different filaments and glue them together.”

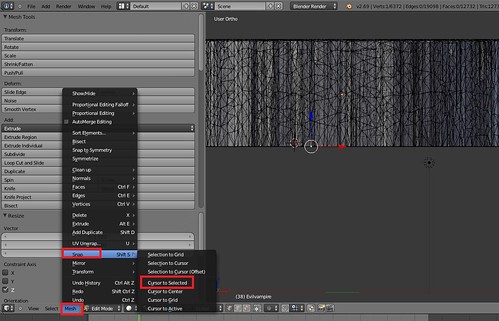
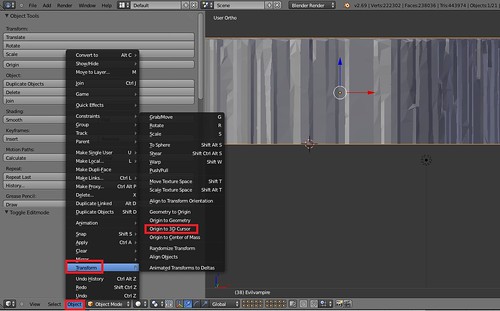
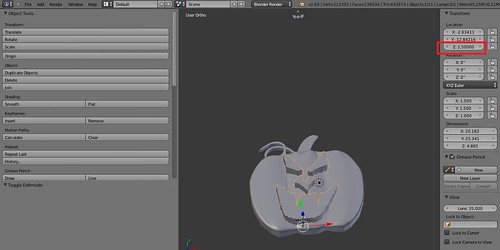
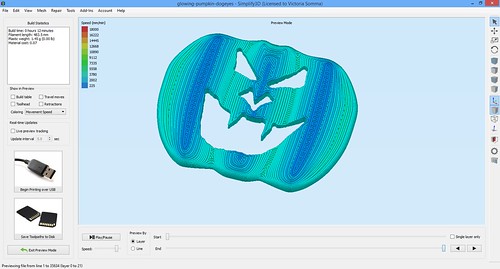
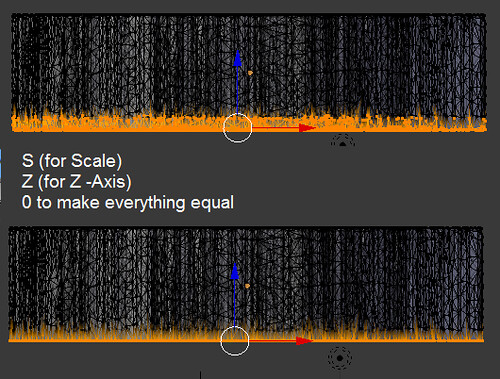
And I got to correct him and explain how I use Simplify3D to do the multiple processes and start the different colors that their designated heights.

Out of all the visitors that past weekend, I think it was only he who could really fully appreciate the technique.

To Learn: Pricing
When learning 3D Printing, you do a lot of experimentation. Ooh your overhangs are messy, let’s try a print with lower temperatures. Still not perfect? Let’s try a print with slower speeds. You tweak and make adjustments.

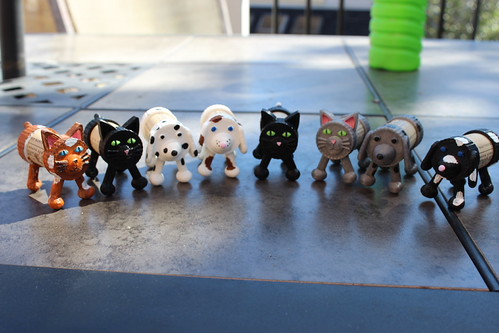
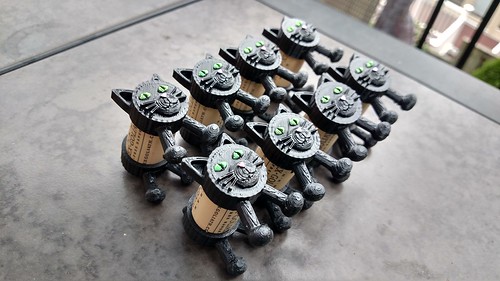
I do believe it’s going to be the same kind of thing with sales. Right now, I believe I priced the Cork Puppies and Cork Kitties too high. I was pricing it, thinking the end users were adults (using them as décor, place set holders, and entrée labels). It was very clear at the show, I should have been pricing it for KIDS. The end users are KIDS! They love them.

Occoquan Craft Show - Eight Black Cork Kitties

I also believe I priced the birds too high.

On the other side of the spectrum, it is possible I priced the Mamie Davis Gazebo Ornament too low. Why do I say that? My Mom accidently quoted a lady TWICE the price and she still agreed to buy THREE. (I only charged her the real price). So go figure. hehe

It’s just another thing for me to learn and master. It may take me a while to master, but I’ll keep working at it. : )

Next Up
Next up– a little bit of rest, getting my remaining inventory up on Etsy, doing these custom orders… and then prepping for more shows!

Print Diary – Painting Party!

We’re in crunch time for the Occoquan Fall Arts and Craft Show. How can a first time vendor make forward progress toward having a respectable inventory and keep their social life going? Why, a painting party, of course!

Remember all those Cork Puppies and Cork Kitties I’ve been printing? Some friends of mine generously agreed to help paint them. Not only that, they hosted said painting at their house… and they fed me homemade lasagna. (They seemed to have gotten the short end of this deal).

Cork Puppy and Cork Kitty Painting Party

Cork Puppy and Cork Kitty Painting Party

We had a good time and we all fell in love with the black cat. Green eyes popped so gorgeously on that Black plastic… and he is perfect for the upcoming Halloween Holiday.

3D Printing - Cork Puppies and Cork Kitties

In fact, when I left with my newly painted Cork Puppies and Cork Kitties, I also left with an order for 8 Black Cats. My hostess is going to use them for a Halloween party she is having. : )

Carving My Pumpkins In Blender

We’ve done a number of faces now for my Glowing Pumpkin Pendants for the Fall Occoquan Arts and Craft Show. I thought I would go ahead and document my carving process in Blender.

Quick background– with the pumpkins, I print 1.5mm of ColorFabb Green. I next switch over the ColorFabb GlowFill for another 1mm. Finally, I end with Translucent Orange filament from MakerGear.

Cross Section of Pumpkin

What this all means is whatever face I’m using to carve out of my pumpkin template (be it through OpenSCAD, Inkscape, ShapeJS, or any other means)– I want the bottom to be right at the 2.5 mm mark. I want the hole to extend all the way down through the orange to the top of my GlowFill.

Although, not intuitive, this is pretty easy in Blender.

First I import my face (in .STL format) from the File->Import menu option. If necessary, I resize it to fit more appropriately on the pumpkin. Now the fun part– what’s the easiest way for me to make sure my face carving goes all the way to the 2.5mm mark?

  1. I switch to Edit mode.
  2. I click on one of the vertices that is at the bottom of my face.
  3. I go to Mesh->Snap->Cursor to Selected
    Blender - Positioning
    This moves my 3D cursor to that selected vertex.
  4. I switch to Object mode
  5. I go to Object->Transform->Origin to 3D Cursor
    Blender - Changing Origin
    This makes the point of reference for that object that very same vertex. This means when I am filling in coordinates for that object, it is using that vertex for the placement.
  6. Finally, at this point, I just change the Z position of my object (assuming I’m on Global) to 2.5mm.

    Blender - Setting Exact Coordinates

And there you have it— the bottom of my face I wish to carve out of the pumpkin is down at the 2.5mm mark, the top of my GlowFill layer. At this point, I can proceed with going to the Modifiers, adding a Boolean modifier and doing a Difference Operation on my pumpkin template and my face. (The difference allows me to subtract an object from another object).

Just to be sure, I do double check in Simplify3D that my orange process looks we expected. In particular, I don’t want to see a solid layer of orange covering up my GlowFill.

Simplify3D - Previewing Orange Layers

I haven’t had any trouble with ShapeJS and my Black and White PNG images. However, if I were ever to be concerned my pumpkin face did not have an even bottom, I could make sure the bottom was consistent by:

  1. Go into Edit mode
  2. Select all the vertices on the bottom of my face (I typically take advantage of Select->Border Select)
  3. Hit S (for Scale) and then Z for the Z-axis and then 0. This sets ALL the selected vertices to the exact same Z height, so I’m thoroughly ensured if one vertex is at 2.5mm, they all are.
    Blender - S Z 0

And there you have it— how I carve my pumpkins (for now).