Tag Archives: ColorFabb

Personalized Glowing Valentines for Kids

My son is named Sagan, after Carl Sagan.  Over here in the U.S., that’s a unique name.  As a result, he won’t be going into gas stations or souvenir shops and finding mass produced keychains and trinkets with his name on it.

Luckily, I have the MakerGear M2. I am not bound to get what someone else has decided to design and make.  I can make it myself!

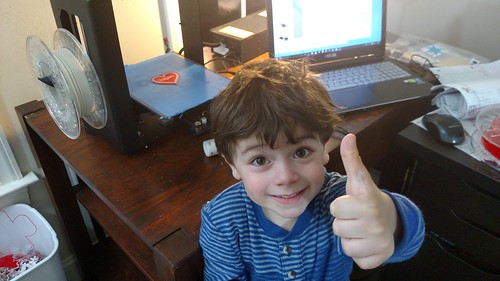
3D Printing Valentines - Sagan

In my son’s pre-K class, a vast majority of the students are in the same boat– most of them have unique names. This seemed like a great use for the flexibility of a 3D Printer.

The Design
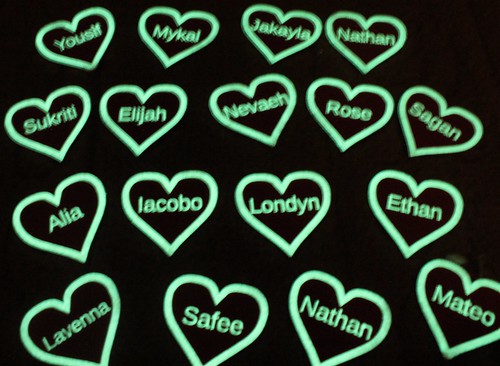
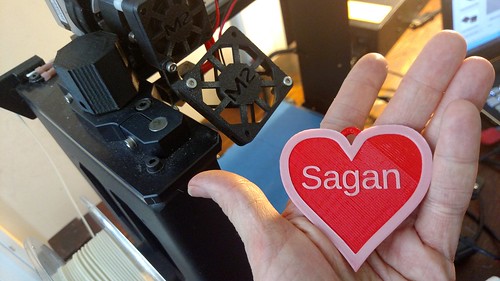
The design is not especially ground breaking. Hey, it’s a little heart pendant/medallion with a name on it. I printed most of it in ColorFabb Traffic Red PLA/PHA (duh) and then the detailing and the name are in GlowFill. One thing I have noticed with my kids is they LOVE glowing things. They love taking it into the bathroom and turning off the lights to see it glow.

Glowing Valentines

Modeling – Blender
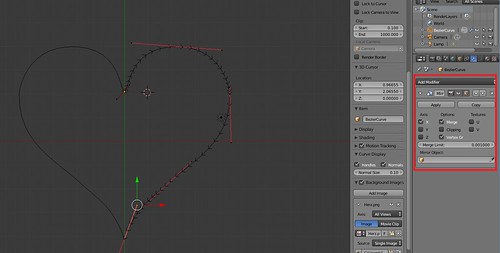
The base model I did in Blender. I started with a Bezier Curve. I used the Mirror modifier to make it symmetrical.

Modeling a Heart - Bezier Curve - Mirror

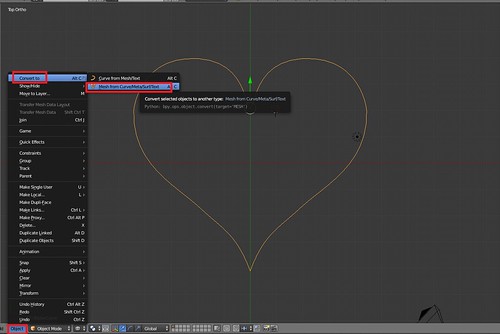
I converted the curve to a Mesh. Modeling a Heart - Convert to Object

I did a little cleanup of the Vertices, by Merging a couple of oddly mirrored vertices to the center.
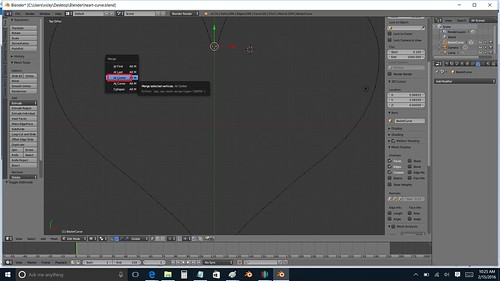
Modeling a Heart - Merge Vertices at Center

The detailing of my design, I wanted an outline of a heart in GlowFill. I’ve worked with hearts in the past and I knew that just scaling another heart down wasn’t going to do the trick. Inset is key to that!
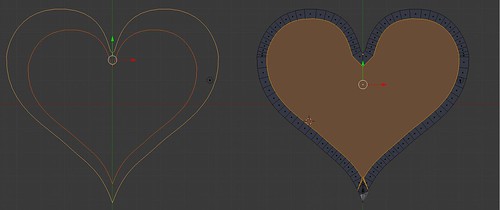
MOdeling a Heart - Scale VersusInset
Scaling Versus Inset – Inset Will Give You Consistent Widths

I did an Inset of my face and did some manual cleanup of the vertices.

After that, it was just straight Extrusion to the heights I wanted.

The hook was just a cylinder subtracted from another cylinder (courtesy of the Boolean Modifier). I decided to keep the hook separate in case anyone wanted to print just straight up hearts.

At the end of my Blender session– I had two .STL files — my heart and my hook to make it a medallion.

Modeling – OpenSCAD
Although I had experimented with Python scripting for Blender roughly a year ago, OpenSCAD seemed easier and quicker for me. There is an Import command in OpenSCAD where you can pull in STL files. I went ahead and brought my Blender STL files into my OpenSCAD project and set a variable name for the “Child’s Name”. I was then able to rapidly run through and create 17 models for all my son’s classmates.

child_name = "Adela";
font_size=10;
y_offset=-4;

union()
{
 translate([30,10,0])
   import("heart.stl", convexity=10);

  
 translate([30,10,0])
  import("hook.stl", convexity=10);  


translate([30,y_offset,2])
linear_extrude(height=0.7)
    text(child_name, halign="center", size=font_size);
}


Slicing and Printing – Simplify3D and MakerGear M2
I printed on my trusty MakerGear M2. Since I have a single extruder machine, I used Simplify3D to set up two processes to print my heart:

Red
From 0.0 – 1.0mm, I printed in ColorFabb Traffic Red PLA/PHA. I printed in 0.25mm layer heights.
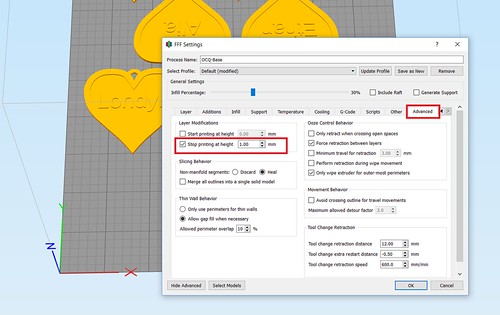
Slicing a Heart - First Process in Simplify3D

GlowFill
From 1.1 – 1.7mm, I printed in ColorFabb GlowFill. I printed those in 0.10mm heights. Usually I have found with detailing 3 or 4 layers were sufficient. In this case, because the GlowFill was a little translucent, going up to 6 and 7 layers made sure the text appeared more crisp and white. (It also gave me a little more leeway to recover if an edge came unstuck from the build plate).
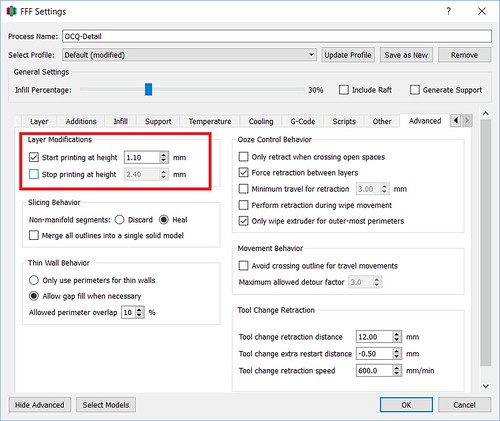
Slicing a Heart - Second Process in Simplify3D

Quick Tip
And a quick tip. Sometimes parenting is harder than 3D Printing. When I printed my first batch of hearts, I was quite pleased. I showed my son and was ready for a positive response. It did not go well. I..uh… I kinda didn’t include his name in the first batch of hearts. He can read and he was quite miffed when he did not see his name. Luckily, I started an emergency print and was able to get back on his good side. But you can avoid such drama. Make sure to print your kids’ in the first batch. : )

Forgiven

On Thingiverse!
If you covet a heart for Valentine’s Day or a special occasion, I was able to make a Customizer on Thingiverse. Feel free to make your own.

Print Diary – July 29th – Monarch Butterfly and Glowing Cthulhu

Victory with the Monarch Butterfly
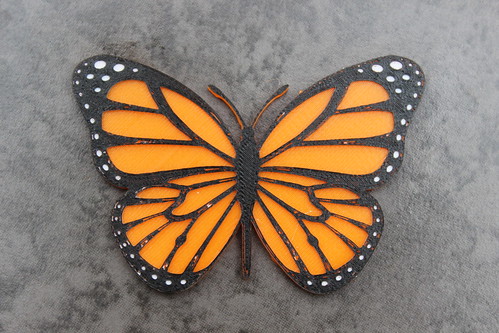
As I mentioned yesterday, I was having some trouble adapting the Public Domain Monarch Butterfly model by Liz Havlin. Although I have been 3D modeling for about 18 months, I was having some trouble achieving what I wanted– I wanted the holes of the butterfly to not be holes. I wanted the sections I wanted to be orange to be 2mm high and the sections I wanted to be white to be 2.3 mm high.
Unfortunately, I was introducing all sorts of manifold issues along the way. One day, I may look back on this and laugh at myself and my “silly ways”, but for now here’s what I ended up doing that actually worked for me.

I was able to easily make a solid butterfly that I extruded up to 2mm high– so I had my orange all set. For the white, I:

  1. Highlighted the vertices of the hole I wanted to fill.
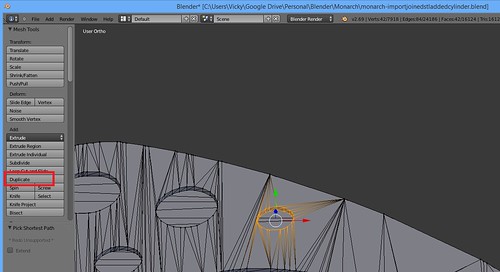
  2. Hit the Duplicate button to make copies of those vertices.
    Monarch Butterfly - Duplicate Vertices
  3. I hit escape (those new vertices were selected).
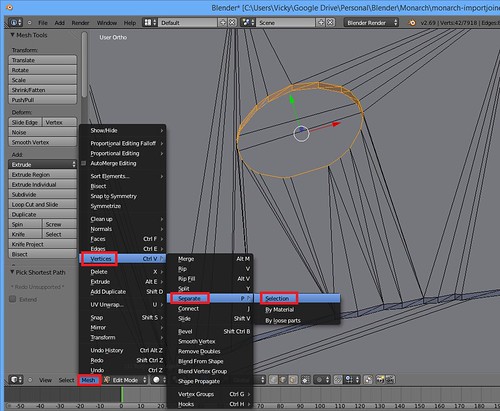
  4. Then I went to Mesh->Vertices->Separate->Selection. This move those vertices to their own object, which I filled in as a face and then extruded up 0.3mm.
    Monarch Butterfly - Seperate Menu Options
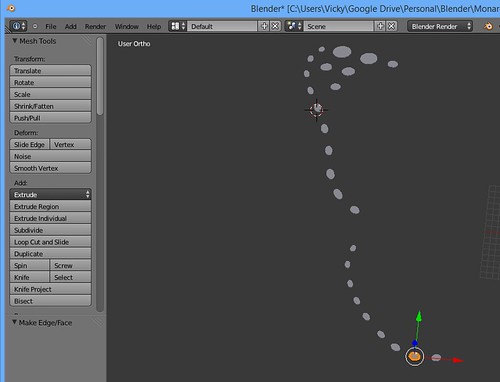
  5. I ended up with a bunch of 0.3mm high cylinders that I added to the solid butterfly (that was 2.0 mm high) and the hollow butterfly which was 0.7 mm high (making my black outline 0.4mm high)

    Monarch Butterfly - New Solid Cylinders

The colors are in the same height and order as the Baltimore Oriole (Orange – 2mm, White 0.3mm, Black 0.4mm), so I can print butterflies and orioles together.

Again, with future modeling knowledge I may look back and scoff at my approach. Nonetheless, I have my butterfly… and he’s beautiful!

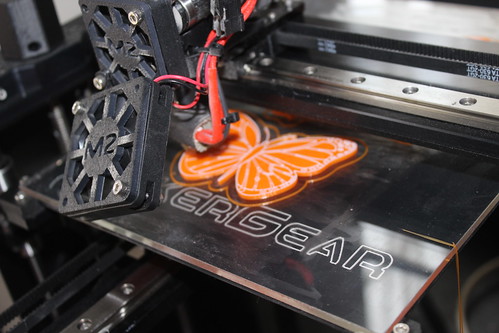
3D Printing - Monarch Butterfly in Action

3D Printing - Monarch Butterfly Magnet

Glowing Cthulhu Coaster
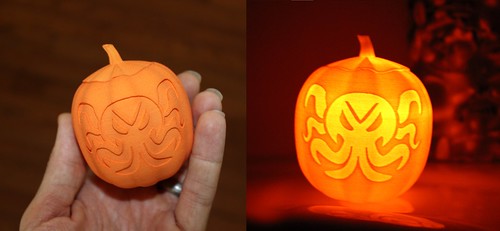
Another project I tackled was a lot easier. I have a little Cthulhu cutout I modelled for my “Glowing Cthulhu Pumpkin” on Shapeways.

Cthulhu Pumpkin in Hand and Glowing

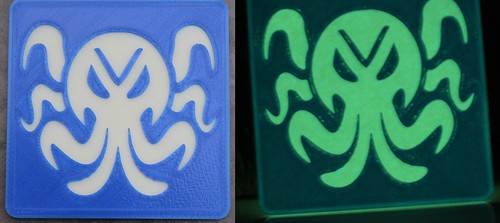
In the case of the pumpkin, an LED inside provides the light. I decided to see what ColorFabb’s GlowFill could do. I went ahead and took that same cut out I drew and modelled and carved it out of a small beveled cube to make a coaster. I printed the first 2mm in GlowFill and then the top in a solid color. I am pleased with the result. Not only does Cthulhu glow, but the border around the coaster glows as well. A win.

3D Printing - Glowing Cthulhu Coaster (Blue) - Before After

Print Diary – July 23, 2015 – The Orphaned Swans and the Lost Mobius Strip

One of the things I started designing this summer was for my cousin’s wedding. Like me, he is a computer programmer and like my husband and I, his nuptials also celebrated geek culture. Need proof? Final Fantasy was part of his wedding music and he wore Star Wars crocs during the ceremony.

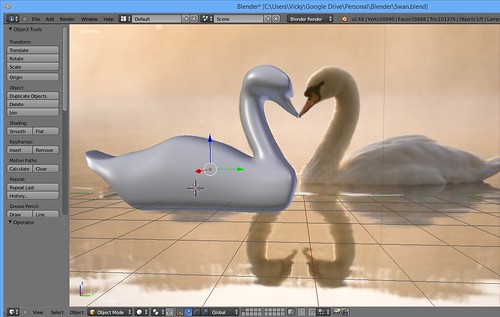
I had tossed around numerous projects. His wedding was in held in The National Aviary. I love “Hearts in Nature” and have seen stunning photographs of two swans making a heart. It seemed like a perfect thing. I pulled up my Blender and started modeling my swans. My process was very similar to what you would find in
Jjannaway3D’s Modeling A Velociraptor in Blender Series.

3D Modeling - Swan

And then… I had a tough question… “Okay, now what do I make out of these swans?” Napkin rings (and the swans did look great curved)? Napkin holder? Hook for oven mitts?

Then I thought, “Oh, he’s into computers, how about I make them into a USB/Sandisk holder.” But then I closed my eyes and really tried to picture my cousin with these swans on his desk. I just couldn’t see it. I loved the swans– I was happy with where they were going, but they no longer seemed to be a good fit.

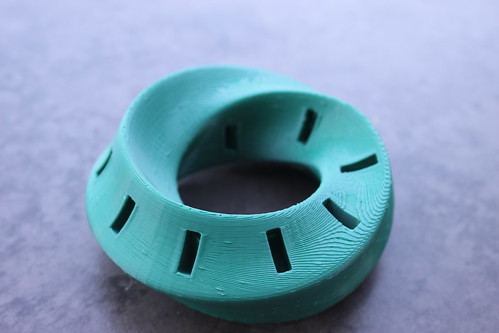
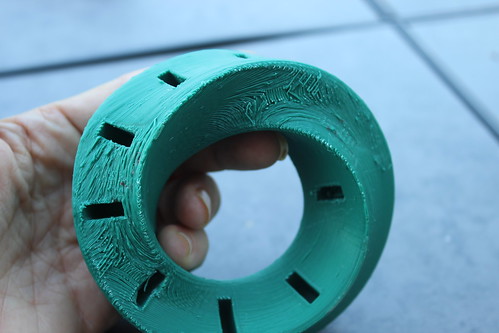
What *did* seem to be a good fit was a Möbius Strip. And how cool would that be? A Möbius Strip USB holder! *I* want one! My process of modelling the strip itself was very similar to John Malcolm’s Modeling a Mobius Strip Pendant In Blender 2.73. My cross section was a little more stylized (instead of a straight square). After I applied the Bend Simple Distort, I made placeholder cubes for my USB slots (I did that afterwards as I wanted them to retain their measurements and not get distorted during the bend) and voila! I had my model!!!

All along I intended this to be a Shapeways order, but I decided to give it a go on the MakerGear M2. I printed with 0.25 layers and 30% infill in my fabulous new Mint Turquoise Filament from ColorFabb (via PrintedSolid).

Six hours later, I had my print.

I was really digging the print lines on the top. I thought they were neat and added an additional pattern to the mix.

Holy crap, I thought, Maybe this isn’t a Shapeways order!

Mobius USB Holder- Top

Then I turned it over, removed the supports, and looked at where the supports were.

Yikes— Maybe it *is* a Shapeways order

Mobius USB Holder - Bottom (Before Sanding)

Some quick sanding with 120 grit paper, however, changed my mind completely. I didn’t even get to the 220 or 400 grit. After just that first sanding, my husband and I had to concentrate to figure out which was the top and which was the bottom. AMAZING.

“Where are the ‘after’ pictures,” you may ask. “Document your claim!” You may say.

Well, there aren’t any.

I let my kids play with it… outside…in the yard… where there is all this green shrubbery.

They lost it. Three adults scoured the yard and that Mint Turquoise filament has done an excellent job of concealing itself. Interrogations of the two year old and the four year old, “Do you know where Mommy’s green toy is?” was just as much of a dead end. I suspect it’ll be winter before I find it again.

A reprint is in my future (an advantage of 3D printing– you can always print another one). Regarding the reprint, ColorFabb has an amusing suggestion: