
Amateur Hour
My morning print could be aptly described as “amateur hour”. I decided to make another stab at my two color cardinal. I had a busy workday, so the print wasn’t my top priority and I did note my filament had come uncoiled as I put it on the machine, but I didn’t think much of it. I got the print started, confirmed the first layer was going well and then I directed my attention to some programming projects.
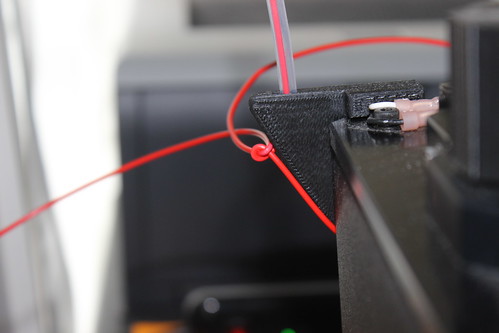
All of a sudden I noticed the infill of the cardinal, which is usually quite smooth, was very much NOT so.

It was shortly there after, I noticed that all those loose coils had worked themselves in a nice, extruding-thwarting, knot.
I was able to undo the knot and the print resumed. Now, I have seen first hand how the quality and quantity of the infill can impact your top layer.
I was printing at 0.10 mm layers and at this point, I knew I had enough layers for my bird to recover. I felt that he would still end up with a smooth body and head. And I was right! Sure enough, layer by layer, the surface smoothed out and was looking rather fine.
But then…. ANOTHER KNOT.
Seriously! I let the exact same thing happen AGAIN. You would never guess that I spent 10 years working on Quality Control Software. You would never guess that I have heard of phrases like “corrective and preventative action”. : )
Anyway, at that point, I was just two layers away from one of my visible surfaces. I knew the bird would not recover.
But I let the print continue.
Failures in life (and 3D Printing) can also be “Learning Opportunities”. In this case, I wanted to see how my wing detail later in the print would look. It didn’t matter how shabby the rest of the bird looked. I would still be able to assess whether my “peeks of black” were going to be effective in the wing. The overall print would be a fail, but I would still gain some knowledge.
Experiments with Wing Detail
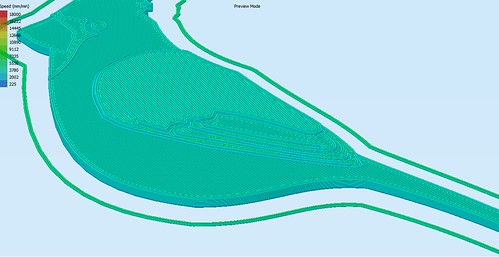
Later in the afternoon, I decided to give the cardinal another whirl. This time I made sure I wasn’t sloppy with my filament. And to keep the learning going with the print, I decided to play with the print lines in the wing.
I remembered seeing the “Owliver Belt Buckle” by Shapeways Designer Michael Mueller in Grey Polished Steel a while back. One of the things that really struck me about the design is how amazingly the print lines added to the feather effect.
Although I was working in plastic, it occurred to me that perhaps my feather detail could also benefit from some changes in the print lines. Perhaps instead of the straight lines on the wing, something like concentric lines that followed the contour of the feather/wing would look nice. But I wanted to keep the body-as in. I wanted to keep the diagonal straight lines there.
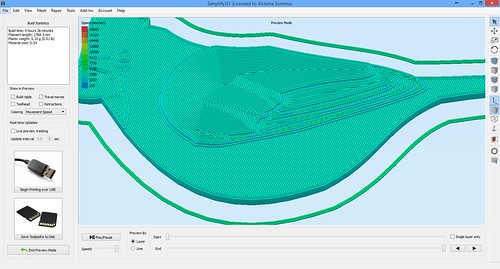
This experiment was easy to set up in Simplify3d. For more detail instructions, I suggest referring to their Different Setting for Different Regions of the Model Tutorial.
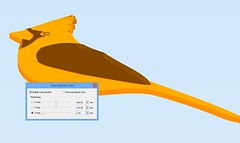
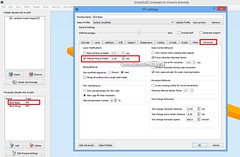
Quick synopsis – You use the Cross Section View to determine the actual height of where you want to make setting changes. Then you set up multiple processes (aka Settings). In the Advanced tab you can define the scope of the settings– where they should begin and end.
|
|
Quick note– I didn’t test it out in Simplify3d v3.0.0, but in v2.2.2 I had to be careful to turn my fan on for the first layer in my second batch of settings (because it isn’t actually a first layer– it just thinks it is)
Another multiprocess note- I have seen a bug with these multi-processes and rafts. I have not tested to see if it is corrected in v3.0.0
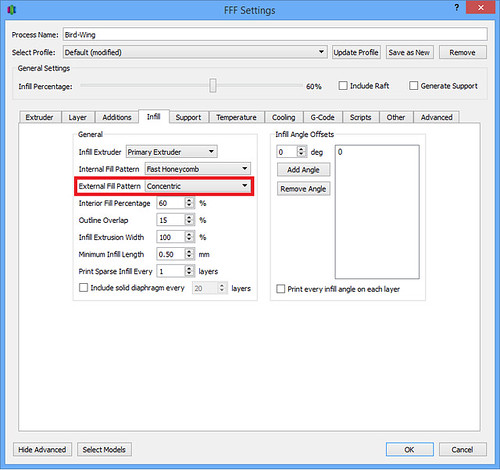
With my wing settings, under the Infill tab, I changed my External Fill Pattern to Concentric.
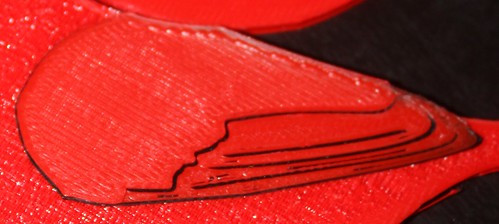
When the print was done, I was able to decide which External Fill Pattern I liked best in the wing.
| Rectilinear | |
|---|---|
 |
|
|
| Concentric |
|---|
|
 |
Conclusion: The original! I liked the original rectilinear better. Does that mean I wasted my time? Nah… at least now I know*. : )
*I’m paraphrasing Barnacules Nerdgasm here (from his BronzeFill polishing experiments).
Print Diary – July 14, 2015
M2 Lubrication
Today I did something scary (for me). My comfort level is more in the modeling and the software side, but the MakerGear M2 was due for some monthly maintenance. According to the documentation I received with the printer, I needed to:
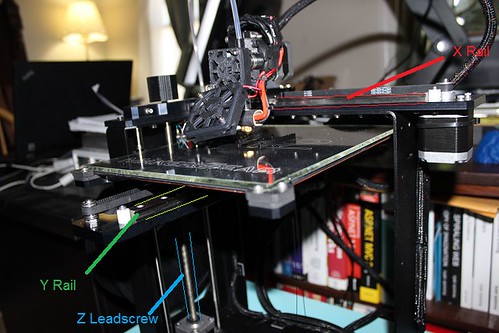
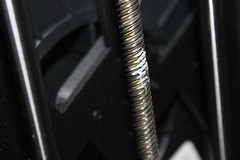
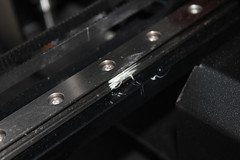
Clean the X and Y linear rails, and the Z leadscrew, of grease, then apply a fresh coat to each – a dot of white lithium grease in each of the long grooves on the X and Y rails, and a dot in four consecutive troughs of the Z leadscrew; once applied, move that axis through its full travel multiple times to spread the grease.
Okay. So first step. I needed to confirm what I thought was the X and Y rails and the Z leadscrew was accurate. With that, I did some poking in the M2 Assembly Instructions. My conclusion seemed accurate (I’m happy to consider evidence to the contrary).
The M2 What’s in the Box manual that shipped with my printer helpfully had pictures of the Lithium Grease and the Applicator, so I knew exactly what supplies to use.
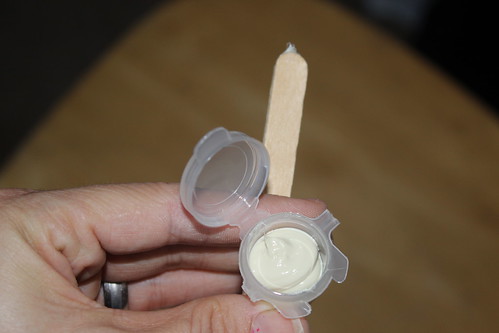
I did my dabbing.
|
 |
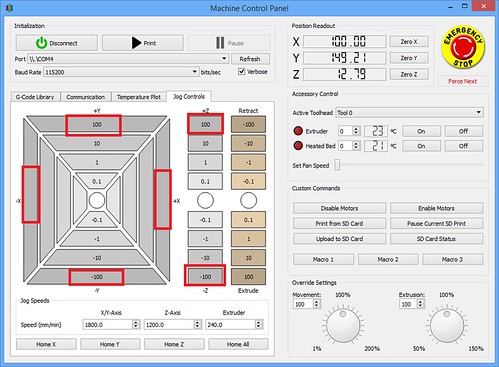
Then I opened my Simplify3D, went to Tools->Machine Control Panel and then clicked on the Jog Controls tab. I used the various X, Y, and Z movements to move the printer around to spread the grease.
It turned out to be pretty easy and not very scary at all.
Cardinal Progress
I did a test run of my two-color Cardinal. With a item like this, the point of focus is going to be on the top, so when I slice in Simplify3d, I give some scrutiny to the my top level (As opposed to say a 3D scan of a person– there the top of the object isn’t the center of focus). I noted with my cardinal there was an oddity in the top.
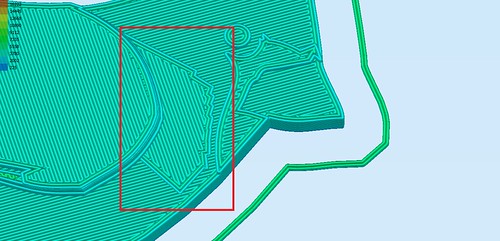
Even though that section was going to be all red, I didn’t want that odd texture in the mix. I wanted a nice, smooth surface for viewing pleasure. I’ve seen this issue before and I knew what I was up against– I didn’t have a completely flat surface where I wanted one.
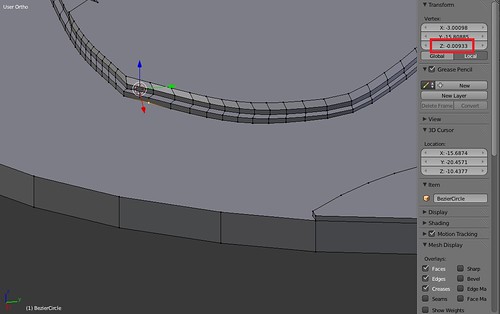
I opened my modeling software back up (Blender) and the issue was I had a number of vertices that weren’t exactly the same as the others of that level. In the example below -0.00933 instead of 0. This caused the surface to not be exactly flat and when it came to slicing time, the printer has to translate that into layers. To adjust for the non-flat surface, part of the cardinal’s chest did not go as high as everything else.
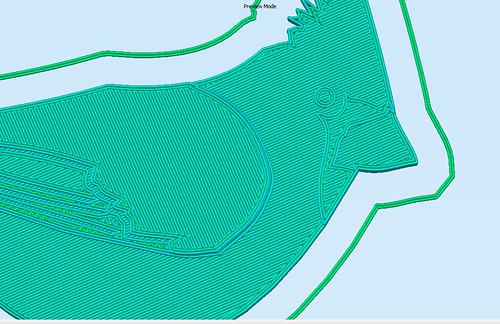
I adjusted my vertices to make them exact and make a nice flat surface. When I sliced again you can see the difference.
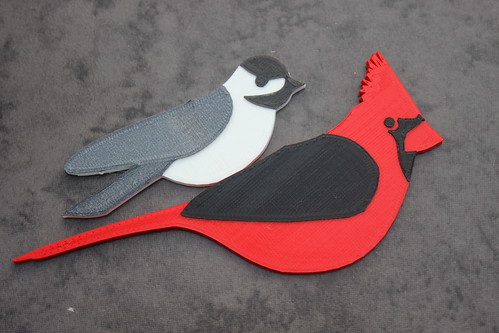
My test print is coming along. The cardinal is cute, though this doesn’t represent my vision. He’s supposed to have red on his wing with just snippets of black poking through. I had a lapse of concentration during the last filament change to red and ended up mucking up the exchange by going the wrong way on the Z axis.
The Chickadee and His Friend
Live and learn! Tomorrow is another day and another print. : )
Print Diary – July 13, 2015
Today in my printing adventures. Most of my endeavors were focused on printing multiple colors on the single extruder machine.
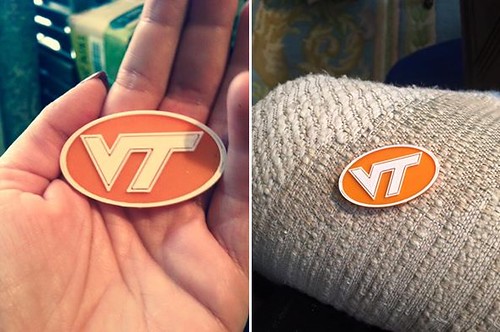
Victory Pictures of VT Logo
My first practice run was right before the July 4th holiday, I made a quick VT medallion in OpenSCAD using GlennLo’s awesome Virginia Tech Logo model. A couple of my Facebook friends commented positively on the item so I mailed a few out over the weekend.
Today, my friends were kind enough to post pictures of their new arrivals. It made me smile to see.
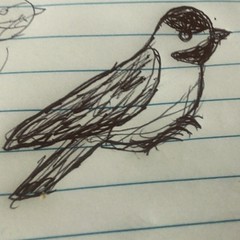
Modelling a Cardinal
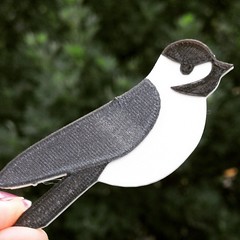
Another multi color project I took on was making myself a chickadee. It was simple and cute and I’m smitten with it (I do have a version with legs that I printed last Thursday).
 |
|
My Chickadee– Three Colors on the MakerGear M2
I decided I need some other birds to keep it company. I have aspirations of making a variety of species and maybe making a wreath. Over the weekend, I went through my Mom’s bird book and I have a bunch I’m eyeing. Since last week, I just got a shipment from PrintedSolid of new filament and one of the colors is Traffic Red, the cardinal seemed like a good option. It’s not the most intricate modeling, so I squeezed a little of bit of Blender work in here and there while the code for my day job compiled.
I’m excited about the wing detail. I’ve carved out some feather detail to show a peek of the black underneath. I think it’s going to look mighty fine.
