Quick order of business– in my print diary posts, settings and strategies are not necessary solid conclusions, just a documentation of what I tried and my observed results.
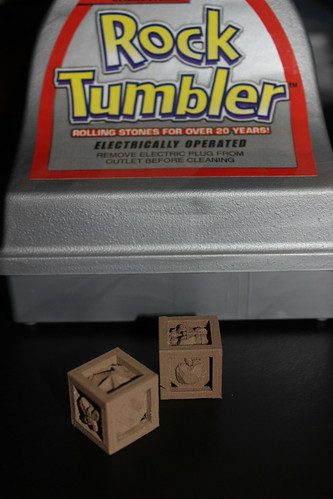
My programming day job was going to be exceptional busy, so I needed some more hands-off experiments. One of the things I covet with my new hoarding tendencies is a rock tumbler to polish my bronzeFill.
“But we have a rock tumbler,” my husband said. He pointed to a free one we got from our neighbor a few years ago. The one sitting on a book shelf in behind a commemorative Star Trek plate collecting dust. The thing is– it’s for kids and not at all like the fancy rock tumbler in the Barnacules Nerdgasm video. And the barrel is tiny!
But I did just splurge on a whole lot of filament. There was no harm in experimenting with this free, tiny rock tumbler. I did have a project that would fit in the barrel. The Elements of Harmony Di.
I designed it for my favorite Brony‘s birthday this past January. It looks amazing in Shapeways’ Stainless Steel.
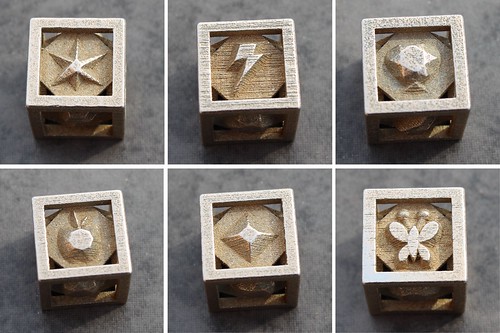
Back in April when I first got the MakerGear M2 I had run through several runs and iterations perfecting the Di in Black PLA. I did end with something I was satisfied with. But I wanted to resurrect the experiments with a couple of changes:
- Back then I was concerned with the shininess of the bottom layer and how it looked so different from the rest of the die. I ended up using a raft to give it a similiar texture and feel. Don’t need that anymore. If I’m printing in bronzeFill, it’s all going to shine up. This was also back in the day before I discovered how amazing hairspray and the gluestick is. Another reason I can ditch the raft.
- Back then I was using Slic3r. I tend to user Simplify3d nowadays. In my experience, I’ve had better results with bridging with Slic3r than with Simplify3d. So my experiments were an ongoing effort to try to improve my bridging in Simplify3d.
Some odds and ends of the past couple of days.
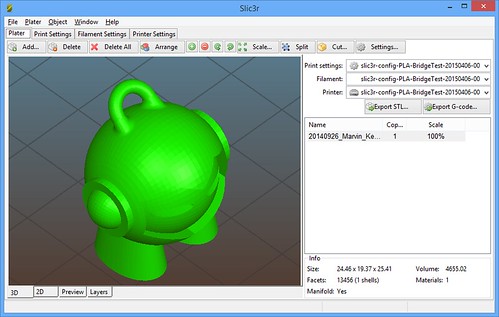
New Slic3r is Beautiful!
I went ahead and used this as an excuse to download and use the new 1.2.9 version. My impression is positive. The new 3D View is lovely, but I’m most pleased to see the new “Layer” and “Preview” views. The Preview view is of particular interest to me as I like to scrutinize print lines and patterns.

Now, I did end up crashing new Slic3r three or four times. My hypothesis is that I was changing multiple settings in a row while it was trying to regenerate it’s previews. That’s not a conclusion– just a hunch.
Cooling, You Idiot!
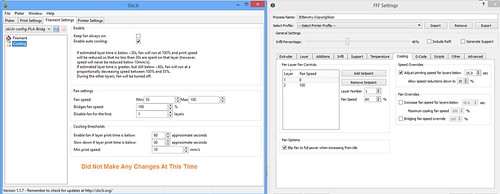
I mentioned I have had better luck bridging (and sometimes overhangs) in Slic3r than Simplify3d. A few months ago, I opened both and started scrutinized settings and trying to get my Simplify3d to match my Slic3r results. Because I’m anal, I took screenshots and made notes of the changes and why I tried them. Well, I pulled up Cooling and I made NO changes and I wrote down that I had made no changes.
Back then, I hadn’t realized the extent cooling played a role, specifically in overhangs. I would learn that when I mastered the 3D Hubs Marvin.
I went ahead and made some changes in the Cooling tab:
- Under Speed Overrides changed Adjust printing speed for layers below from 15 seconds to 30 seconds
- Under Fan Overrides, I checked Increase fan speed for layers below and changed the seconds from 45 to 60
- Under Fan Overrides, I checked Bridging fan speed override.
Note– Since my Fan Speed is already 100 for everything after the first layer, I do not expect any change from my Fan Overrides section. (But the settings are in place should I tweak fan settings at a later date).
I have a feeling the Speed Override alone would have made my 3D Hubs Marvin endeavor a whole lot easier. The jury is still out on that, however, as I haven’t tested him out. : )
Simplify3D Bridging Hack
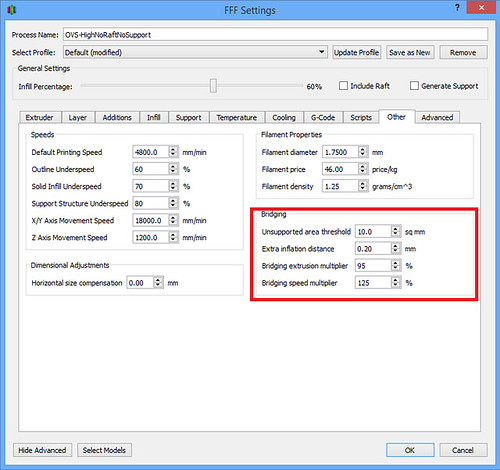
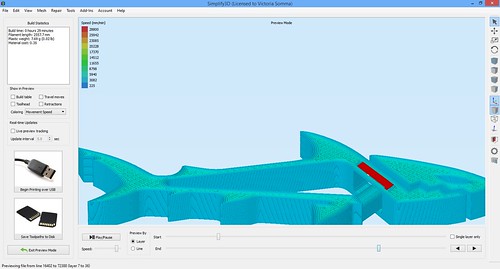
I also have a new version of Simplify3d which I had been hoping would fix a perimeter bridging issue I had noted. Quick tip, if you ever want to see where the Bridging Settings are taking effect set your Bridging Speed SUPER high– like 600%.
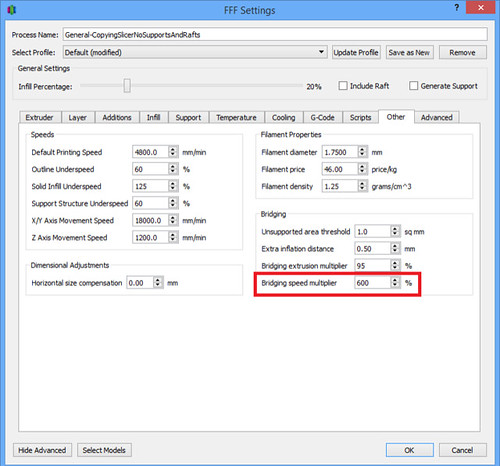
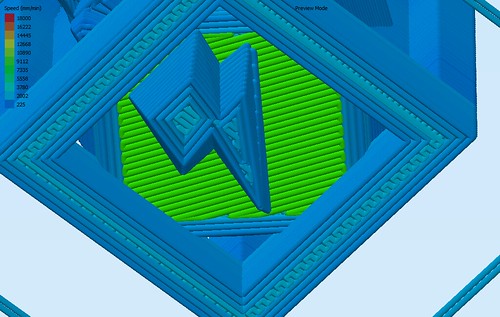
Then when you preview your layers, those items are color coded in red and orange. Unfortunately, that revealed that my bridging settings were still not taking effect where I wanted them.
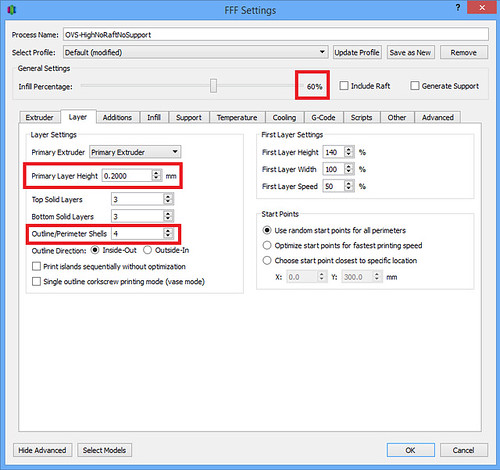
In the case of my dice, I had a lucky workaround. My perimeters of the bottom face were doing okay. It was the infill that was drooping and sagging. There were only two places on the dice considered “Solid Infill”. So I changed my Solid Infill speed to match what I wanted for the Bridging Speed.
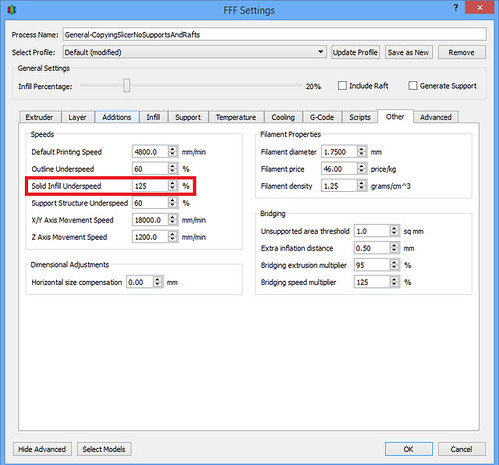
And I could see that bottom layer was going to print at a faster “bridge” speed.
This doesn’t help with things like the Bridging Extrusion Multiplier, but guess what– in the case of my dice, it was enough! I got my satisfactory results.
P.S. I could have always gone with supports. I was just being stubborn.
So at the end of these experiments– I have a handful of dice to run through our el cheapo rock tumbler. Wish me luck!