Tag Archives: birds

Fall Occoquan Arts and Craft Show

Well, it was a whirlwind, but we had a phenomenal time at the Fall Occoquan Arts and Craft Show! Everything clicked into place so we could relax and enjoy the show. We had steady enough sales that we didn’t have to worry about not selling anything…. but the sales paced in a way that we didn’t have to worry about running out of everything on Saturday.

When I step back, it is crazy we accomplished in just eight weeks. Eight weeks ago, I may have had some designs up on Shapeways, but for all practical purposes I was just a girl with a 3D Printer. I had NO inventory. NO tent. NO tables. Nothing! So in eight weeks, we (I say we, because from my husband to my mother to my brother to my sister-in-law to a battery of friends– it was a big group effort) pulled off a little business.

19 new designs, over 400 prints, a business license, tax IDs, a logo and signage, infrastructure for display and credit cards reading.

Whew! No wonder I’m so tired.
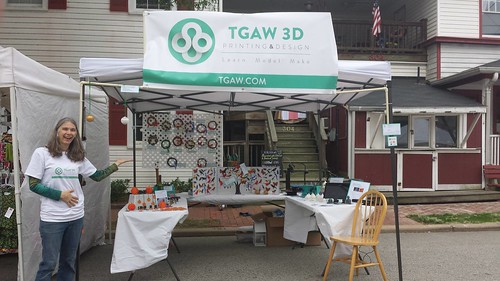
3D Printing - Occoquan Craft Show - Vicky and Booth
This All Did Not Exist Eight Weeks Ago!

Surprise Strong Sellers
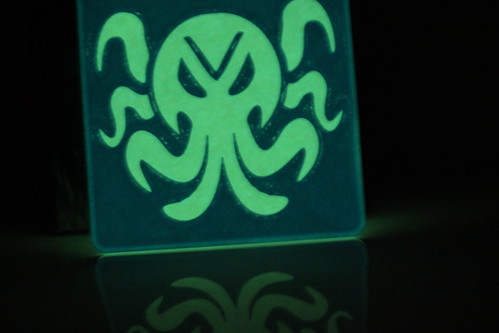
The most surprising seller was the Glowing Cthulhu Coaster. The Glowing Cthulhu Coaster was actually our first sale, a mere minute after the bells rung to start the show. We ended up selling out of Cthulhu Coasters the very first day. The second morning, we printed more…which was good because in the afternoon we sold another one!

3D Printing - Glowing Cthulhu Coaster (Lit Up)

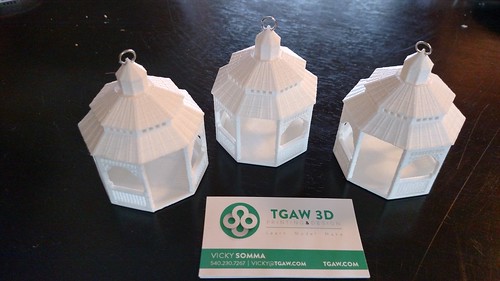
The other great surprise was my Mamie Davis Gazebo Christmas Ornament. I didn’t blog about it yet. That was my very last design for the show- done in a marathon 16 hour design session and then printing the very last week before the show. After a handful of gazebos, I was thinking of switching back to other products. My husband convinced me to print more gazebos and I’m glad I did. By the end of the show, they were all spoken for!

3D Printing - Mamie Davis Park Gazebo Ornament

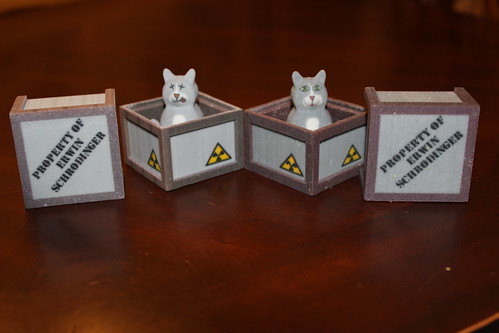
I was also pleased to sell a Schrodinger’s Cat and Box! He is definitely a niche product.

Schrodinger Cat - Two in Boxes

Surprise Slow Sellers
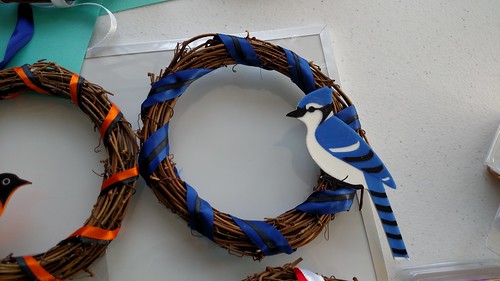
On the other hand, the bird magnets and wreaths did not do as well as I had anticipated. Possible variables- I had that in the back of the booth. I also suspect I mucked up the pricing and made them too high (More on that below).

3D Printing - Blue Jay Wreath

Leads!
I left the show with a half dozen custom design requests to follow-up on. In Episode 89 of the WTFFF Podcast, Tom and Tracy Hazzard said for them, if they left a tradeshow with just one lead, the show was worth it. I left with multiple leads plus SALES. So yeah, totally worth it.

Beyond Sales
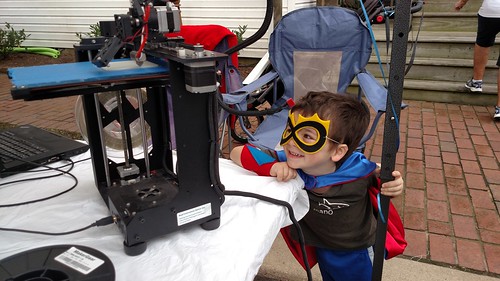
We had a best case scenario. Even if we missed a sale, we still got our egos stroked with compliments to the designs and then the best part- we got to introduce 3D printing to the masses! Visitor after visitor came in and told us, “This is the first time I’ve laid eyes on a 3D Printer. I’ve read about it, but I’ve never seen one.” They would call others over to mob around the printer. That was very satisfying.

Occoquan Fall Arts and Craft Show

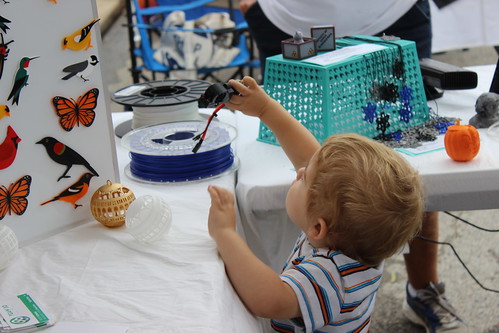
Occoquan Craft Show 2015 - Dyson Plays with Hot End

One lady admired all my birds and said, “I heard about 3D Printing, but I had no idea you could use it to make beautiful art work.” Beautiful art work! That’s the term she used!

And I got to do something I really do revel in– talking about 3D Printing and showing people how it is within their grasp right now. They can start designing and printing right now!

Surprising Another 3D Printer
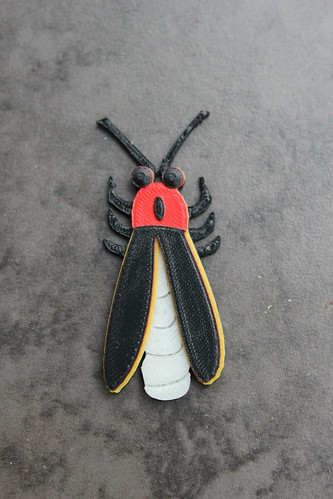
Okay… so yeah, maybe it is easy to wow the layman with 3D Printing. But what about people who have 3D printers of their own? Sunday, a local man with a 3D Printer stopped by my booth. We talked about nozzles and NinjaFlex and slicing. All of a sudden his wife interrupted, pointing to one of my glowing fireflies and asking how I did the different colors.

3D Printing - Firefly Magnet

“That’s painted, baby.” the man quickly said.

And I got to correct him, “No, it’s different color filaments.”

He looked at the firefly again. “Ooooh, I see. You print the different filaments and glue them together.”

And I got to correct him and explain how I use Simplify3D to do the multiple processes and start the different colors that their designated heights.

Out of all the visitors that past weekend, I think it was only he who could really fully appreciate the technique.

To Learn: Pricing
When learning 3D Printing, you do a lot of experimentation. Ooh your overhangs are messy, let’s try a print with lower temperatures. Still not perfect? Let’s try a print with slower speeds. You tweak and make adjustments.

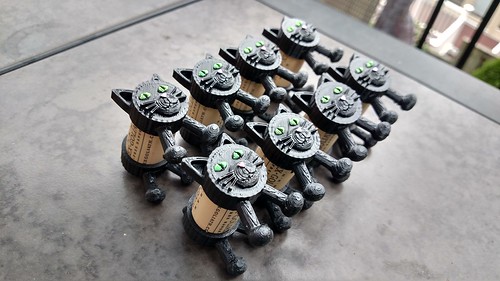
I do believe it’s going to be the same kind of thing with sales. Right now, I believe I priced the Cork Puppies and Cork Kitties too high. I was pricing it, thinking the end users were adults (using them as décor, place set holders, and entrée labels). It was very clear at the show, I should have been pricing it for KIDS. The end users are KIDS! They love them.

Occoquan Craft Show - Eight Black Cork Kitties

I also believe I priced the birds too high.

On the other side of the spectrum, it is possible I priced the Mamie Davis Gazebo Ornament too low. Why do I say that? My Mom accidently quoted a lady TWICE the price and she still agreed to buy THREE. (I only charged her the real price). So go figure. hehe

It’s just another thing for me to learn and master. It may take me a while to master, but I’ll keep working at it. : )

Next Up
Next up– a little bit of rest, getting my remaining inventory up on Etsy, doing these custom orders… and then prepping for more shows!

Print Diary – July 31st – Process Improvement and Cyanocitta cristata

Tethered by Filament Change
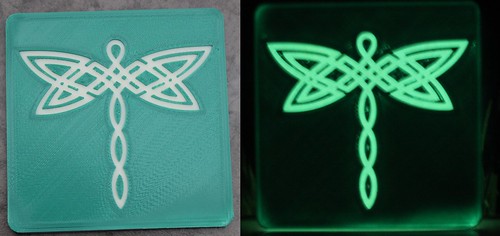
First thing in the morning, I started a print run of some coasters. This time I was etching in this lovely Creative Commons Celtic Dragonfly by blah_59. After the first 2 millimeters, I was going to change colors for the top. It was after the print I realized……

Starbucks Day

On Fridays, I usually take my kids out to breakfast at Starbucks. The timing of my filament change was totally going to muck up Starbucks Day. I wanted to be around to pause my print and switch colors.

Compromise. My oldest son and I ran to Dunkin Donuts and picked up a special breakfast and brought it home. I was deprived of my weekly Flat White, but boy, the kids didn’t care one bit. They loved eating Dunkin Donuts on the deck.

All was well and I ended up with my glowing Celtic Dragonfly Coaster.

3D Printing - Glowing Celtic Dragonfly Coaster (Green) - Before After

But it was a sign that I needed a better process. I’m a working mother. It isn’t going to be sustainable for me to be tethered to the printer waiting for the exact moment to change my filament.

3D Printing Nerd to the Rescue
I thought my solution was going to lie in adding custom G-code, but it turns out I don’t even need to do that! I just so happened to watch the latest video from the 3D Printing Nerd that very same morning. He also does a lot of creations by switching filament colors and he also uses Simplify3D. I mentioned yesterday and we saw it before with some experiments with the cardinal wing that I do use multiprocesses to change my settings for different sections of the print. Well, I never thought about the implications of running those multiple processes one at a time. I had always let them run as a single print run, meaning I still would have to monitor and pause my print when I wanted to switch colors.

The 3D Printing Nerd’s video showed me to run them one at a time. So when the printer finishes one color it stops and then waits for you to take the next steps…on your time.

I gave it a test run on my new Blue Jay (Cyanocitta cristata). It worked splendidly. I ran the white. I ran the blue. I ran the black. Wonderful! This is just what I needed to keep my sanity and prepare for the Occoquan Arts and Craft Fair.

The latest bird from the MakerGear M2- Cyanocitta cristata (American Bluejay). #3DPrinting

A photo posted by Vicky Somma (@vickytgaw) on

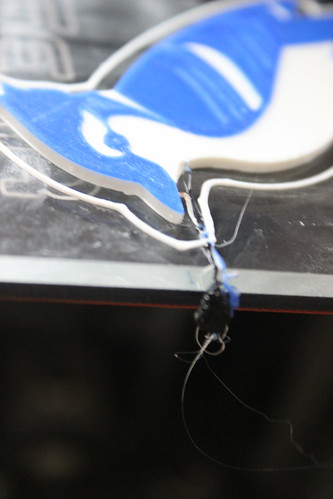
I did notice one tiny best practice for the future. When I start a new color, the print runs through it usually start up process (which I can change if I want). It squirts out some plastic off the side of the bed and then it swipes the nozzle clean on the bed. When I ran a bed full of bluejays, I did notice I put one a little too close to that swiping action. He was just barely getting knicked by the nozzle as it passed by. So either I not place things that close to that section… or I change my start up G-Code.

3D Printing - Swipe Collides with Bird

I’m really excited. A HUGE thanks to the 3D Printing Nerd for helping me improve my process. It’s really going to help as my collection of birds continues to grow!

3D Printing - Blue Jay, Monarch, Goldfinch, Cardinal, Chickadee, Baltmore Oriole

Print Diary – July 27th – The Baltimore Oriole and USB Mobius Strip Holder

Today was an eventful day with the printing. I had no slicing or modeling challenges or obstacles. Just straight up printing.

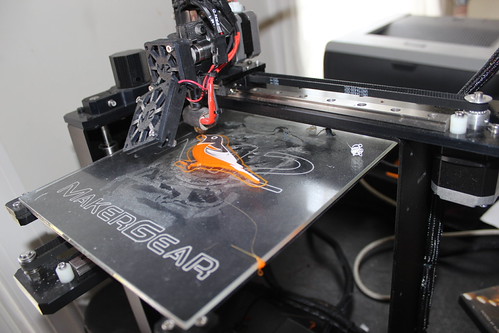
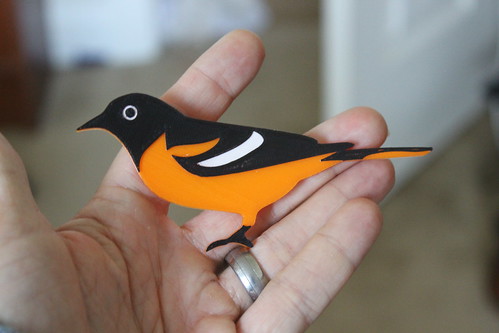
With switching out the filament during the print, I got to see my Baltimore Oriole come to life!

3D Printed Birds - Oriole in Action - After White Layer, the Black is Just Starting

3D Printed Bird - Oriole

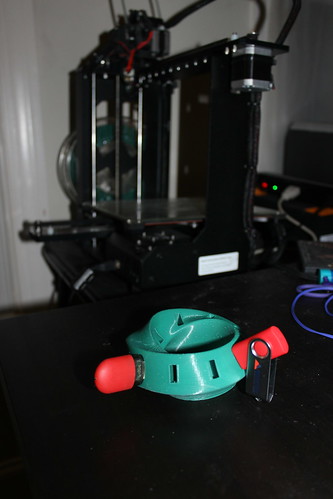
And then for a “mindless” print so I can get my day job done, I reprinted my USB Mobius Strip. The only real adjustment I made from the first print was not putting supports with in the USB slots. LOVE. Now hopefully I won’t use my USB keys as frequently. (There are only two pictured because…well… I can only locate two of my USB keys, emphasizing WHY I need this in the first place).

3D Printing - Mobius Strip USB Holder

Print Diary – July 26th – Icterus galbula

On the printing side of things, I did 3 Sharkz and 2 3D Hub Marvin keychains in colorFabb’s GlowFill. I had company over, including a 6 year old, a 9 year old, and a 10 year. Of course, I had to show them the 3D Printer and what’s better for kids than GlowFill?

The 3D Printer was a hit. I knew I was really connecting with the oldest child, but as they were departing, the youngest told me, “I’m going to ask Santa for a 3D Printer… so my Mommy can save her money.”

“Thanks Vicky!” The mom joked when she heard that news.

P.S. I added some new cooling settings and now my 3D Hub Marvins are better than eva!!!

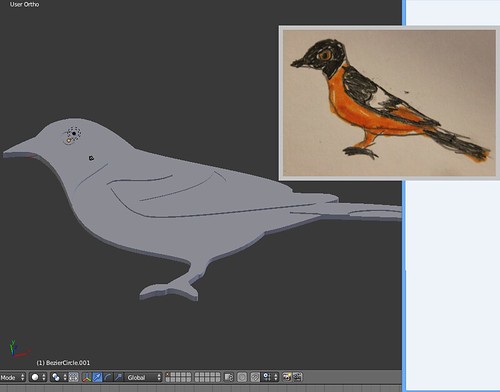
On the modeling side, I do have a working model of a new bird – Icterus galbula, better known as the Baltimore Oriole. I do reside near Maryland, but really I was drawn to this bird because my translucent orange filament is fabulous and I thought the black and the orange color combination was going to translate well to a print. We shall find out if I’m right tomorrow! : )

WIP - Oriole

Print Diary – July 14, 2015

M2 Lubrication
Today I did something scary (for me). My comfort level is more in the modeling and the software side, but the MakerGear M2 was due for some monthly maintenance. According to the documentation I received with the printer, I needed to:

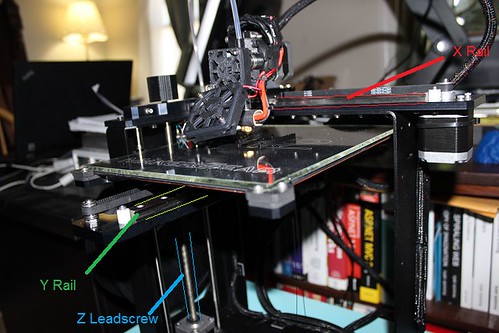
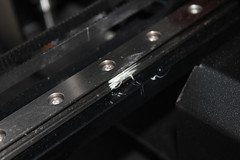
Clean the X and Y linear rails, and the Z leadscrew, of grease, then apply a fresh coat to each – a dot of white lithium grease in each of the long grooves on the X and Y rails, and a dot in four consecutive troughs of the Z leadscrew; once applied, move that axis through its full travel multiple times to spread the grease.

Okay. So first step. I needed to confirm what I thought was the X and Y rails and the Z leadscrew was accurate. With that, I did some poking in the M2 Assembly Instructions. My conclusion seemed accurate (I’m happy to consider evidence to the contrary).

M2 Lubrication - Rails and Leadscrew

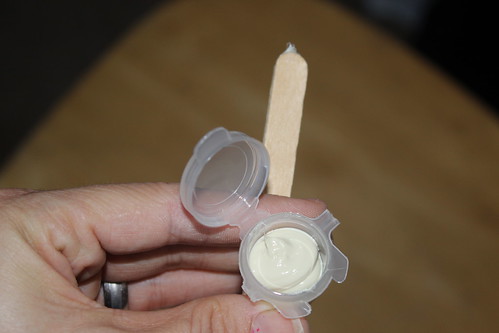
The M2 What’s in the Box manual that shipped with my printer helpfully had pictures of the Lithium Grease and the Applicator, so I knew exactly what supplies to use.

M2 Lubrication - Supplies

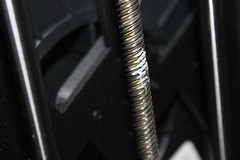
I did my dabbing.

M2 Lubrication - Z Leadscrew M2 Lubrication - Y Axis

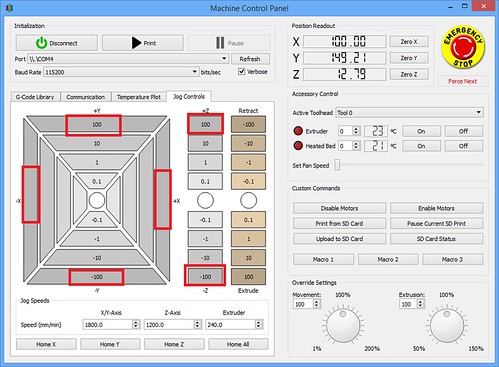
Then I opened my Simplify3D, went to Tools->Machine Control Panel and then clicked on the Jog Controls tab. I used the various X, Y, and Z movements to move the printer around to spread the grease.

M2 Lubicration Process Via Simplify3D

It turned out to be pretty easy and not very scary at all.

Cardinal Progress
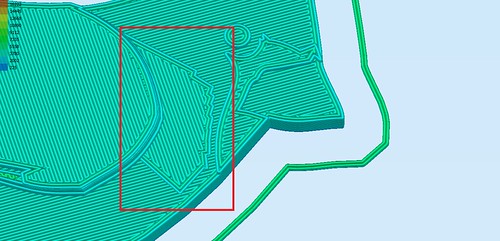
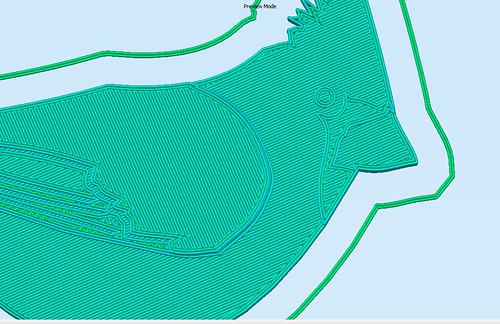
I did a test run of my two-color Cardinal. With a item like this, the point of focus is going to be on the top, so when I slice in Simplify3d, I give some scrutiny to the my top level (As opposed to say a 3D scan of a person– there the top of the object isn’t the center of focus). I noted with my cardinal there was an oddity in the top.

Top Layer - Cardinal - Why This Section

Even though that section was going to be all red, I didn’t want that odd texture in the mix. I wanted a nice, smooth surface for viewing pleasure. I’ve seen this issue before and I knew what I was up against– I didn’t have a completely flat surface where I wanted one.

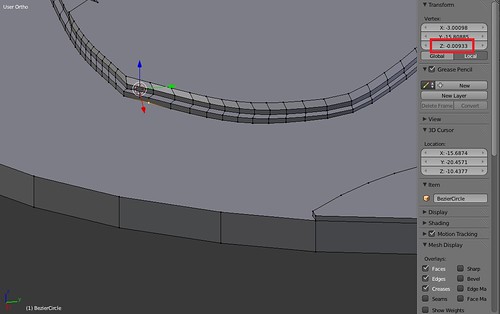
I opened my modeling software back up (Blender) and the issue was I had a number of vertices that weren’t exactly the same as the others of that level. In the example below -0.00933 instead of 0. This caused the surface to not be exactly flat and when it came to slicing time, the printer has to translate that into layers. To adjust for the non-flat surface, part of the cardinal’s chest did not go as high as everything else.

Top Layer - Vertices

I adjusted my vertices to make them exact and make a nice flat surface. When I sliced again you can see the difference.

Top Layer - Much Better

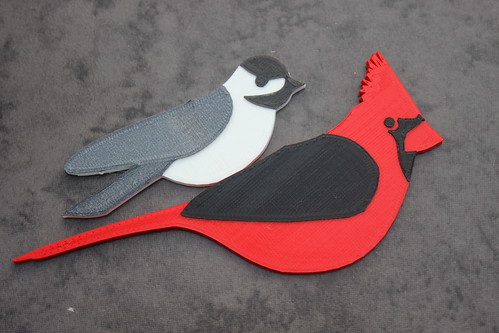
My test print is coming along. The cardinal is cute, though this doesn’t represent my vision. He’s supposed to have red on his wing with just snippets of black poking through. I had a lapse of concentration during the last filament change to red and ended up mucking up the exchange by going the wrong way on the Z axis.

3D Printed Birds - Chickadee Has a Pal
The Chickadee and His Friend

Live and learn! Tomorrow is another day and another print. : )

Print Diary – July 13, 2015

Today in my printing adventures. Most of my endeavors were focused on printing multiple colors on the single extruder machine.

Victory Pictures of VT Logo
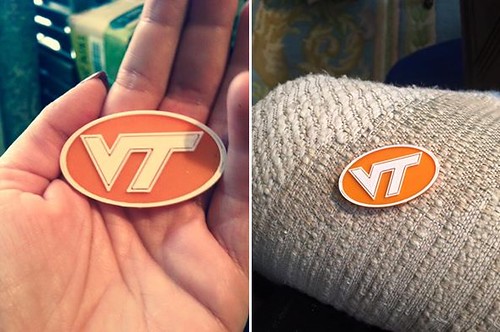
My first practice run was right before the July 4th holiday, I made a quick VT medallion in OpenSCAD using GlennLo’s awesome Virginia Tech Logo model. A couple of my Facebook friends commented positively on the item so I mailed a few out over the weekend.

Today, my friends were kind enough to post pictures of their new arrivals. It made me smile to see.

VT Arrivals

Modelling a Cardinal
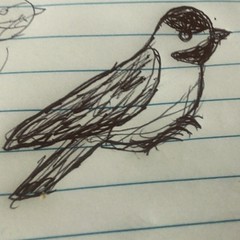
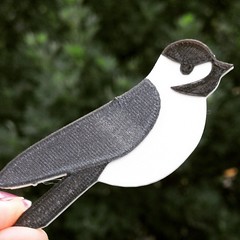
Another multi color project I took on was making myself a chickadee. It was simple and cute and I’m smitten with it (I do have a version with legs that I printed last Thursday).

Now that I know how to do multicolor prints on our MakerGear M2, I'm plotting ways to make myself a chickadee (I'm thinking 3 colors - white, black and grey) #3DPrinting #3DModeling My 3 Color Chickadee Experiment on the MakerGear M2- Take 1.  My silver filament is a little translucent so I think I need to add some extra layers there.  Overall, pleased!  #3DPrinting

My Chickadee– Three Colors on the MakerGear M2

I decided I need some other birds to keep it company. I have aspirations of making a variety of species and maybe making a wreath. Over the weekend, I went through my Mom’s bird book and I have a bunch I’m eyeing. Since last week, I just got a shipment from PrintedSolid of new filament and one of the colors is Traffic Red, the cardinal seemed like a good option. It’s not the most intricate modeling, so I squeezed a little of bit of Blender work in here and there while the code for my day job compiled.

I’m excited about the wing detail. I’ve carved out some feather detail to show a peek of the black underneath. I think it’s going to look mighty fine.

Work in Progress - Cardinal