Making an SVG File 3D In Blender

Despite some earlier blog posts on the matter, I have become fond of using Inkscape to make SVG files for my 3D Models.  (My breakthrough came when I started saving as a “Plain SVG” format instead of an “Inkscape SVG” format).

I figured I should document my process at pulling and prepping those files in Blender.

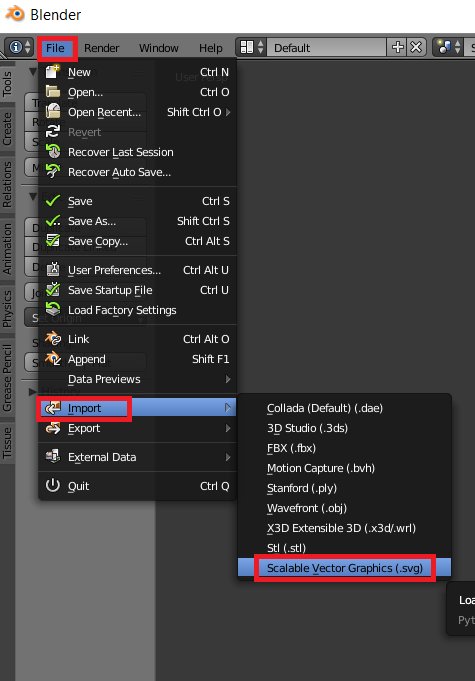
  1. Import the SVG file.  File->Import->Scalable Vector Graphics (.svg)IMport SVG
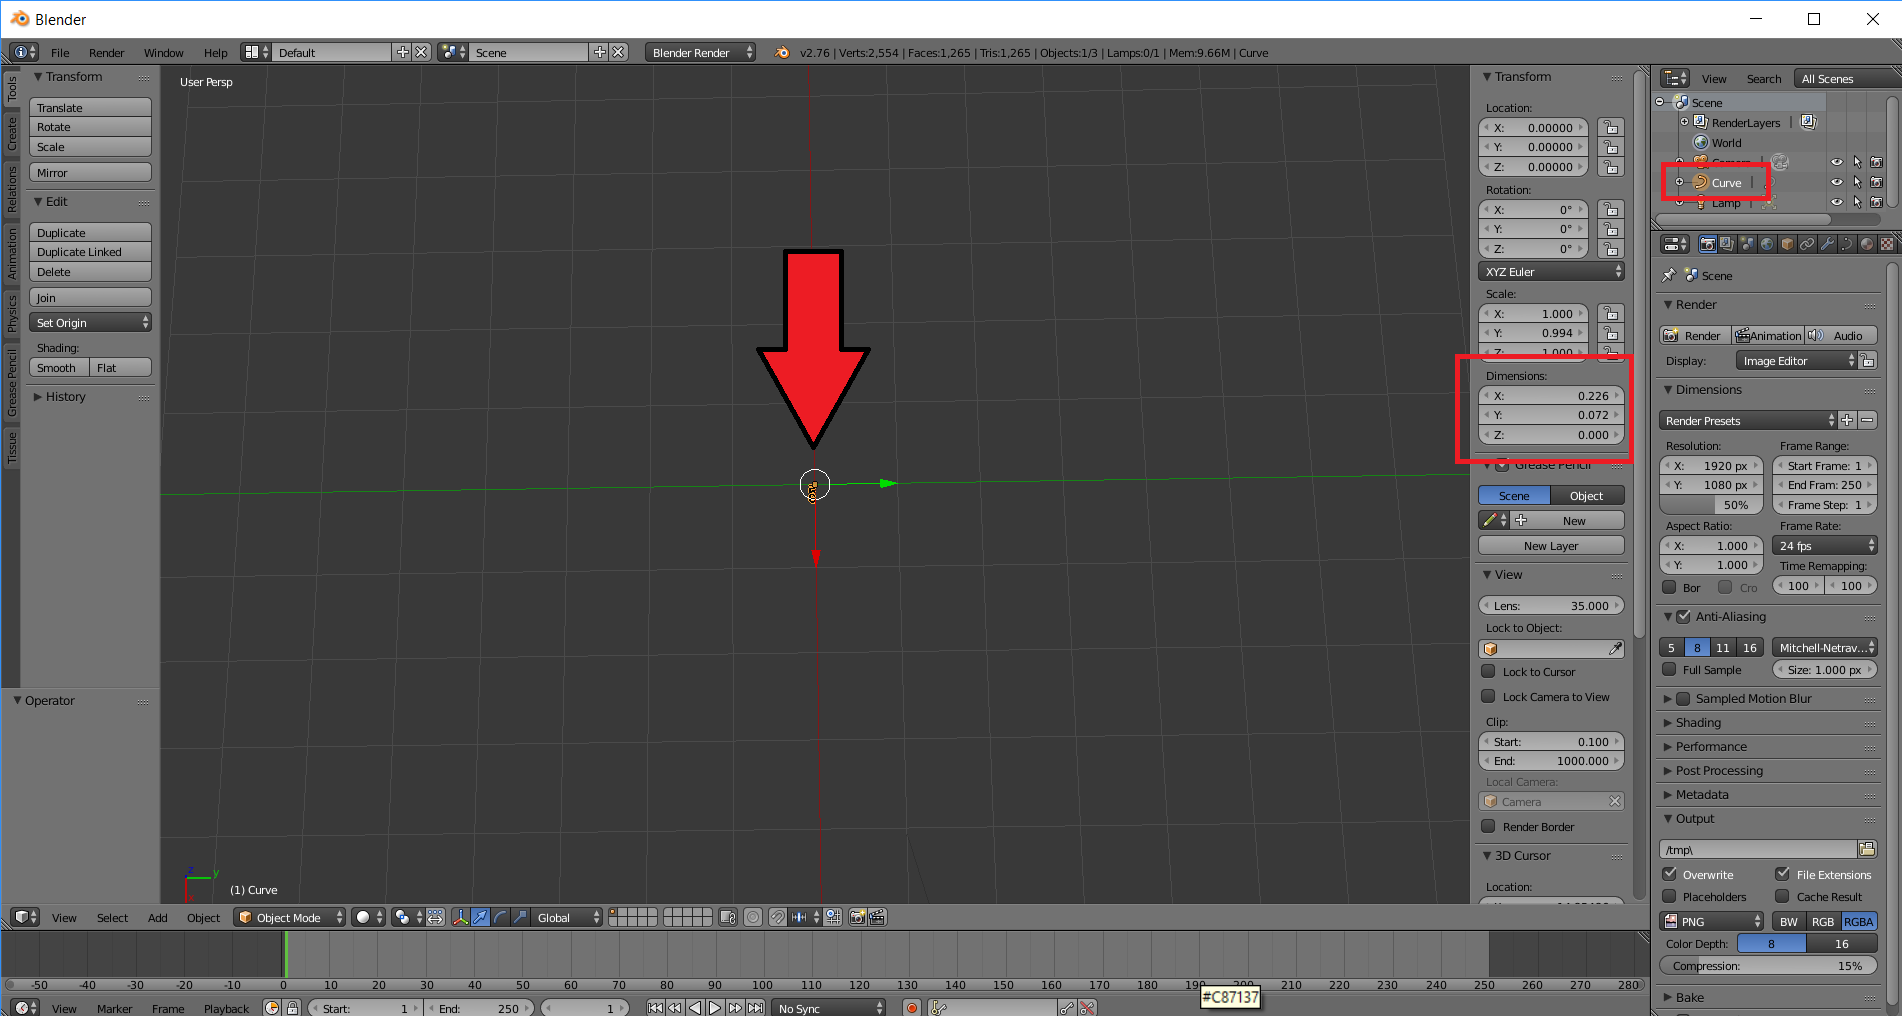
  2. It looks like nothing happened, but your SVG is there.  It’s just really really really small.  If you look to the right in your Objects listing, you can see a new “Curve” that was not there before.
    SVG Tiny
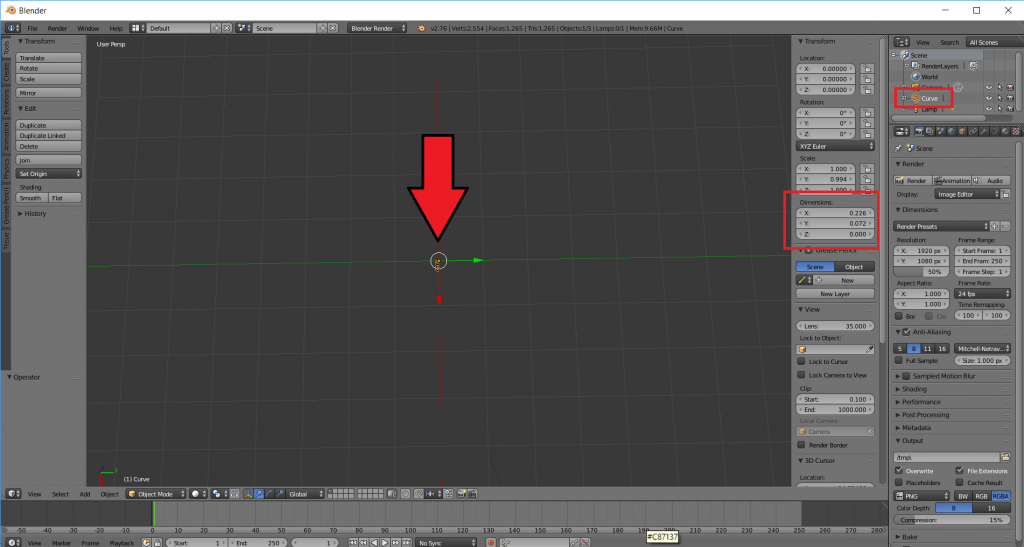
  3. Resize the object so you can see it better.
    Resize
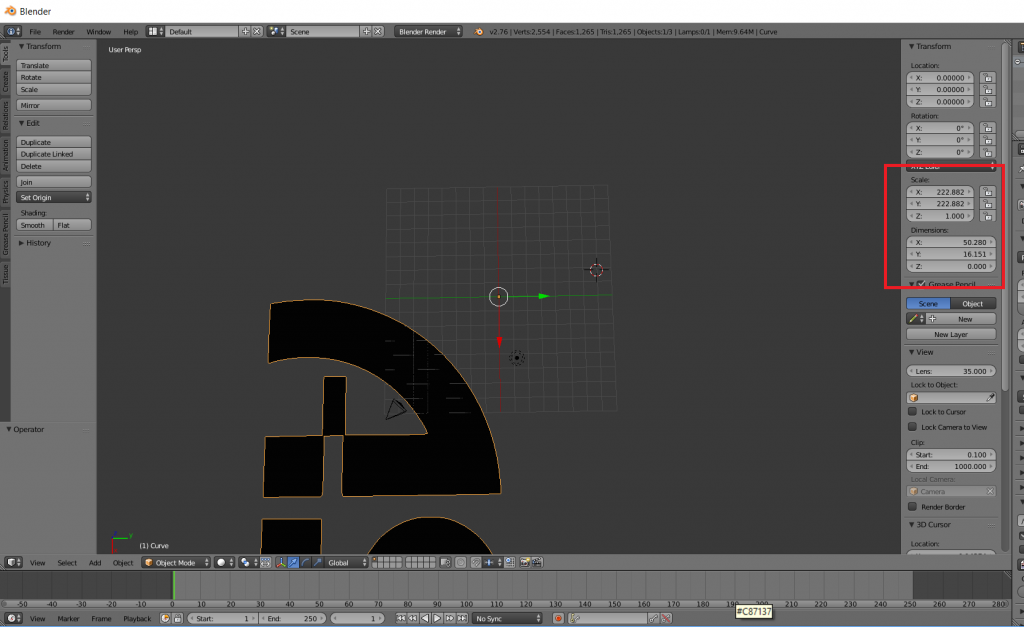
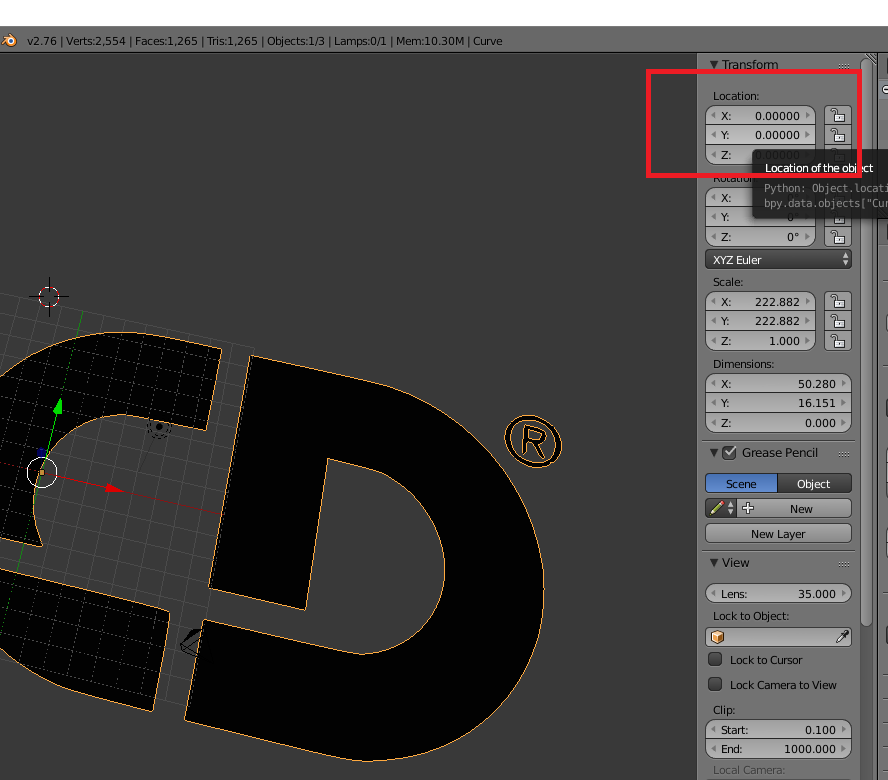
  4. Sometimes resizing it takes it off the screen and the Object’s Origin is not very intuitive  For that, I change the Object’s Origin to the Center of the Mass.  I do that by going to Object->Transform->Center of Mass
    Object Transform Origin to 3D Cursor
  5. Then I can change all the Transform coordinates to 0,0,0 to center my new SVG
    PUt ot 0 0 0
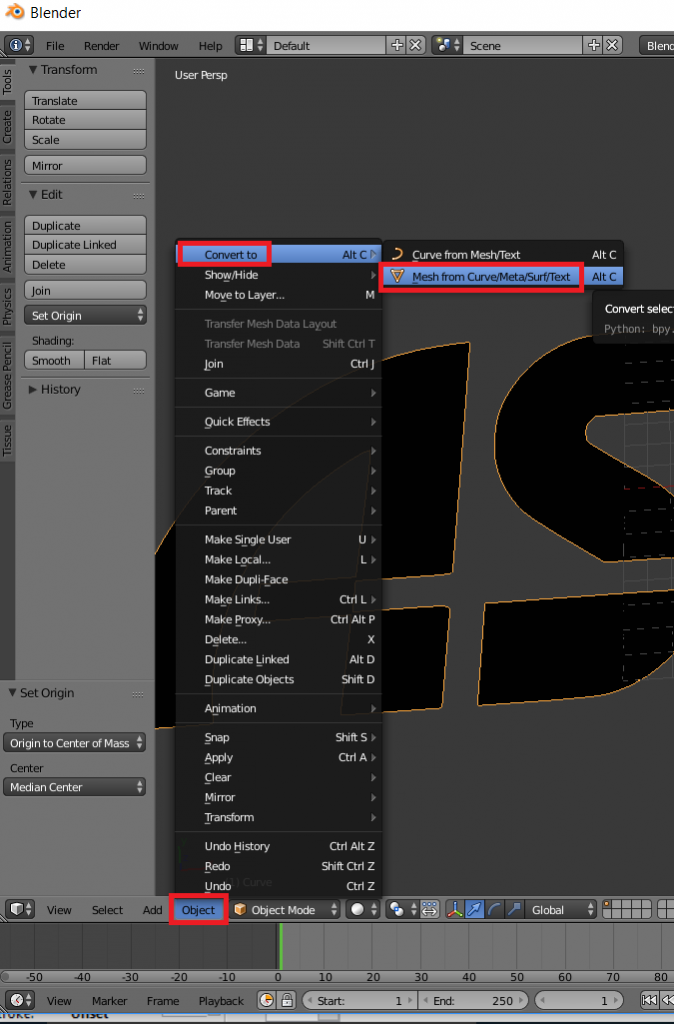
  6. SVGs pull in as Curves.  You’ll want to convert it to a Mesh before doing anything with it.  You can do that by going to Object->Convert to->Mesh from Curve/Meta/Serf/Text
    Convert To Mesh
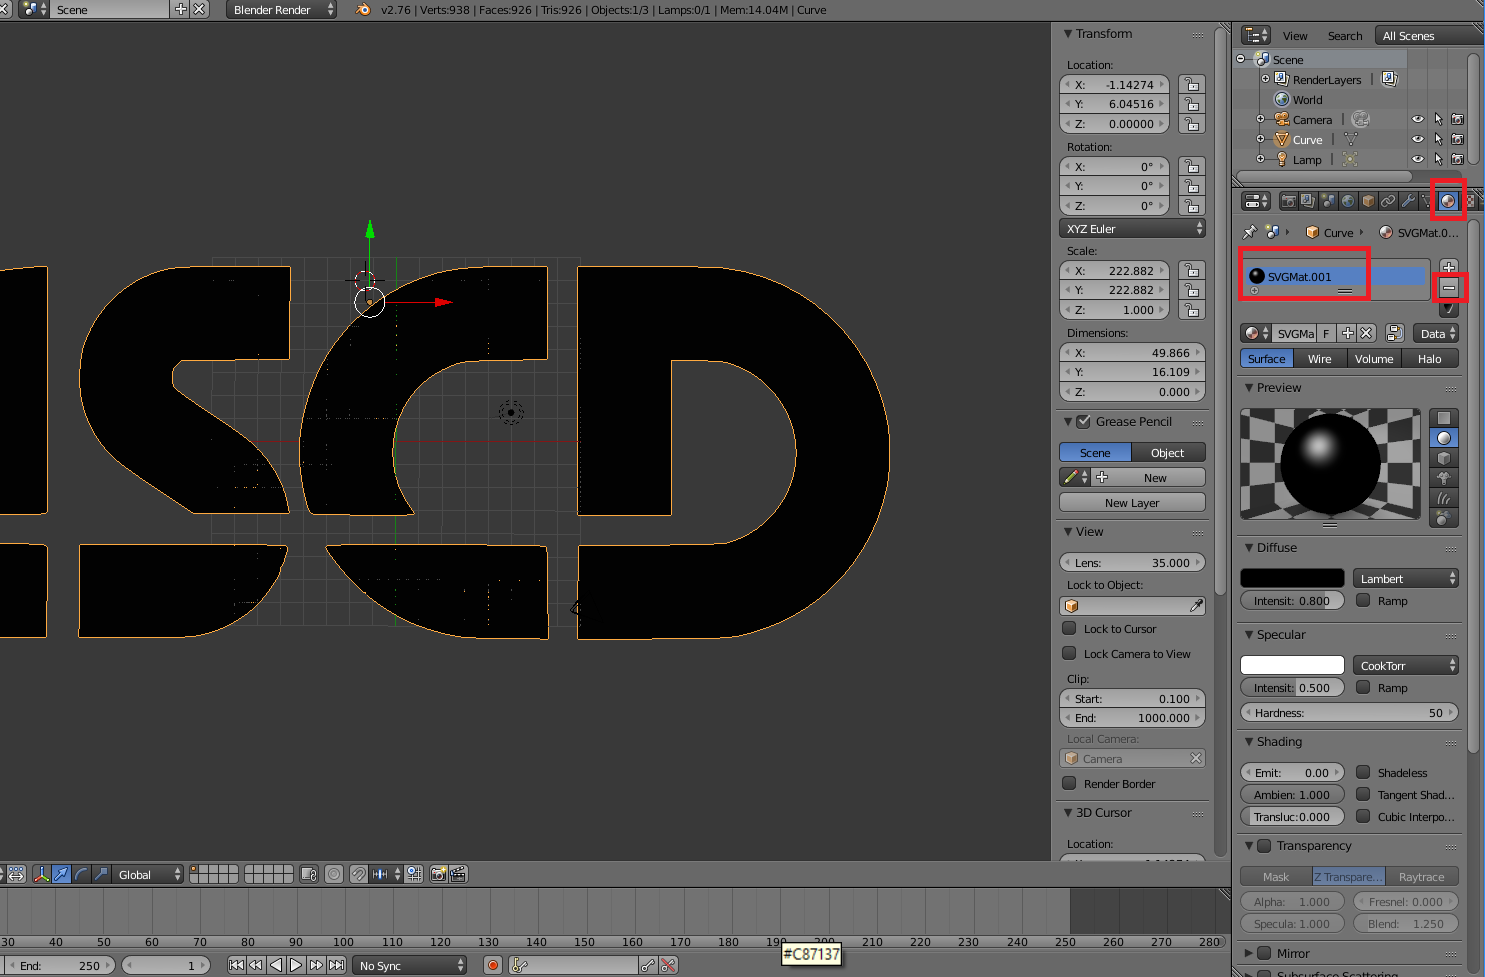
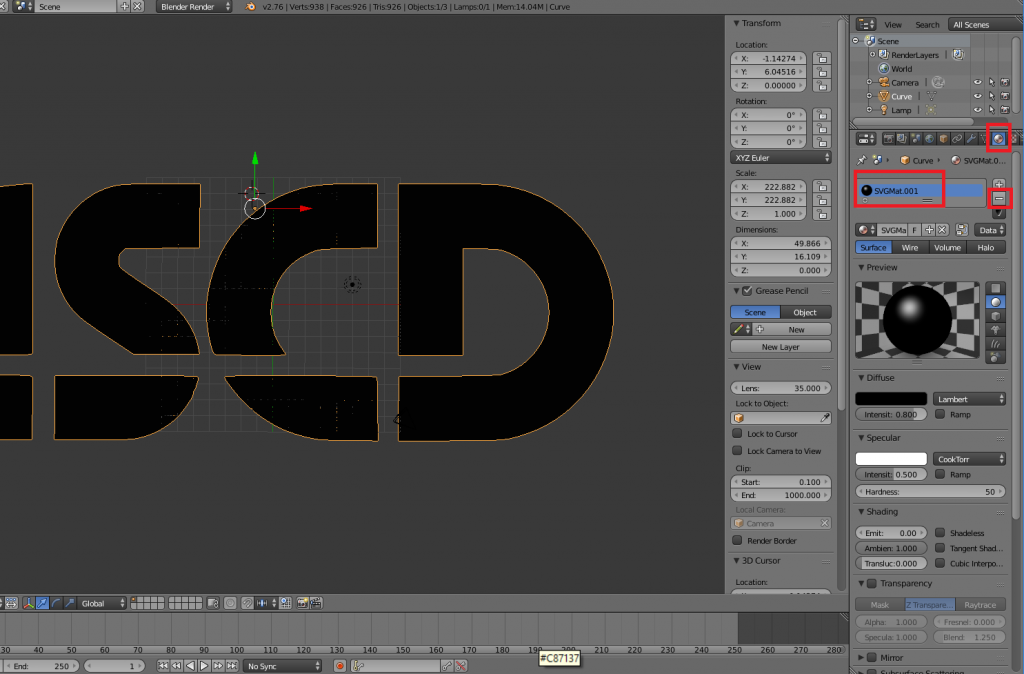
  7. OPTIONAL – Get Rid of Black Color
    When I was new to Blender and Inkscape, I could not figure out why my Inkscape SVGs were all black… and I just did not know enough to find the right keywords to Google.  Later when I learned about Materials, it will started to click.  The SVGs import in with a Default Material.  If you want to get rid of that, click on the Materials icon for your object, click on the black material and hit to get rid of it.
    Getting Rid of Black
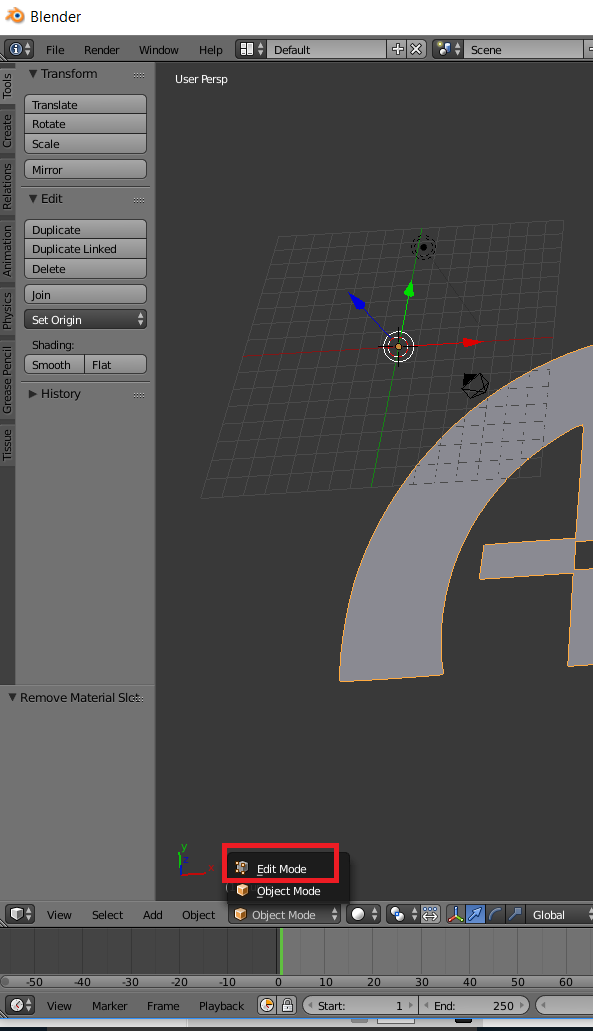
  8. With your newly converted Mesh selected, switch to Edit mode.Switch to Edit Mode
  9. Click A to select all vertices.
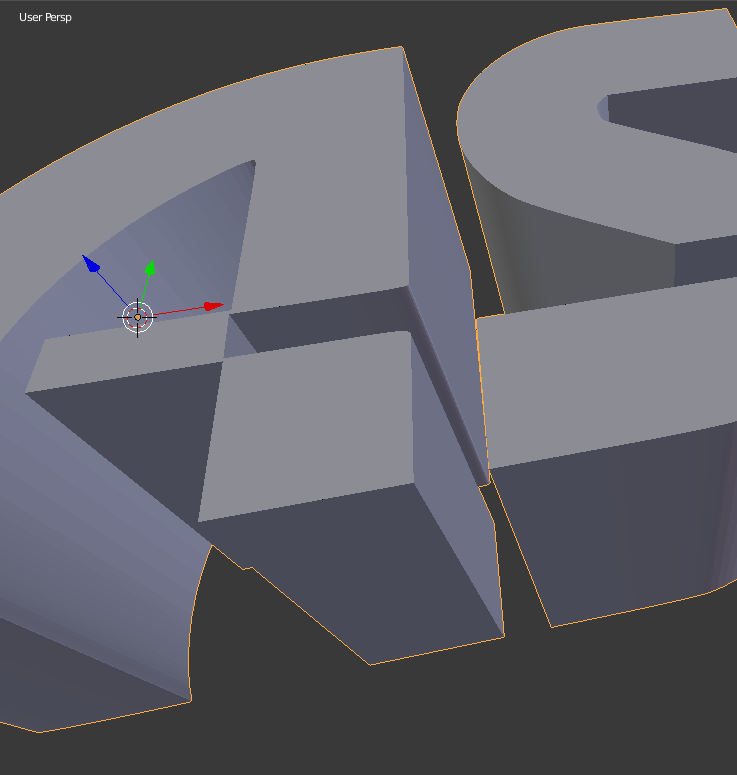
  10. Go to Extrude->Region to give your 2D Object some Depth.  If you can you the mouse to size or type in a measurement– for example 0.5 for 0.5mm.Extrude Region
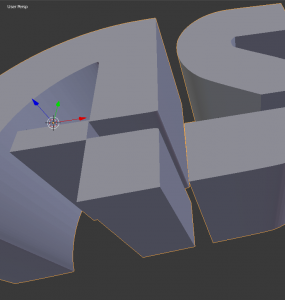
  11. And then you have a 3D Object in Blender from an SVG file.3D Object

Filling 3D Prints with Sand

One of my Maker Faire Nova experiments was filing prints with sand. I am still new to the process, but already had a few tips to pass along.

And since it has been a while since I went into detail about multiple processes in SImplify3D, I decided to do a tour of my slicing settings of the two prints.

Ending Script of my First Print of the Ribbon:
G91 ; relative mode
G1 Z10 ; lift 10mm
G1 X30; move over 30mm

Starting Script of my Second Print to Finish the Ribbon:
G90 ; absolute mode

Maker’s Muse has a most excellent tutorial on running Multiple Processes together– that is at: https://www.youtube.com/watch?v=OcddlK36OVs

And if you want to try RJ Make’s approach, please see his Embedded Magnetron Video at https://www.youtube.com/watch?v=Ubvs2vgv014

There is a Creative Commons image in this video. It is by Amanda B and you can fill the photo on Flickr at https://www.flickr.com/photos/muddybones/5550623402/

Community Hangout at NillaBean 3D

I have a new content creator I am smitten with.  Somehow, Dick from NillaBean 3D was flying under my radar.  He does an absolutely great job on his channel.  If you haven’t done so already, check it out!

This week, I got to be on his channel as part of the Friday Night 3DP Community LiveStream.  Tonight’s episode also feature Clare from the new Make It & Fake It, another channel to watch closely, particularly for her keenly calibrated wit.

It was my pleasure to spend Friday night with my fellow makers.  You can catch the full episode below.

To learn more about future episodes of Friday Night 3DP Community Hangouts, be sure to follow @F3DPCH on Twitter.

Community Live Stream – Maker Faire Nova and MRRF

I got invited to participate in another live stream last night. This one was hosted by 3D Printed Aspie. There were many new-to-me faces in last night’s stream, so I was thrilled to make even more acquaintances in our great community. The topics of conversation included recaps of two recent events- Maker Faire Nova and MRRF. I got to highlight my Dial-O-Lantern (a pumpkin where you can configure up to 27 difference faces) and a Maker Faire Vase made with the kids at last year’s Maker Faire Nova. In addition, I got to advise my peers at how to watch their young children around rolls of filament.  They… uh…might be tempted to roll it down the stairs. : )

A big thanks to Matt from How I Do It for kicking off the Community Live Chats and for Ryan at 3D Printed Aspie for his hospitality at having me at his channel. : )

Embedded Magnetron Tubes by RJ Make

Not a project or video of mine, but I just love this example of an embedded object by RJ Make. He shows us how to extra Magnetron Tubes and then uses Simplify 3D to embed it in a print.

RJ uses a different Simplify 3D technique than I do. I tend to rely on Multiple Processes with custom Starting and Ending Scripts. RJ takes advantage of another section of that Scripts tab. In the Additional terminal commands for post processing, you can set up special code that runs against the G-Code Simplify3D makes to print your object.

If you pull up your G-Codeinto a text editor like Notepad, you can see that each layer is prefixed with a comment in the G-Code.  In the screenshot below, the text “; layer 15,” indicates the very start of my Layer #15.

Layer15

This gives you a nice place mark and opportunity to do a search and  replace . You use \n for your Carriage Returns. Other than that, everything is normal G-Code.

In RJ’s case, he told Simplify 3D to find the spot in his gCode where Layer 54 is about to begin and he replaced it with:

G91 (putting the machine in relative mode)
G1 Z150 (telling the machine to move the nozzle up 150mm
M0 (the pause command for RJ’s printer)
G90 (putting the nozzle back into absolute mode so it has its bearings when RJ resumes the print).

{REPLACE "; layer 54," "G91\nG1 Z150\nM0\nG90\n; layer 54,"}

I tried it out in my Simplify 3D (for a much smaller print at Layer 15)

Additional Terminal Commands

Simplify 3D compiled the G-Code and ran the Search and Replace, so the additional commands were at the very right spot, right before my Layer 15.

Layer15AfterREplace

One thing that intrigues me about this technique is what I call my “sealing” layers, the layers that will be sealing my object in.  Often these are the very first layer of a brand new process, so they are picking up my First Layer Settings (which I do adjust accordingly).  When you use this technique, the sealing layer would be picking up the bridging settings.

I look forward to giving RJ’s technique a try!

Wanna Learn More?
Documentation on this Simplify3D Feature can be found at: Tip of the Day 8 – Scripts Tab, G-Code


Spool Holder Switch on The Wanhao

Ha! I have had not one but TWO YouTube commenters point out that my Spool Holder on the Wanhao was backwards. I did a Google Image search and sure enough– it appeared I was the only person in the entire world that had mine pointing towards the outside of the machine.

I felt a little relieved when I looked at the Quick Start Guide. At first glance the image made it look like I wasn’t a complete trail blazer. When I looked at the picture, I saw the spool holder pointing outwards…. like mine.

3D Printing - Wanhao Spool Holder Mystery

But when my husband looked at the picture, he saw it differently. It’s the angle of the image. It is pointing to “outside” of the machine— but the other side. So it is still pointing to the center like the rest of the Wanhao User Base.

When I decided the Wanhao was going to be accompanying me to the Maker Faire Nova, I decided it was time to make a correction. First thing in the morning, I got out an allen wrench and made the switch.

I am now assimilated! 🙂

(And I think my filament is going to thank me for it)

Blogging the trials and successes of 3D Modeling, 3D Printing…and trying to make a business out of the whole thing. : )