My “day job” has been demanding extra attention which has been leaving my own TGAW 3D Channel a little neglected. Thanks to some community hangouts, however, I’m still making some appearances on YouTube. This weekend, I participated in about 4 1/2 hours of live streams.
Friday 3D Printing Community Hangout
This week the Friday 3D Printing Community Hangout was hosted by Nilla Bean. The topic was a fascinating one– Community Outreach. This one was one of my favorite discussions and there were a few surprises in the mix. Josh Ajima from Design Make Teach was able to join us despite short notice and a busy week of STEM Camp and speaking at the International Society for Technology in Education conference in Houston. Another surprise guest– Chuck Hellebuyck from Filament Friday fame. He started off with a bang with a wonderfully inspiring endorsement of Snap Circuits.
I usually try to get myself off the stream at midnight my time. This week, the conversation was so fascinating, I stayed on an extra hour. Great stream, team!
For more information about the Friday Night 3D Printing Community Live Stream, you can follow F3DPCH on Twitter or on the brand new F3DPCH Facebook Group
Ladies of 3D Printing Live Stream
Just about 11 hours after I signed off of #F3DCH, I joined a group of talented women on the 3D Printing Ladies Live Stream! We continued the discussion of Community Outreach and chatted about some technical stuff like 0.25mm nozzles.
This discussion will stick with me a while. A community question from 3D Printed Aspie on STEM versus STEAM made me realize how fitting it is that I have a photo of Kurt Vonnegut hanging above my MakerGear M2.
Another highlight– a cameo from my oldest son, Sagan, to give Joel Telling (his favorite YouTuber) an on-air high five. Oooh and also my bird, Blue Tail Talon Scream, made his YouTube debut.
Back in April I heard some exciting news about Maker Box. In celebration of “International Women in Engineering Week”, Maker Box was going to make June’s shipment to be Ladies’ Choice. I was asked if I had any recommendations. One of my suggestions– ColorFabb corkFill.
Earlier today I was introduced to a new 3D Printing Family at the YouTube Channel FunKing3D. And what do you know, their latest video was a June MakerBox Unboxing. One of the selections– CorkFill! Coincidence? 🙂
My other suggestions were some “Ada Lovelace Lavender” and “Grace Hopper Grey”. Sadly, I did not see my fictitious, completely made up colors included. 🙂
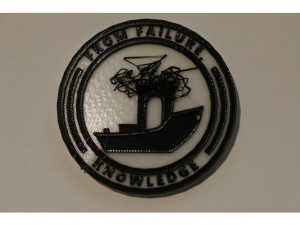
Eagle eye social media star Heather from A Pyro Design spotted my Maker Coin on Twitter. What a fantastic “make” of the English Version of the Maker Coin!
Last night I participated in another Friday Night 3D Printing Community Hangout. The episode started discussing filaments where I had to confess I am pretty homogeneous (loyal) with my brand. I almost exclusively use ColorFabb filaments with just recently venturing out to give Hatchbox and Polyalchemy a try.
Later the conversation turned to something very close to my heart — outreach and bringing 3D Printing to our communities.
And for more information about the Friday Night 3D Printing Community Live Stream, you can follow F3DPCH on Twitter or on the brand new F3DPCH Facebook Group
This morning I caught up on a few things for my Etsy site. New listings now available for perusal:
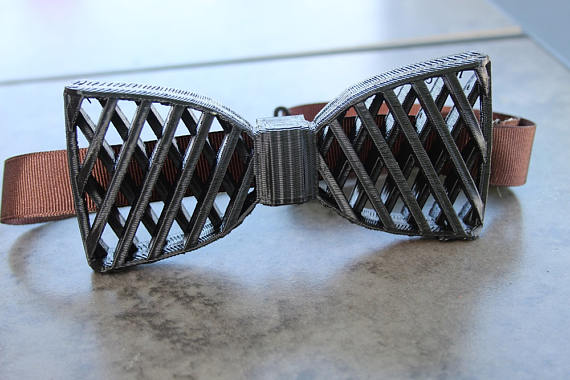
Black 3D Printed Bow Tie
A few months ago, I got a rushed custom order from someone looking for a Black Bow Tie for a wedding. They had a good idea and I’ll make sure to keep a black “tuxedo-ready” version in stock for the future.
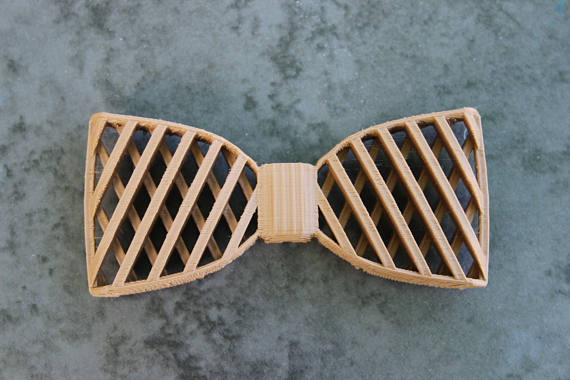
Brown, Wood-Like Bow-Tie
I inadvertently discovered the Brown Plastic version of the Bow Tie looks just as good as the Wooden One. Since this material is a little less finicky, I can offer it for a lower price than the full blown wood… just in time for Father’s Day!
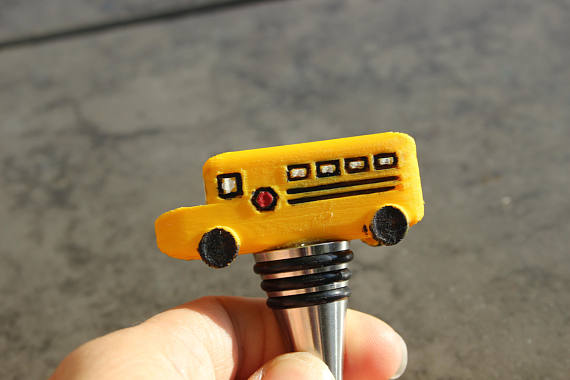
School Bus Wine Stopper
A great gift for your favorite retiring School Bus Driver! After about a dozen custom orders, I decided to finally list my School Bus Wine Stopper up on Etsy.
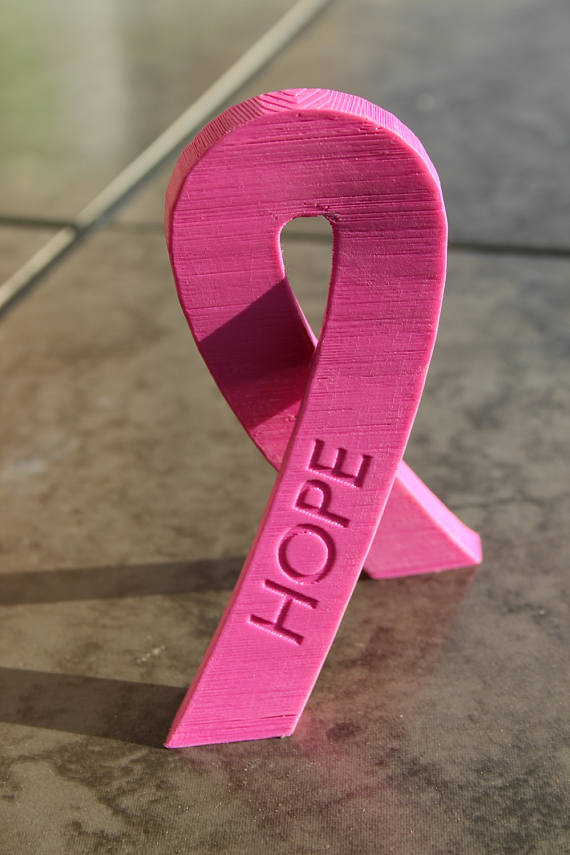
Standing Cancer Ribbon
This is another one where custom orders have enticed me to make an Etsy listing. The Standing Cancer Ribbon can be customized in color and inscription.
A friend of mine who is a drone-enthusiast recently starting dabbling in Fusion 360. He designed himself a GoPro Mount for his SpaceOne 220x which I printed over here on the Wanhao Duplicator i3. It ended up being a pretty darn sweet deal for me. Quick easy print and I got a free sushi dinner out of the gig (not to mention great company over the meal).
Now that the weather is warm, my friend is flying more frequently and I’m finding it delightful to see the print in action… or rather what the print helps records while in action. The latest video is below. You can also check out his channel at Pokey FPV.