Category Archives: 3D Printing

Fall Occoquan Arts and Craft Show

Well, it was a whirlwind, but we had a phenomenal time at the Fall Occoquan Arts and Craft Show! Everything clicked into place so we could relax and enjoy the show. We had steady enough sales that we didn’t have to worry about not selling anything…. but the sales paced in a way that we didn’t have to worry about running out of everything on Saturday.

When I step back, it is crazy we accomplished in just eight weeks. Eight weeks ago, I may have had some designs up on Shapeways, but for all practical purposes I was just a girl with a 3D Printer. I had NO inventory. NO tent. NO tables. Nothing! So in eight weeks, we (I say we, because from my husband to my mother to my brother to my sister-in-law to a battery of friends– it was a big group effort) pulled off a little business.

19 new designs, over 400 prints, a business license, tax IDs, a logo and signage, infrastructure for display and credit cards reading.

Whew! No wonder I’m so tired.
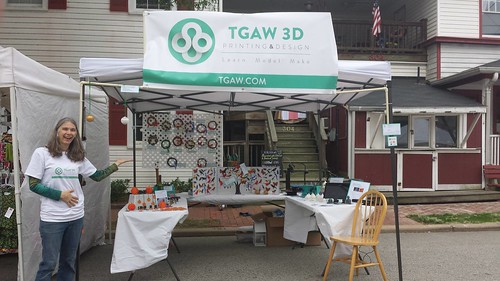
3D Printing - Occoquan Craft Show - Vicky and Booth
This All Did Not Exist Eight Weeks Ago!

Surprise Strong Sellers
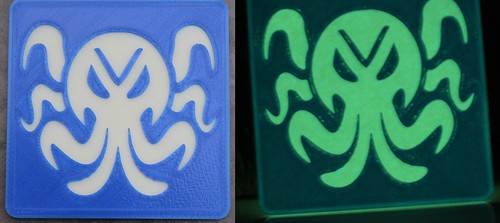
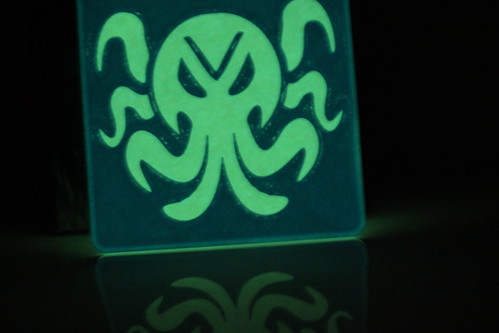
The most surprising seller was the Glowing Cthulhu Coaster. The Glowing Cthulhu Coaster was actually our first sale, a mere minute after the bells rung to start the show. We ended up selling out of Cthulhu Coasters the very first day. The second morning, we printed more…which was good because in the afternoon we sold another one!

3D Printing - Glowing Cthulhu Coaster (Lit Up)

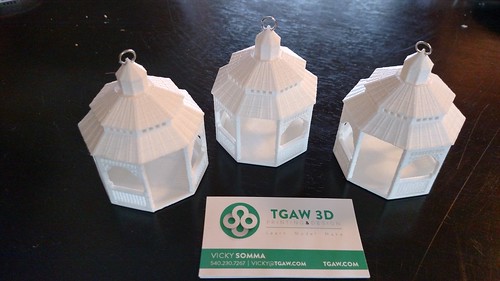
The other great surprise was my Mamie Davis Gazebo Christmas Ornament. I didn’t blog about it yet. That was my very last design for the show- done in a marathon 16 hour design session and then printing the very last week before the show. After a handful of gazebos, I was thinking of switching back to other products. My husband convinced me to print more gazebos and I’m glad I did. By the end of the show, they were all spoken for!

3D Printing - Mamie Davis Park Gazebo Ornament

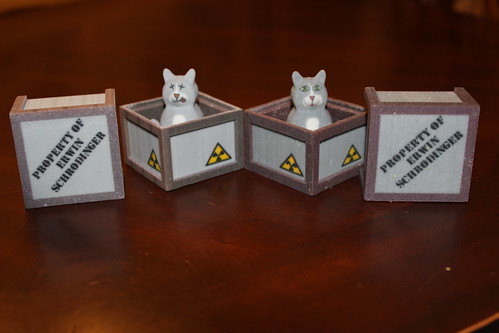
I was also pleased to sell a Schrodinger’s Cat and Box! He is definitely a niche product.

Schrodinger Cat - Two in Boxes

Surprise Slow Sellers
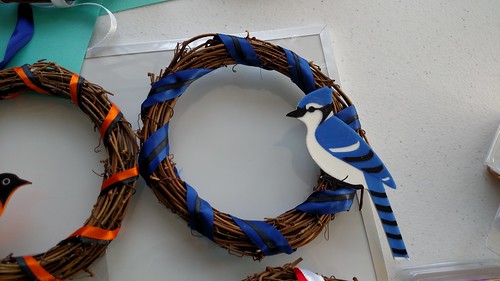
On the other hand, the bird magnets and wreaths did not do as well as I had anticipated. Possible variables- I had that in the back of the booth. I also suspect I mucked up the pricing and made them too high (More on that below).

3D Printing - Blue Jay Wreath

Leads!
I left the show with a half dozen custom design requests to follow-up on. In Episode 89 of the WTFFF Podcast, Tom and Tracy Hazzard said for them, if they left a tradeshow with just one lead, the show was worth it. I left with multiple leads plus SALES. So yeah, totally worth it.

Beyond Sales
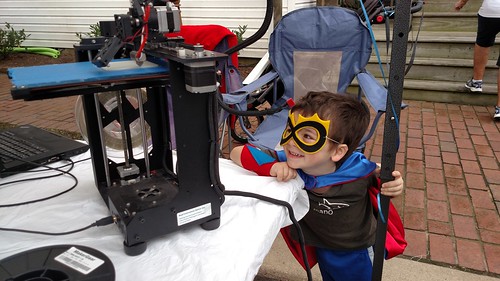
We had a best case scenario. Even if we missed a sale, we still got our egos stroked with compliments to the designs and then the best part- we got to introduce 3D printing to the masses! Visitor after visitor came in and told us, “This is the first time I’ve laid eyes on a 3D Printer. I’ve read about it, but I’ve never seen one.” They would call others over to mob around the printer. That was very satisfying.

Occoquan Fall Arts and Craft Show

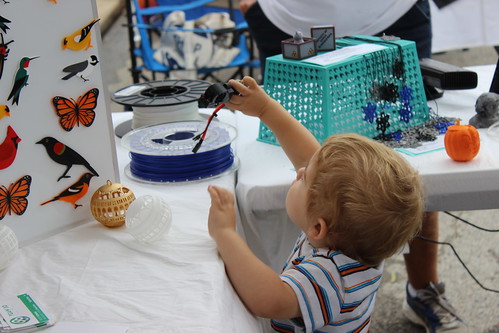
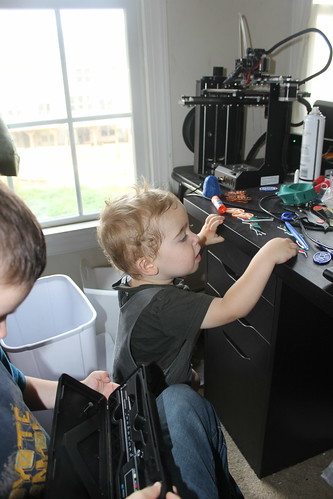
Occoquan Craft Show 2015 - Dyson Plays with Hot End

One lady admired all my birds and said, “I heard about 3D Printing, but I had no idea you could use it to make beautiful art work.” Beautiful art work! That’s the term she used!

And I got to do something I really do revel in– talking about 3D Printing and showing people how it is within their grasp right now. They can start designing and printing right now!

Surprising Another 3D Printer
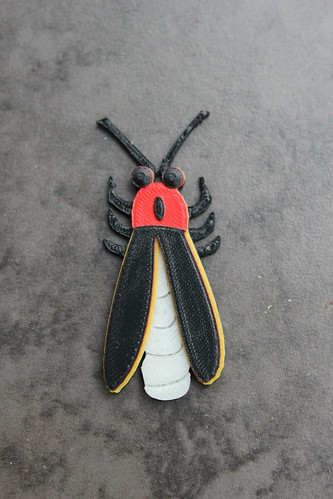
Okay… so yeah, maybe it is easy to wow the layman with 3D Printing. But what about people who have 3D printers of their own? Sunday, a local man with a 3D Printer stopped by my booth. We talked about nozzles and NinjaFlex and slicing. All of a sudden his wife interrupted, pointing to one of my glowing fireflies and asking how I did the different colors.

3D Printing - Firefly Magnet

“That’s painted, baby.” the man quickly said.

And I got to correct him, “No, it’s different color filaments.”

He looked at the firefly again. “Ooooh, I see. You print the different filaments and glue them together.”

And I got to correct him and explain how I use Simplify3D to do the multiple processes and start the different colors that their designated heights.

Out of all the visitors that past weekend, I think it was only he who could really fully appreciate the technique.

To Learn: Pricing
When learning 3D Printing, you do a lot of experimentation. Ooh your overhangs are messy, let’s try a print with lower temperatures. Still not perfect? Let’s try a print with slower speeds. You tweak and make adjustments.

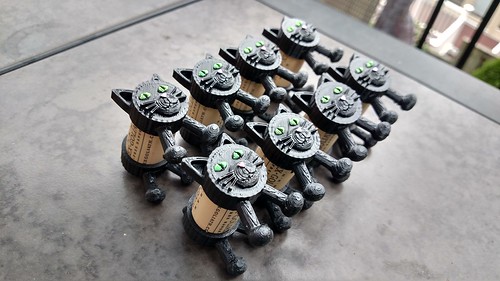
I do believe it’s going to be the same kind of thing with sales. Right now, I believe I priced the Cork Puppies and Cork Kitties too high. I was pricing it, thinking the end users were adults (using them as décor, place set holders, and entrée labels). It was very clear at the show, I should have been pricing it for KIDS. The end users are KIDS! They love them.

Occoquan Craft Show - Eight Black Cork Kitties

I also believe I priced the birds too high.

On the other side of the spectrum, it is possible I priced the Mamie Davis Gazebo Ornament too low. Why do I say that? My Mom accidently quoted a lady TWICE the price and she still agreed to buy THREE. (I only charged her the real price). So go figure. hehe

It’s just another thing for me to learn and master. It may take me a while to master, but I’ll keep working at it. : )

Next Up
Next up– a little bit of rest, getting my remaining inventory up on Etsy, doing these custom orders… and then prepping for more shows!

Virginia is for Wine Lovers Bottle Stopper

Preparing for the Occoquan Arts and Craft Show, I thought about the extra SS Niles Bottle Stoppers I had on hand. I asked my co-workers if they had any ideas for wine stoppers I could do for the craft show. They all had great ideas, but one stood out above the rest.

“What about instead of ‘Virginia is for Lovers’ [our state’s ad slogan], you have something that says ‘Virginia is for Wine Lovers’?”

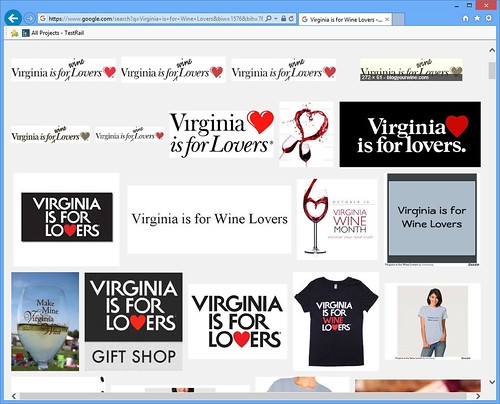
Well that sounded like an excellent idea and it did seem like it would go over well with the crowd. But I wanted to see if it was an unique idea…. and not so much. A Google image search showed a lot of products with that saying.

Virginia is For Wine Lovers - Other Products

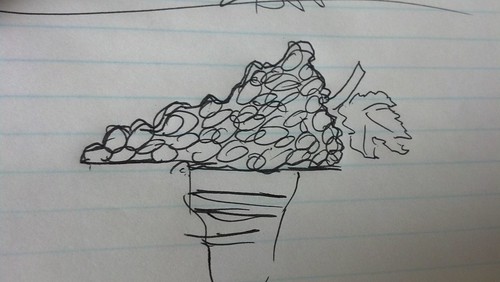
Now here’s the silver lining of being a busy working mother with limited time to 3D Print. You are naturally going to discriminate what you spend your time modeling and printing. So I reflected on how I could take that concept and make it unique and fresh– make it worth spending time one. I did some doodling and all of a sudden it occurred to me. That Commonwealth of Virginia…. it sort of looks like a bunch of grapes.

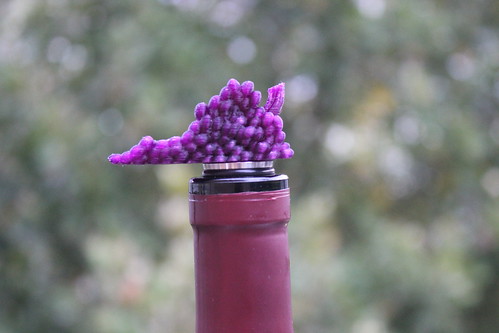
So instead of printing the slogan, “Virginia is for Wine Lovers”, I decided to model grapes… in the form of Virginia.

Virginia is for Wine Lovers Sketch

Modeling and printing took a few iterations to get it to the point where I was satisfied. All that tweaking paid off. I’m totally in love with it. In fact, I went and ordered 20 more bottle stoppers so we can have more on hand for the Occoquan Fall Arts and Craft Show.

3D Printing - Virginia is for Wine Lovers Wine Stopper (Close)

And if you can’t make it to the show, I do have the Virginia is for Wine Lovers Wine Stopper up on Etsy

Print Diary – Cork Puppies, An Injury, First Etsy Sale!

Greetings All! Another busy, busy week preparing for the Occoquan Fall Arts and Craft Show. Here’s what I’ve been up to.

Achievement Unlocked – First Injury???
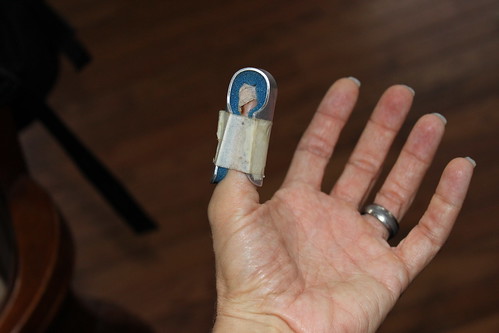
And….. I suffered my first 3D Printing injury. You know how I was reveling in the benefits of printing on the painter’s tape? One of the “perks” is the items stick so well to the tape, I need to use a scraper to get them off. I like to consider myself typically a smart individual, but Tuesday I made a very un-smart decision as to where I placed my thumb. I sliced right into it.

3D Printing - Injury

Good news– I didn’t get stitches (I used to verb “get” instead of “need”– because it was borderline).
Bad news– it is steri-stripped and all wrapped up to keep immobile.
Good news- now my Mom, my four year old ad my husband get to do raft removal. Muahaha : )

3D Printing - Raft Removal with Ryan and Mom

Cooling Fan
Eight days ago, I had a victory when I replaced my 50mm Cooling Fan. I know, that’s not normally a victory, but you have to keep in mind that I am a software person. Anything remotely hardware related is an immediate victory for me.

That cooling fan was perfect for 8 days. Then yesterday some filament fell into it… again… and snapped a blade…again.

I’m officially adding M107 to all my ending GCodes.

Cork Puppy Licensed!
I heard back from Thingiverse Designer EHM and she gave me permission to sell the Cork Puppy at the Craft Show! This week, we’ve printed a mini army of Cork Puppies.

Cork Kitty
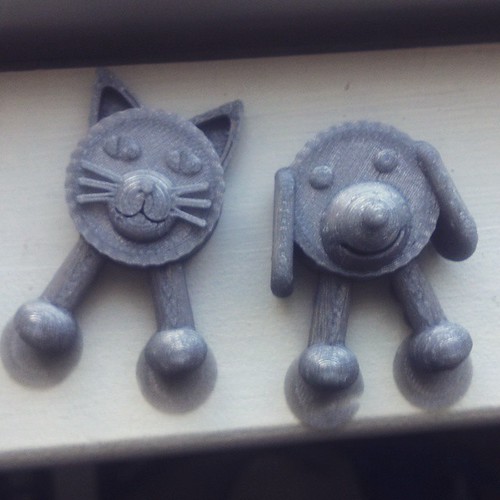
To compliment the Cork Puppy, I designed a little Cork Kitty. I tried to match Designer EHM’s style for the puppy. My two year old instantly pointed and said “Cat”, so it seems I was successful in making the species of domestic animal identifiable. At least to two year olds. : )

Companion piece to Designer EHM's Cork Puppy-- the Cork Kitty.  #3DPrinting

First Etsy Sale!
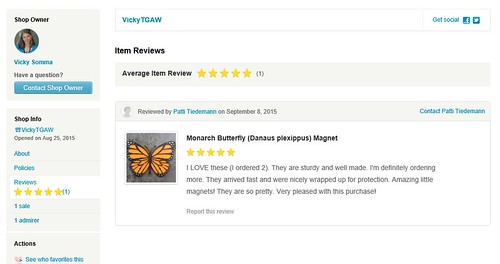
Holy crap, Internet. I already had my first Etsy sale. I wasn’t going to promote my shop until October. I haven’t even told my closest girlfriend that my shop is up. But someone found me and bought something! AND they left the most amazing review.

First Etsy Review

This is very different from my listings on Shapeways where you often have to actively promote to get the word out. Tracy Hazzard from HazzDesign had mentioned to me a while back that Etsy is a buying platform and people know to go there when they are shopping, whereas they may not necessarily think to go over to Shapeways. My experience so far, seems to support her claim.

Achievement Unlocked – Fixing My First Filament Clog!

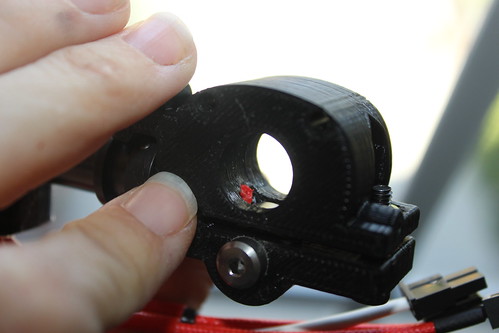
Internet, get this– I fixed a filament clog all by myself. Thanks to our recent maintenance, I’m become more familiar and, dare I say, more comfortable with some of the parts. And it’s a good thing because yesterday I got my very first extrusion clog. I took off my fans and filament drive and discovered the issue– there was a big blobbie (that’s the technical term) of red filament in the bottom that wasn’t supposed to be there.

MakerGear M2 - Bottom Extruder Feed - Take II

Commence Googling

Well, dude, my first round of searches brought forth a bunch of scary things. People saying stuff like using a drill bit to clear out the clog.

“Holy crap, am I going to have to use fire?” I thought, thinking about 3D Printing Nerd’s latest debacle.

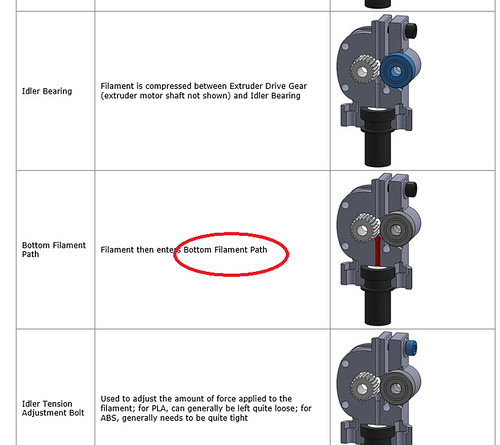
But there is a lesson here, my friends. It really helps to know the exact terminology when you are doing Google searches. After referring to the MakerGear M2 Extruder documentation, I had a better description of my issue. I had a clog at my “bottom filament path”.

Terminology from MakerGear M2

That produced more meaningful (and less scary) Google results. In particular, I owe a hat tip to Dale Reed in this MakerGear User Forum thread.

…see if you can get some fine needle-nose pliers to pull up any remaining filament in the bottom of the filament drive (if it’s sticking up out of there).

Needle-nose plyers didn’t quite work for me. But, I was able to stick the very tip of an Exacto Knife underneath the red blobbie (again, sorry for all the technical terms). And POP! Just like the Hungry Little Caterpillar and his egg, my obstruction popped right out with no force at all!

MakerGear M2 - Bottom Extruder Feed Clog - FIXED!

YAAAAAY! I put everything back together with my trusty Allen wrenches and printing resumed.

Print Diary – Experiments in Pumpkin Carvings

Occoquan Arts and Craft Show – September 26th and 27th!
First off, I’m in! My application to the Fall Occoquan Arts and Crafts Show has been accepted (with multiple explanation marks from the show director). It’s official– TGAW 3D is the show’s very first 3D Printing Booth! Hopefully, we’ll be setting a trend for future shows.

Even better news– our booth is going to be adjacent to my brother’s shop, which means we’ll have access to power. Weather permitting, Ryan and I will be bringing the MakerGear M2 down and have it running. We’ll also have our Kinect on hand in case anyone wants to get themselves scanned. 🙂

If you are in the area, stop by and see us!
Acceptance-Highlighted

Automating Pumpkins
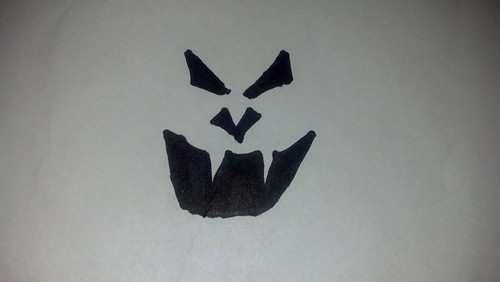
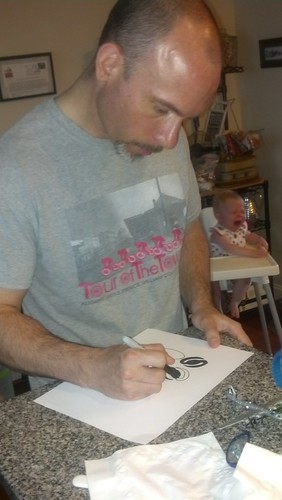
My ultimate game plan with the Glowing Pumpkin Pendants is to take advantage of one of the great perks of 3D printing– customization. I want people to draw/design their own pumpkin faces. I have my base pumpkin model. I would just need to make their face into a model and subtract it from my pumpkin. Thinking ahead, I did some experiments. I grabbed a Sharpie, drew a face and scanned it as a black and white image.

3D Printing

Now what?

OpenSCAD?
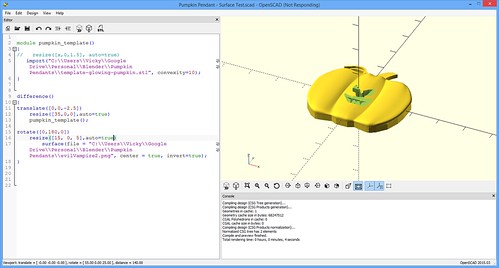
Looking over the OpenSCAD documentation, it looked like I might be able to use the Surface feature to achieve my goal. It uses the greyscale values of an image to determine the various heights of a surface. Since my image was Black and White, it should give me a template to carve out of my pumpkin.

It did make my face surface as planned… but it had a bottom plane underneath it. No worries, I rotated it 180 degrees. At this point, all I would need to do is position it, size it, and subtract it from my pre-existing pumpkin template.

OpenSCAD-Surface

I got it carved out, albeit a lot smaller than I wanted. At this point, I had to abort. I do truly believe OpenSCAD could be a viable option. But the rendering times were sooooo long. And then anytime I wanted to scroll or examine my object, I would have to wait again.

Disclaimer- It very well could be my old laptop from 2010 that has dwindling harddrive space…courtesy of all my 3D modeling.

If you’d like to explore this option further, my OpenSCAD code is below for reference and you may also want to refer to CubeHero’s Emboss and Impress Images onto a Surface in OpenSCAD article.

module pumpkin_template()
{
    //This is me importing in my base pumpkin template
    //what I want to carve the face out of.
   import("C:\Users\Vicky\Google Drive\Personal\Blender\Pumpkin Pendants\template-glowing-pumpkin.stl", convexity=10);
}

//This difference command is me subtracting my
//face surface from my base pumpkin .STL
difference()
{
translate([0,0,-2.5])
    resize([37.275,0,0],auto=true)
    pumpkin_template();

//This is me making my surface file based on my PNG
//of my face.  I rotate it 180 degrees so the solid
//plane base is on top (and out of the scope of my carving
rotate([0,180,0])
    resize([30, 0, 5],auto=true)
        surface(file = "C:\Users\Vicky\Google Drive\Personal\Blender\Pumpkin Pendants\evilVampire2.png", center = true, invert=true);
}          

InkScape?
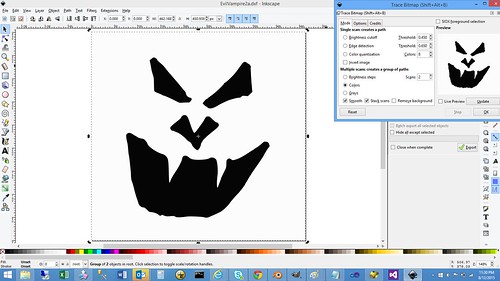
Inkscape seems to be a very powerful way of turning images, logos, and patterns into scalable vector graphic images that you can import into Blender or other modeling software. I’ve seen many people having success with it on the Internet.

One of those people just isn’t me. : (

Inkscape - TraceBitmap in Action

I’ve tried using it for three different projects over the last 18 months. Each time, I’ve ended up with a model that is cumbersome to edit and full of mismatched face normals. It just seems like I have an awful lot of cleanup to do. And not fun, “I’m learning more about 3D modeling” cleanup– tedious, demoralizing cleanup (“What– now I have even MORE non-manifold edges? #@(*&$I*!”)

Disclaimer- This could end up being user error– something like I should export to a different SVG format instead of the Inkscape SVG.

ShapeJS
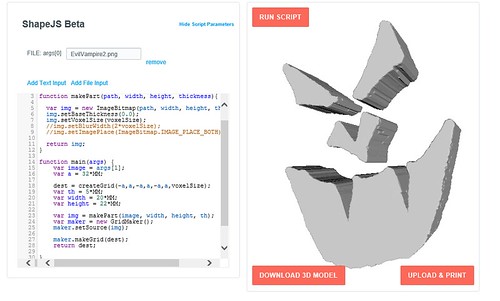
Interestingly enough, the tool I found I liked the most is Shapeway’s JavaScript-based library, ShapeJS. Just like OpenSCAD’s surface, you can upload an image and the colors in that image is used to make your model.

I stole code from their Absinthe Spoon example, uploaded my Black and White image and very quickly I had a model.

ShapeJS- Pumpkin Face

They have a Download 3D Model button, but I couldn’t seem to get that to work in Internet Explorer or Chrome.

My workaround was:

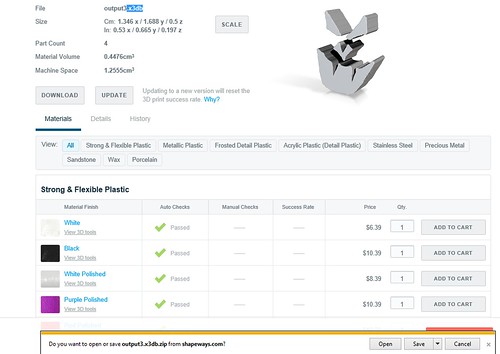
  1. Click on Upload & Print button.
  2. When the new Model details came up, I clicked on the Download button near the top and saved the file to my desktop.
    Shapeways - Export to x3db
  3. This downloaded a zip file, so I extracted the inside
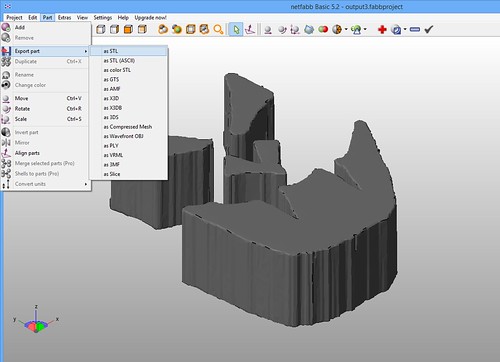
  4. D’oh. This file was in x3db format. I wanted .STL. I had the free version of NetFabb Basic on my machine. I opened that up, added my x3db part and then went to Part->Export Part->as STL. (Hat Tip, StackOverflow!) NetFabb Basic - Export Part - as STL
  5. Yay! I had my .STL
Yes– that is indeed a lot of steps. But guess what– I found it still better than Inkscape cleanup. : )

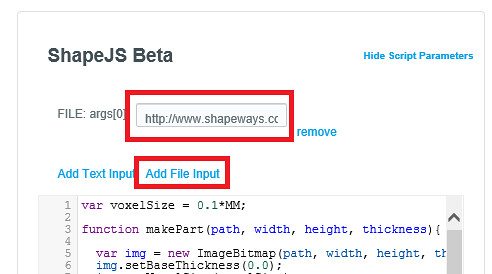
If you wish to follow in my footsteps, here’s my ShapeJS code. To compliment the code, you’ll want to click on Add File Input at the top of the code editor and then upload the file you wish to use.

ShapeJS - Adding a File Argument

var voxelSize = 0.1*MM;

function makePart(path, width, height, thickness){

  var img = new ImageBitmap(path, width, height, thickness);
  img.setBaseThickness(0.0);
  img.setVoxelSize(voxelSize);

  return img;
}

function main(args) {
	//This argument (arg[0]) is our PNG file.
	//I add by clicking on the "Add File Input"
	//and then I upload the file I want to use
	var image = args[0];
	var a = 32*MM;

	dest = createGrid(-a,a,-a,a,-a,a,voxelSize);
	var th = 5*MM;
	var width = 20*MM;
	var height = 22*MM;

	var img = makePart(image, width, height, th);
        var maker = new GridMaker();
	maker.setSource(img);

	maker.makeGrid(dest);
	return dest;

}

3D Printing

Other Options
There are most definitely other options out there. I’m sure my learning and experimenting will continue. Last night, for example, I was just reading an article by Chris Gerty about using Online-Convert to do the same thing. H.G. Dietz’s Trace2SCAD looks interesting as well.

But for now, the ShapeJS method has served me well. My husband drew me two new faces that we were able to model and print quickly this past weekend.

3D Printing

Beta Testing OCQ Keychains and the Merit of Simple Designs

Okay, don’t laugh. Sometimes the simplest designs is what resonates with people. My breastfeeding pendant, for example. It’s such a simple model– I could make it in minutes now, but that doesn’t keep it from drawing the attention and appreciation from breastfeeding mothers. My favorite example is Erin (below) who I got to meet at the National Maker Faire. She bought a breastfeeding pendant from me right after pumping. : )

Two Breastfeeding Mothers at National Maker Faire

So, I made these quick little OCQ keychains to represent my hometown–Occoquan and maybe even raise some money for the Occoquan Historical Society (though they don’t know those aspirations yet). Super easy– I just adapted some OpenSCAD code I had for some Virginia Tech wine stoppers. I used white text on blue background to match our new stunning town signs. They looked nice, but design-wise, nothing ground breaking or special.

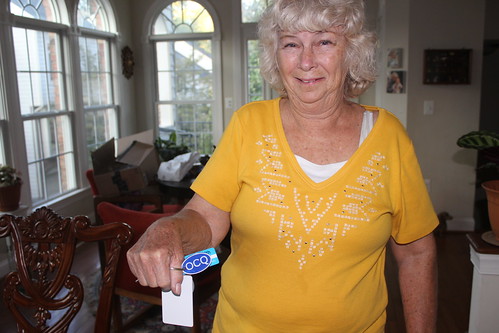
“I want one,” my mother said as I sprayed some gloss on my day’s prints out on the deck.

Out of all the things I’ve printed, I believe this is the first time she’s wanted something for herself.

“I want one,” she repeated later as I stacked and counted prints on the dining room table. She even volunteered to take one of my rejects. “The one with the weird C.” So I gave her one (ahem… the one with the weird C).

She promptly put it on her keychain and it fit perfectly. And there you have it. Sometimes simple designs can make people happy.

3D Printing - OCQ Keychain - Anne's New Keychain

For those so inclined, my OpenSCAD code is below:

//
// This is our module that will create a base
// cylinder which we stretch out for aesthetic
// purpose.
//
// We pass in the dimensions and a flag whether
// we want an embossed outline outside of the cylinder
//
module base_cylinder(x,y,z, withOutline)
{
resize([x,y,z])
rotate([0,90,-90])
difference()
{

cylinder(r=30, h=22, $fn=100);

//If we want to do an outline, we are
//going to subtract out a smaller
//cylinder so we have an inlay.
if (withOutline==true)
{

//front
translate([0,0,17])
cylinder(r=28, h=5, $fn=100);
}
}

}

difference()
{
union()
{

base_cylinder(50,3,30, true);

//My OCQ Text
translate([-18,-1.5,-5])
{
rotate(a=[90,0,0]) {
linear_extrude(1.5)
text("OCQ", size=12, center=true);
}
}

}

//Keychain Hole
translate([-20,1,0])
rotate(a=[90,0,0])
cylinder(r=2, h=5, $fn=100);
}


Print Diary – August 11 – Archilochus colubris

Ruby-throated Hummingbird
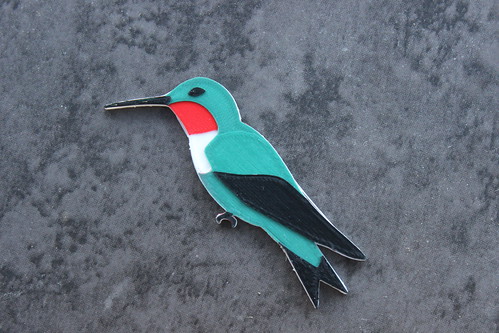
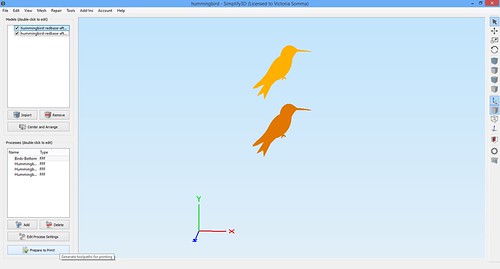
On Tuesday, I welcomed Archilochus colubris (Ruby-throated Hummingbird) to my 3D printed aviary. He was designed in Blender (based off a Creative Commons photo by my husband) and printed in the MakerGear M2. I used four different Simplify3D processes to print four colors– White, Traffic Red, Mint Turquoise, and Black.

3D Printing - Birds - Ruby-Throated Hummingbird

Overthinking the Color Order
Originally, I was printing Red, White, Green and then Black. My thought process was I wanted that White directly underneath the green, so it could be as bright as possible. I was worried if I printed green right on top of the red, it would appear brown.

So I did Red, White, Green and Black…. and I found myself very distracted by the Red outlines to the whole bird.

I switched them up. I printed White, Red, Green and then Black. With the first layer, it does look like my worse fears are realized– the bird is a pretty icky brown.

3D Printing - Birds - Green on Red Doesn't Look So Good...At First

But I have four layers of green (at 0.10mm each) and by the time it finishes all those layers, the green layer looks just as green as it does over the white. It made no difference whatsoever… for my ColorFabb Mint Turquoise. It is possible my translucent filaments from MakerGear (Grey and Orange) may be a different story.

Multi-processes to the Rescue!
I discovered that running Simplify3D’s multiprocesses one at a time are good for more than changing colors. It does give you an opportunity to recover should a mishap occur. In this case, one of my hummingbirds came unstuck to my bed. My attempts to glue stick him back on failed, so every time my extruder hit that blank spot it was making a nice spaghetti mess of filament (Side note– it is impressive to see how little filament actually goes on a layer– no wonder why my filament spools last forever).

3D Printing - Birds - Lost Hummingbird

Luckily, since I was running multi-processes, once my base layer of White finished, I had the opportunity to go into Simplify3D and remove the troublesome hummingbird (being VERY careful not to hit that Center and Arrange button). I exported my new processes to my SD card and that allowed me to not have to waste any more time on the MIA hummingbird.

Simplify3D - Saving Filament

Occoquan Craft Fair Preparation
I also got my application in for the Fall Occoquan Arts and Crafts Show on September 26th and 27th! I’m hoping to be their inaugural 3D Printing booth. Although I have no reason to worry about my acceptance into the show, meh, I still do worry a little bit, so I’ll be happy to hear back from the show director.

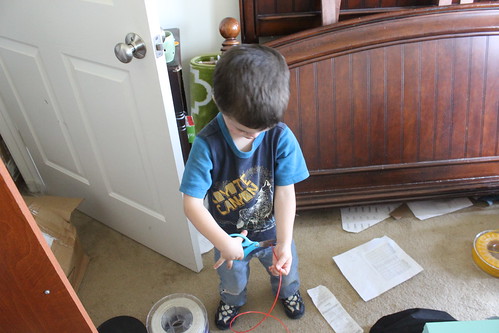
In the meantime, we are still preparing. My entire family is pitching in. Ryan is locating a tent and table and getting us a credit card processing solution. My brother, a small business owner, has been helpful in the business side of things. My Mom, as always, is a huge asset. Even my children are helping! They help with “Market Research” and young Sagan has mastered preparing my filament for color switches. : )

3D Printing - Sagan Preps Filament

3D Printing - Birds - Dyson Plays with Birds

3D Printing - Glowing Pumpkin Pendant - Sagan Helping Me Decide

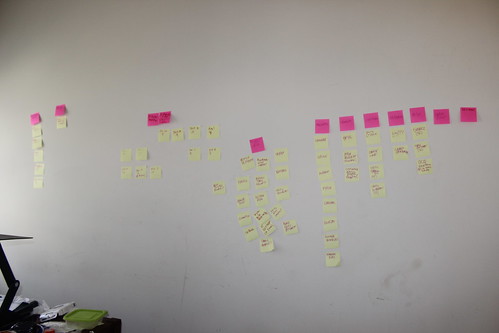
On my end, an entire wall of my office is covered in Post In Notes of ideas and action items. My evenings are spent modeling and slicing, so I can make sure the MakerGear M2 has stuff to do while I work during the day.

3D Printing - Craft Show Planning Wall

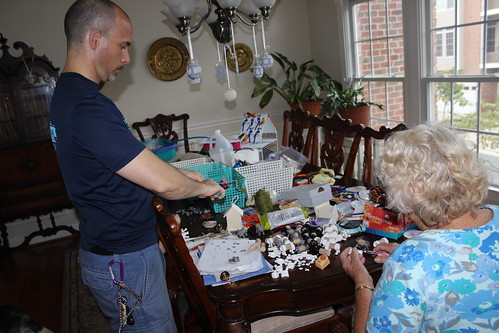
And our dining room table is currently a staging area of potential products.

3D Printing - Craft Fair Inventory

It’s going to be a busy fall. 🙂

Print Diary – July 30th – Taking the Plunge!

Going for the Craft Fair
My town has an annual craft fair every September and June. After much discussion with my husband, we decided we are going to try to do the fair’s very first 3D Printed booth this year. If anything, we will be testing the waters for future 3D printing vendors. I applied for an official business license with my town. Yikes! : )

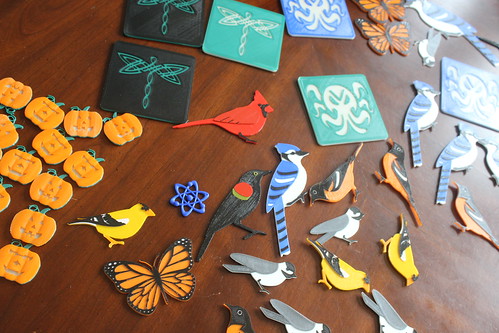
My prints today were some items in preparation for the faire– orioles, coasters, monarch butterflies.

Process Improvement
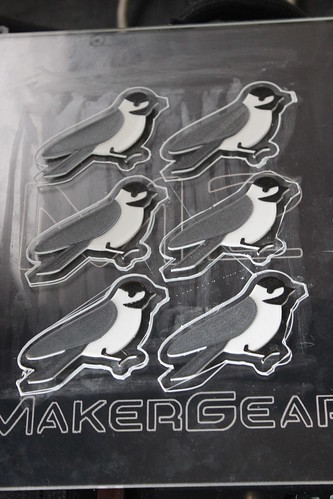
I did improve my bird printing process. Previously, I was printing all the birds at 0.10 layers. This allowed me to get more layers in of colors so they filled in better, but keeping the overall detail small.

Well I realized the backing of the bird didn’t need to be that short. In Simplify3D, I added an additional process where I printed the bottom of my birds at 0.2mm layers and then decreased down to 0.10 when I got to my color switches.

The result– it’s now quite fast to produce out a full bed of birds!

3D Printing - A Whole Slew of Chickadees

Science-Themed Pendant by Rosie Campbell
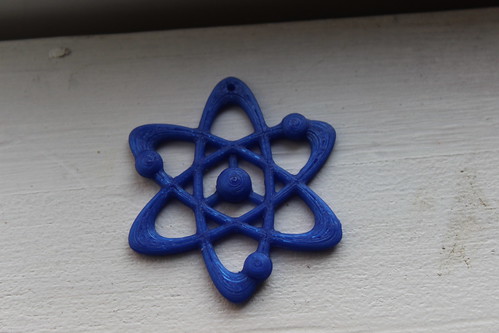
I did also try out the Science Themed Pendant by Rosie Campbell. It’s lovely and licensed Creative Commons (with commercial use). I like it, I’m satisfied with the print. I can see myself wearing it.

But…

Man, that hole is awfully small. It could be done— but you might need one of those needle threaders to do it.

3D Printing - Science Themed Necklace by Rosie Campbell

Nonetheless, it’s lovely!

Print Diary – July 29th – Monarch Butterfly and Glowing Cthulhu

Victory with the Monarch Butterfly
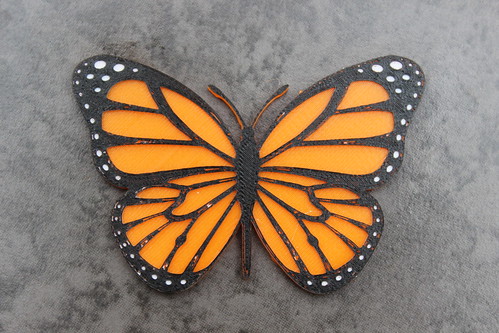
As I mentioned yesterday, I was having some trouble adapting the Public Domain Monarch Butterfly model by Liz Havlin. Although I have been 3D modeling for about 18 months, I was having some trouble achieving what I wanted– I wanted the holes of the butterfly to not be holes. I wanted the sections I wanted to be orange to be 2mm high and the sections I wanted to be white to be 2.3 mm high.
Unfortunately, I was introducing all sorts of manifold issues along the way. One day, I may look back on this and laugh at myself and my “silly ways”, but for now here’s what I ended up doing that actually worked for me.

I was able to easily make a solid butterfly that I extruded up to 2mm high– so I had my orange all set. For the white, I:

  1. Highlighted the vertices of the hole I wanted to fill.
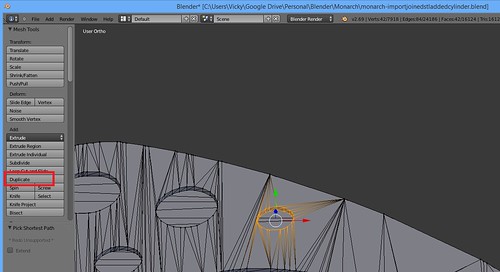
  2. Hit the Duplicate button to make copies of those vertices.
    Monarch Butterfly - Duplicate Vertices
  3. I hit escape (those new vertices were selected).
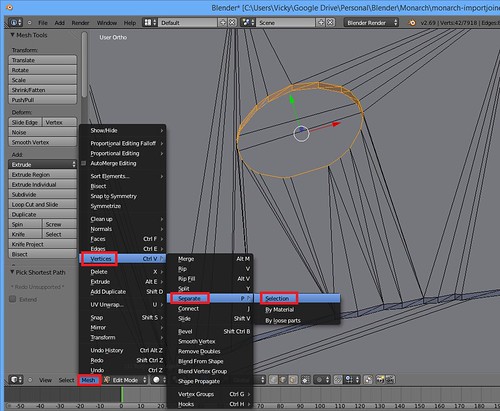
  4. Then I went to Mesh->Vertices->Separate->Selection. This move those vertices to their own object, which I filled in as a face and then extruded up 0.3mm.
    Monarch Butterfly - Seperate Menu Options
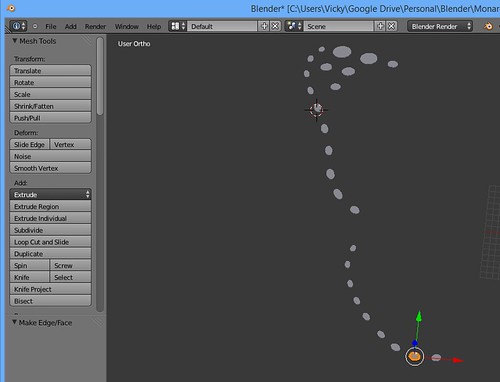
  5. I ended up with a bunch of 0.3mm high cylinders that I added to the solid butterfly (that was 2.0 mm high) and the hollow butterfly which was 0.7 mm high (making my black outline 0.4mm high)

    Monarch Butterfly - New Solid Cylinders

The colors are in the same height and order as the Baltimore Oriole (Orange – 2mm, White 0.3mm, Black 0.4mm), so I can print butterflies and orioles together.

Again, with future modeling knowledge I may look back and scoff at my approach. Nonetheless, I have my butterfly… and he’s beautiful!

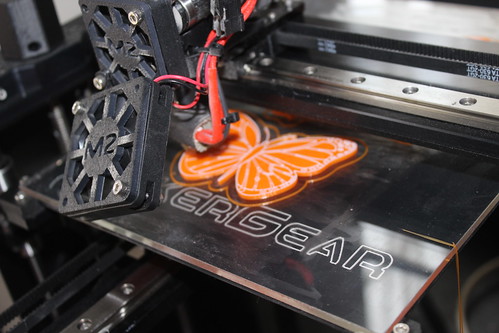
3D Printing - Monarch Butterfly in Action

3D Printing - Monarch Butterfly Magnet

Glowing Cthulhu Coaster
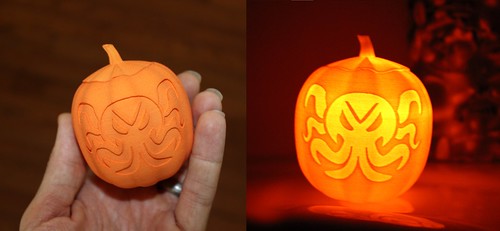
Another project I tackled was a lot easier. I have a little Cthulhu cutout I modelled for my “Glowing Cthulhu Pumpkin” on Shapeways.

Cthulhu Pumpkin in Hand and Glowing

In the case of the pumpkin, an LED inside provides the light. I decided to see what ColorFabb’s GlowFill could do. I went ahead and took that same cut out I drew and modelled and carved it out of a small beveled cube to make a coaster. I printed the first 2mm in GlowFill and then the top in a solid color. I am pleased with the result. Not only does Cthulhu glow, but the border around the coaster glows as well. A win.

3D Printing - Glowing Cthulhu Coaster (Blue) - Before After

Print Diary – July 27th – The Baltimore Oriole and USB Mobius Strip Holder

Today was an eventful day with the printing. I had no slicing or modeling challenges or obstacles. Just straight up printing.

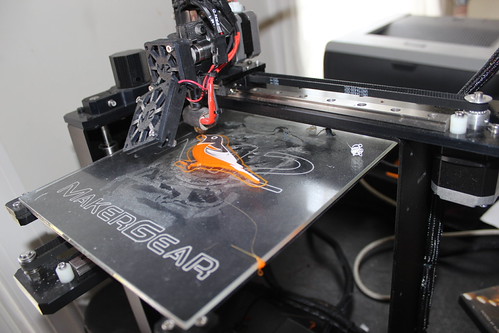
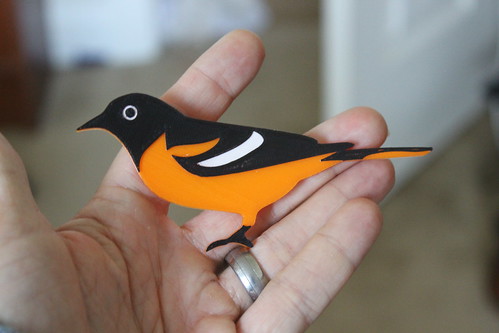
With switching out the filament during the print, I got to see my Baltimore Oriole come to life!

3D Printed Birds - Oriole in Action - After White Layer, the Black is Just Starting

3D Printed Bird - Oriole

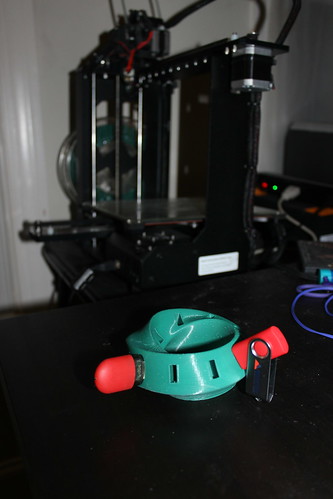
And then for a “mindless” print so I can get my day job done, I reprinted my USB Mobius Strip. The only real adjustment I made from the first print was not putting supports with in the USB slots. LOVE. Now hopefully I won’t use my USB keys as frequently. (There are only two pictured because…well… I can only locate two of my USB keys, emphasizing WHY I need this in the first place).

3D Printing - Mobius Strip USB Holder