TGAW 3D now has Facebook page.

Don’t worry- I’ll still be doing more detailed updates here on the blog. : )

TGAW 3D now has Facebook page.
Don’t worry- I’ll still be doing more detailed updates here on the blog. : )

Shapeways is offering FREE shipping this weekend (October 3rd and 4th, 2015). Know what that means? You can get my Glowing Cthulhu Jack-O-Lantern or my moving part Dial-O-Lantern (pick between 27 face combinations) in time for Halloween… and with FREE shipping.

Glowing Cthulhu Pumpkin
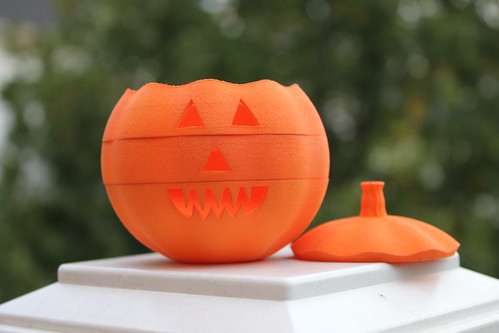
Moving Part – Dial-O-Lantern
Happy Shopping! : )
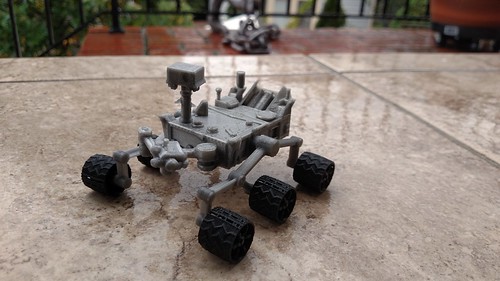
Over the summer, NASA released a FREE 3D Printable model of the Curiosity Rover. Now that the Fall Occoquan Arts and Craft Show is behind me, I had time to do a “fun” print. NASA had two versions to choose from – detailed version estimated to take 11 hours and a Simplified version, estimated to take 2 1/2 hours. I chose to go with the “Simplified” version.

I decided to break the print up into two prints. I did most of the parts in MakerGear Silver PLA filament (I did have to rotate some of the parts in Simplify3d before printing) and then I did the six tires in MakerGear Black PLA Filament. I printed at 0.25 layer height with 20% infill.
The final rover came out FANTASTIC! An easy print with easy assembly. NASA even put in their own rafts and supports which worked wonderfully. I am impressed how easy it was. Great job, NASA!
P.S. Curiosity isn’t the only free NASA model out there. They have an entire 3D Printing section!
Well, it was a whirlwind, but we had a phenomenal time at the Fall Occoquan Arts and Craft Show! Everything clicked into place so we could relax and enjoy the show. We had steady enough sales that we didn’t have to worry about not selling anything…. but the sales paced in a way that we didn’t have to worry about running out of everything on Saturday.
When I step back, it is crazy we accomplished in just eight weeks. Eight weeks ago, I may have had some designs up on Shapeways, but for all practical purposes I was just a girl with a 3D Printer. I had NO inventory. NO tent. NO tables. Nothing! So in eight weeks, we (I say we, because from my husband to my mother to my brother to my sister-in-law to a battery of friends– it was a big group effort) pulled off a little business.
19 new designs, over 400 prints, a business license, tax IDs, a logo and signage, infrastructure for display and credit cards reading.
Whew! No wonder I’m so tired.

This All Did Not Exist Eight Weeks Ago!
Surprise Strong Sellers
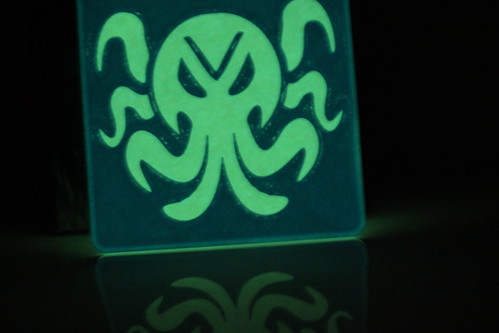
The most surprising seller was the Glowing Cthulhu Coaster. The Glowing Cthulhu Coaster was actually our first sale, a mere minute after the bells rung to start the show. We ended up selling out of Cthulhu Coasters the very first day. The second morning, we printed more…which was good because in the afternoon we sold another one!
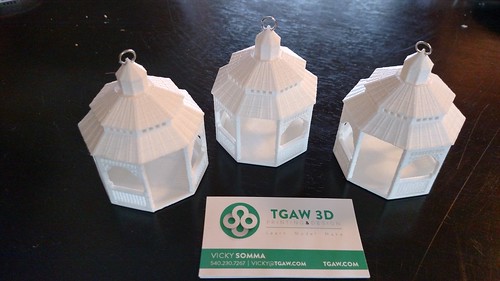
The other great surprise was my Mamie Davis Gazebo Christmas Ornament. I didn’t blog about it yet. That was my very last design for the show- done in a marathon 16 hour design session and then printing the very last week before the show. After a handful of gazebos, I was thinking of switching back to other products. My husband convinced me to print more gazebos and I’m glad I did. By the end of the show, they were all spoken for!
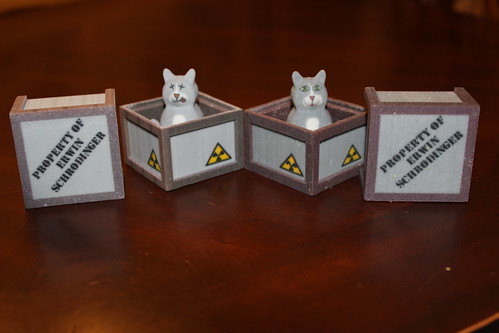
I was also pleased to sell a Schrodinger’s Cat and Box! He is definitely a niche product.
Surprise Slow Sellers
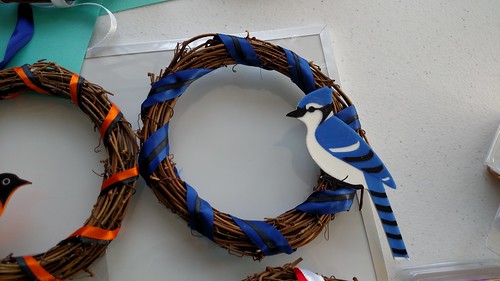
On the other hand, the bird magnets and wreaths did not do as well as I had anticipated. Possible variables- I had that in the back of the booth. I also suspect I mucked up the pricing and made them too high (More on that below).
Leads!
I left the show with a half dozen custom design requests to follow-up on. In Episode 89 of the WTFFF Podcast, Tom and Tracy Hazzard said for them, if they left a tradeshow with just one lead, the show was worth it. I left with multiple leads plus SALES. So yeah, totally worth it.
Beyond Sales
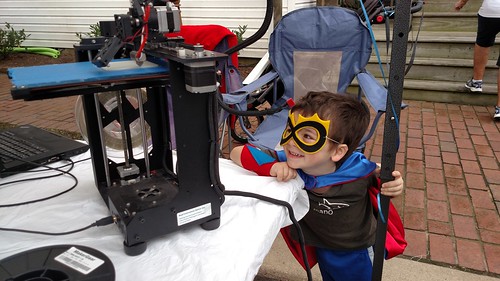
We had a best case scenario. Even if we missed a sale, we still got our egos stroked with compliments to the designs and then the best part- we got to introduce 3D printing to the masses! Visitor after visitor came in and told us, “This is the first time I’ve laid eyes on a 3D Printer. I’ve read about it, but I’ve never seen one.” They would call others over to mob around the printer. That was very satisfying.
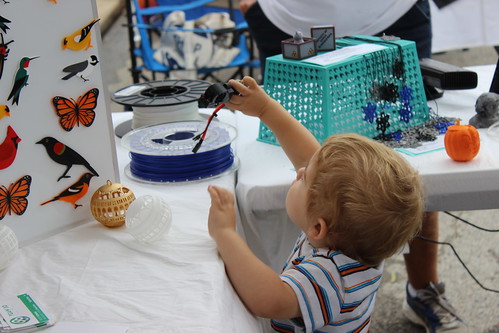
One lady admired all my birds and said, “I heard about 3D Printing, but I had no idea you could use it to make beautiful art work.” Beautiful art work! That’s the term she used!
And I got to do something I really do revel in– talking about 3D Printing and showing people how it is within their grasp right now. They can start designing and printing right now!
Surprising Another 3D Printer
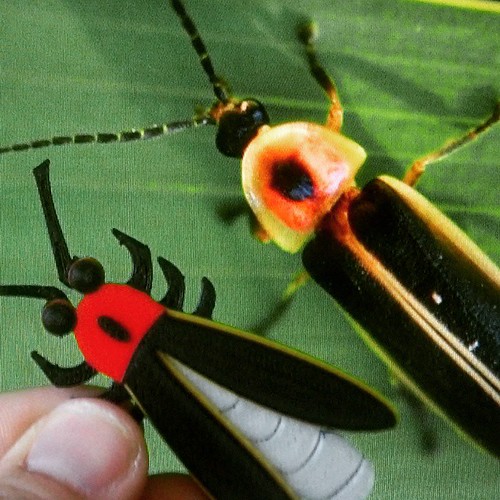
Okay… so yeah, maybe it is easy to wow the layman with 3D Printing. But what about people who have 3D printers of their own? Sunday, a local man with a 3D Printer stopped by my booth. We talked about nozzles and NinjaFlex and slicing. All of a sudden his wife interrupted, pointing to one of my glowing fireflies and asking how I did the different colors.
“That’s painted, baby.” the man quickly said.
And I got to correct him, “No, it’s different color filaments.”
He looked at the firefly again. “Ooooh, I see. You print the different filaments and glue them together.”
And I got to correct him and explain how I use Simplify3D to do the multiple processes and start the different colors that their designated heights.
Out of all the visitors that past weekend, I think it was only he who could really fully appreciate the technique.
To Learn: Pricing
When learning 3D Printing, you do a lot of experimentation. Ooh your overhangs are messy, let’s try a print with lower temperatures. Still not perfect? Let’s try a print with slower speeds. You tweak and make adjustments.
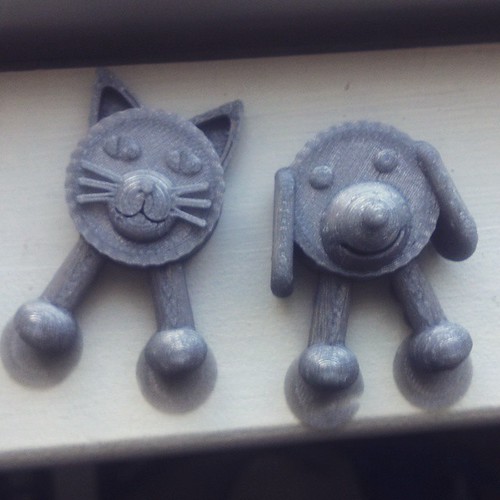
I do believe it’s going to be the same kind of thing with sales. Right now, I believe I priced the Cork Puppies and Cork Kitties too high. I was pricing it, thinking the end users were adults (using them as décor, place set holders, and entrée labels). It was very clear at the show, I should have been pricing it for KIDS. The end users are KIDS! They love them.
I also believe I priced the birds too high.
On the other side of the spectrum, it is possible I priced the Mamie Davis Gazebo Ornament too low. Why do I say that? My Mom accidently quoted a lady TWICE the price and she still agreed to buy THREE. (I only charged her the real price). So go figure. hehe
It’s just another thing for me to learn and master. It may take me a while to master, but I’ll keep working at it. : )
Next Up
Next up– a little bit of rest, getting my remaining inventory up on Etsy, doing these custom orders… and then prepping for more shows!
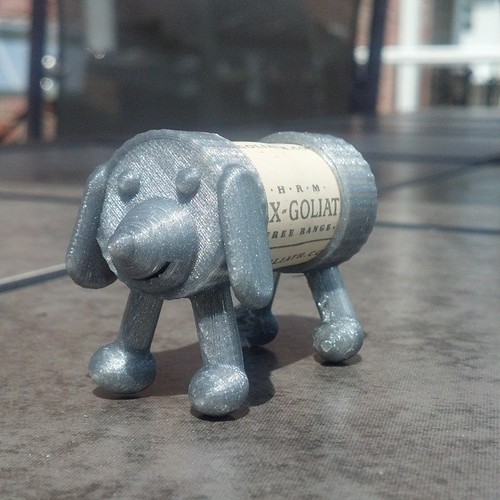
Preparing for the Occoquan Arts and Craft Show, I thought about the extra SS Niles Bottle Stoppers I had on hand. I asked my co-workers if they had any ideas for wine stoppers I could do for the craft show. They all had great ideas, but one stood out above the rest.
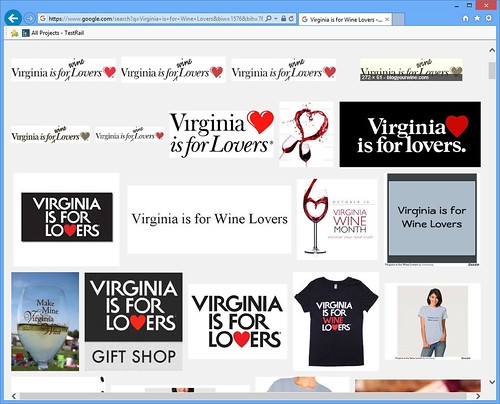
“What about instead of ‘Virginia is for Lovers’ [our state’s ad slogan], you have something that says ‘Virginia is for Wine Lovers’?”
Well that sounded like an excellent idea and it did seem like it would go over well with the crowd. But I wanted to see if it was an unique idea…. and not so much. A Google image search showed a lot of products with that saying.
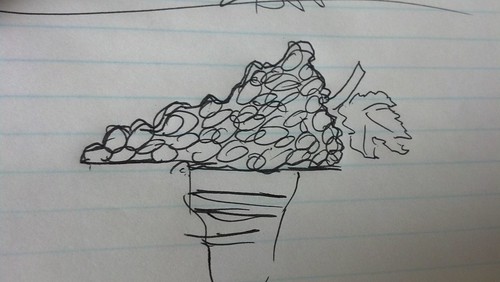
Now here’s the silver lining of being a busy working mother with limited time to 3D Print. You are naturally going to discriminate what you spend your time modeling and printing. So I reflected on how I could take that concept and make it unique and fresh– make it worth spending time one. I did some doodling and all of a sudden it occurred to me. That Commonwealth of Virginia…. it sort of looks like a bunch of grapes.
So instead of printing the slogan, “Virginia is for Wine Lovers”, I decided to model grapes… in the form of Virginia.
Modeling and printing took a few iterations to get it to the point where I was satisfied. All that tweaking paid off. I’m totally in love with it. In fact, I went and ordered 20 more bottle stoppers so we can have more on hand for the Occoquan Fall Arts and Craft Show.

And if you can’t make it to the show, I do have the Virginia is for Wine Lovers Wine Stopper up on Etsy
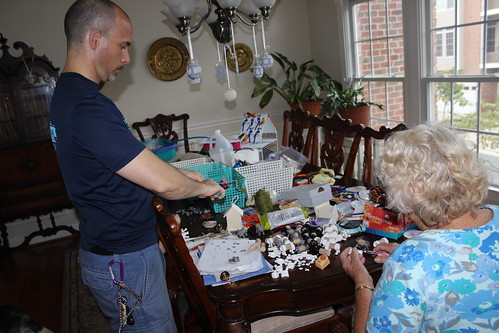
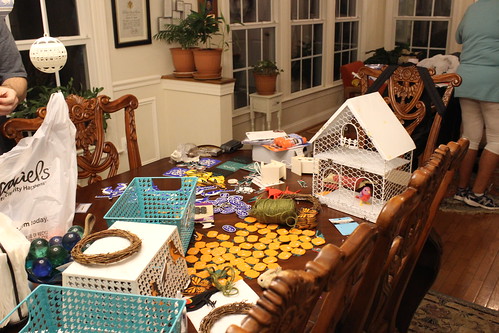
We’re in crunch time for the Occoquan Fall Arts and Craft Show. How can a first time vendor make forward progress toward having a respectable inventory and keep their social life going? Why, a painting party, of course!
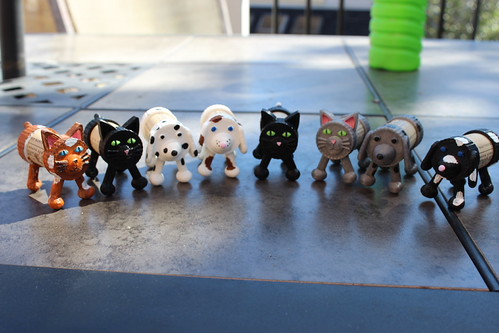
Remember all those Cork Puppies and Cork Kitties I’ve been printing? Some friends of mine generously agreed to help paint them. Not only that, they hosted said painting at their house… and they fed me homemade lasagna. (They seemed to have gotten the short end of this deal).
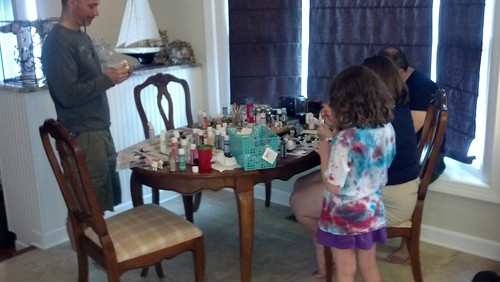

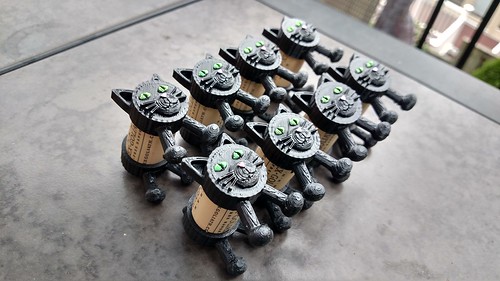
We had a good time and we all fell in love with the black cat. Green eyes popped so gorgeously on that Black plastic… and he is perfect for the upcoming Halloween Holiday.
In fact, when I left with my newly painted Cork Puppies and Cork Kitties, I also left with an order for 8 Black Cats. My hostess is going to use them for a Halloween party she is having. : )
Greetings All! Another busy, busy week preparing for the Occoquan Fall Arts and Craft Show. Here’s what I’ve been up to.
Achievement Unlocked – First Injury???
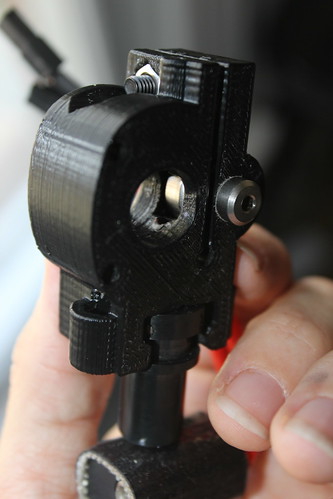
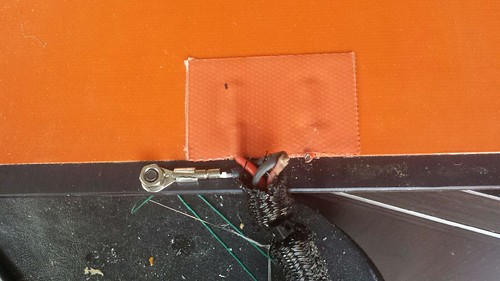
And….. I suffered my first 3D Printing injury. You know how I was reveling in the benefits of printing on the painter’s tape? One of the “perks” is the items stick so well to the tape, I need to use a scraper to get them off. I like to consider myself typically a smart individual, but Tuesday I made a very un-smart decision as to where I placed my thumb. I sliced right into it.
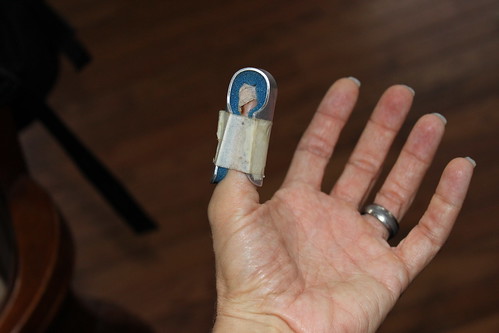
Good news– I didn’t get stitches (I used to verb “get” instead of “need”– because it was borderline).
Bad news– it is steri-stripped and all wrapped up to keep immobile.
Good news- now my Mom, my four year old ad my husband get to do raft removal. Muahaha : )
Cooling Fan
Eight days ago, I had a victory when I replaced my 50mm Cooling Fan. I know, that’s not normally a victory, but you have to keep in mind that I am a software person. Anything remotely hardware related is an immediate victory for me.
That cooling fan was perfect for 8 days. Then yesterday some filament fell into it… again… and snapped a blade…again.
I’m officially adding M107 to all my ending GCodes.
Cork Puppy Licensed!
I heard back from Thingiverse Designer EHM and she gave me permission to sell the Cork Puppy at the Craft Show! This week, we’ve printed a mini army of Cork Puppies.
Cork Kitty
To compliment the Cork Puppy, I designed a little Cork Kitty. I tried to match Designer EHM’s style for the puppy. My two year old instantly pointed and said “Cat”, so it seems I was successful in making the species of domestic animal identifiable. At least to two year olds. : )
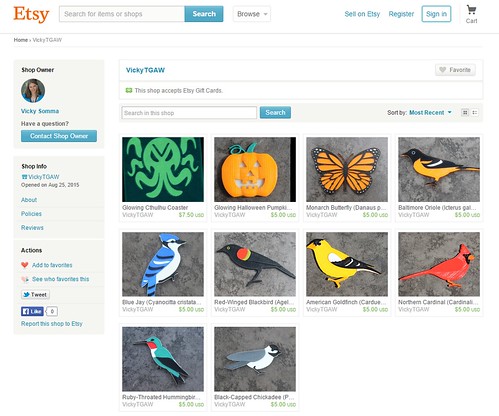
First Etsy Sale!
Holy crap, Internet. I already had my first Etsy sale. I wasn’t going to promote my shop until October. I haven’t even told my closest girlfriend that my shop is up. But someone found me and bought something! AND they left the most amazing review.
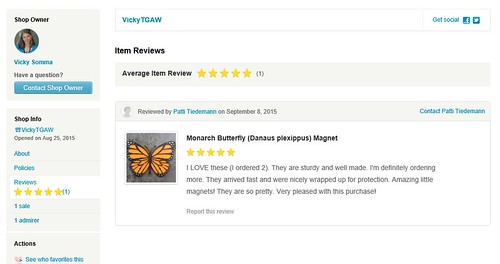
This is very different from my listings on Shapeways where you often have to actively promote to get the word out. Tracy Hazzard from HazzDesign had mentioned to me a while back that Etsy is a buying platform and people know to go there when they are shopping, whereas they may not necessarily think to go over to Shapeways. My experience so far, seems to support her claim.
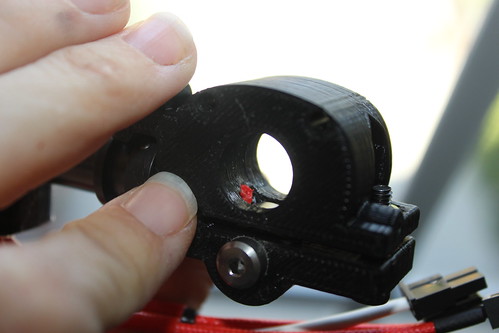
Internet, get this– I fixed a filament clog all by myself. Thanks to our recent maintenance, I’m become more familiar and, dare I say, more comfortable with some of the parts. And it’s a good thing because yesterday I got my very first extrusion clog. I took off my fans and filament drive and discovered the issue– there was a big blobbie (that’s the technical term) of red filament in the bottom that wasn’t supposed to be there.
Commence Googling
Well, dude, my first round of searches brought forth a bunch of scary things. People saying stuff like using a drill bit to clear out the clog.
“Holy crap, am I going to have to use fire?” I thought, thinking about 3D Printing Nerd’s latest debacle.
But there is a lesson here, my friends. It really helps to know the exact terminology when you are doing Google searches. After referring to the MakerGear M2 Extruder documentation, I had a better description of my issue. I had a clog at my “bottom filament path”.
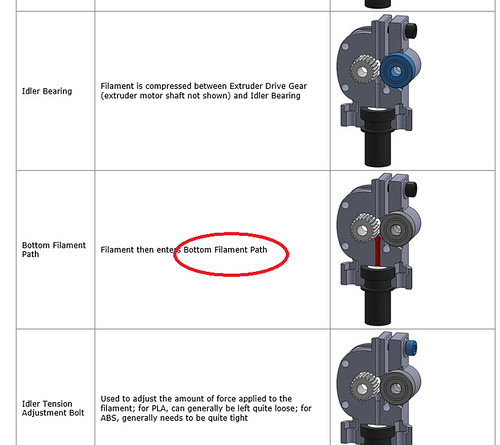
That produced more meaningful (and less scary) Google results. In particular, I owe a hat tip to Dale Reed in this MakerGear User Forum thread.
…see if you can get some fine needle-nose pliers to pull up any remaining filament in the bottom of the filament drive (if it’s sticking up out of there).
Needle-nose plyers didn’t quite work for me. But, I was able to stick the very tip of an Exacto Knife underneath the red blobbie (again, sorry for all the technical terms). And POP! Just like the Hungry Little Caterpillar and his egg, my obstruction popped right out with no force at all!
YAAAAAY! I put everything back together with my trusty Allen wrenches and printing resumed.
Phew. A whole SLEW of updates for you. Been quite busy.
Printer Problems
In high school, when I would meet friends for rollerskating, I would always be tense about falling. It just seemed like the worse thing that can happen. But after that very first fall each skating adventure, I’d relax. It was never nearly as bad as I thought.
So it goes with issues with the MakerGear M2. We had a slew of issues crop up recently. But so far (knock on wood), none of them were as paralyzingly scary as I envisioned printer problems to be. And holy crap, MakerGear Technical Support is top notch.
Perk: I learned to appreciate printing on painters tape. I actually ended up loving that I don’t have to wait for the print bed to heat up to begin and wait for it to cool to pull off prints. I can see occasions in the future where my first choice will be to print on a cool bed.
Perk: Validation– I’m a heavy user! I’m a heavy user, everyone! : )
Perk – I’ve built confidence and got to know my printer better by taking apart the filament drive.
Perk – The Cooling Fan still ran fine sans one blade… and the replacement only cost 7.50.
Now that was a lot of issues in this past week. Well, would you believe it– we still managed to keep up our Craft Show production!
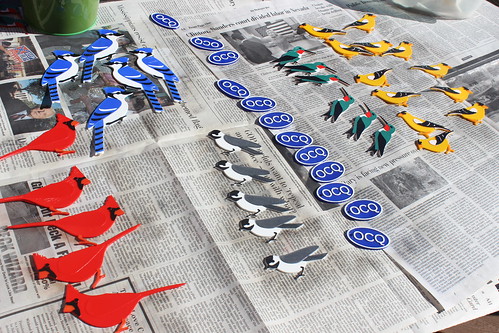
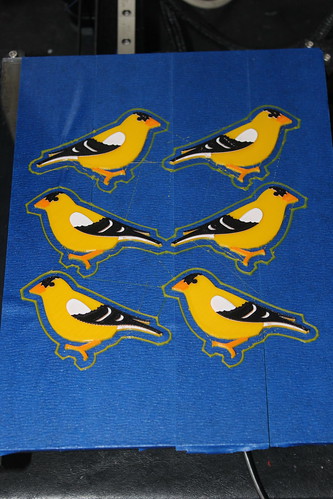
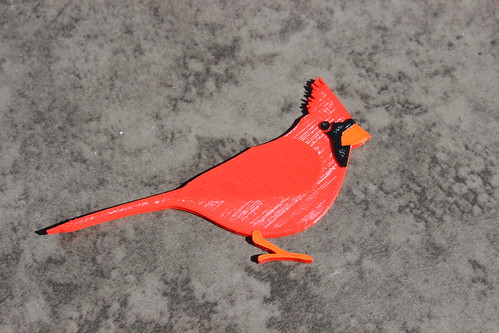
New Finch and Cardinal
I revamped my finch design to make the wing detail simpler so he matched the look and feel of the other birds, particularly the Oriole and the Blue Jay.
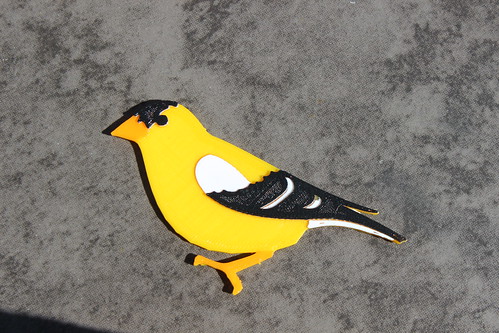
And after five iterations, I finally got a dang cardinal I like. The trick was adding in orange for his beak and feet. Subtle, but made a difference.
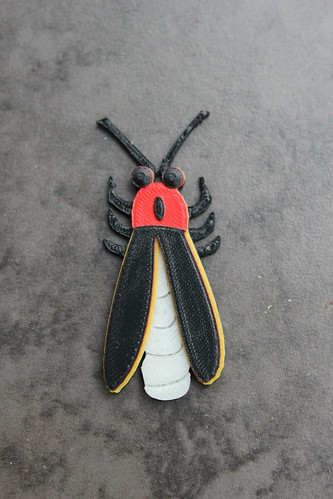
Fireflies!
I also got a Eastern Common Firefly design I’m happy with. His butt is in GlowFill, so it actually glows.
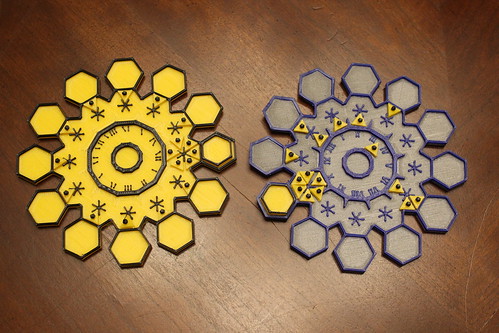
Dyson Spheres
Ryan is creating a table top game he is calling “Dyson Spheres”. He modelled the board and the pieces in OpenSCAD and we printed out a few copies for play testing. The printing part has proven to be a lot easier than the play testing. Play testing is hard when you have a 2 year old and a 4 year old constantly trying to steal your pieces.
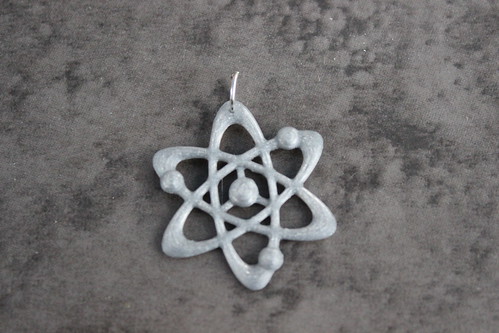
Atom Pendants Back on the Table
Previously I had fretted about adding the lovely Creative Commons Science-themed pendant to our Craft Show inventory because the hole was so small. Turns out the hole is perfect for 9mm rings. Thank you Michaels…and thank you Creative Commons.
Cork Puppies? Cork Kitties?
Last Friday night, I was looking at an overflowing bowl of wine corks my Mom had collected. I tried to brainstorm some projects for them– like Cork Snowflakes. Sidebar– it’s hard to experiment with corks when a 2 year old and a 4 year old are constantly trying to steal your corks. : )
I thought about making the corks into cats. Cork Kitties– the alliteration alone makes me want to model it. Turns out someone had already done something similar. Designer EHM made a Cork Puppy on Thingiverse. We did a test print and my Mom was instantly in love.
The design is licensed Creative Commons for Non-Commercial Use. I wrote the designer to see if I could license the design or split profits for the Craft Show. I hadn’t heard back yet, so I may have to go back to my original plan. Cork Kitties. : )
Logo
Been working with my graphics designer sister-in-law for a logo. For the first time in my life, I picked a logo based on “how will it look as a 3D print?”. Our lead contender would make a mighty fine pendant.
Staging
We have four weeks, but we are already mucking around figuring out how we want to display all this stuff. We happened to find an old metal birdhouse on clearance that our magnet birds stick to. It might be destiny.
Etsy
And I did manage to post some things to Etsy finally. I won’t be heavily promoting it until October…. after the Craft Show. Nonetheless, my heart does a little pitter-patter when I see how my prints are all starting to come together into a product line.
So yeah. I’ve been busy. : )
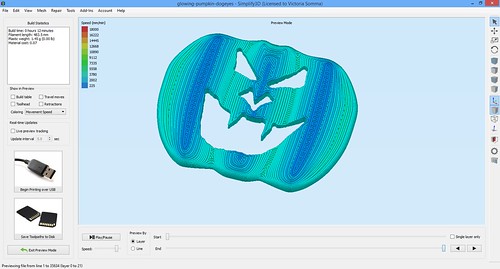
We’ve done a number of faces now for my Glowing Pumpkin Pendants for the Fall Occoquan Arts and Craft Show. I thought I would go ahead and document my carving process in Blender.
Quick background– with the pumpkins, I print 1.5mm of ColorFabb Green. I next switch over the ColorFabb GlowFill for another 1mm. Finally, I end with Translucent Orange filament from MakerGear.
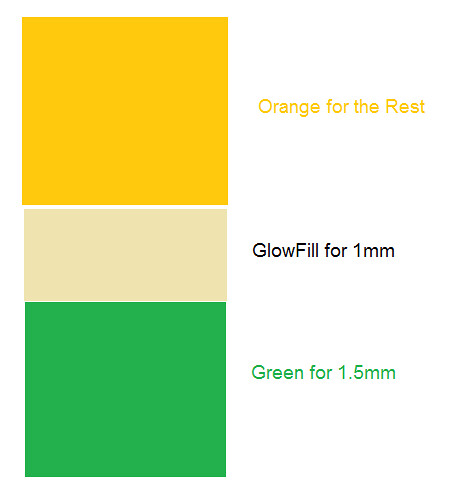
What this all means is whatever face I’m using to carve out of my pumpkin template (be it through OpenSCAD, Inkscape, ShapeJS, or any other means)– I want the bottom to be right at the 2.5 mm mark. I want the hole to extend all the way down through the orange to the top of my GlowFill.
Although, not intuitive, this is pretty easy in Blender.
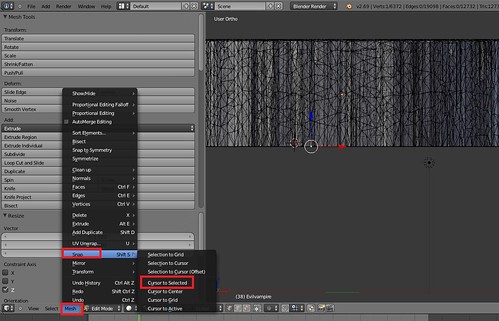
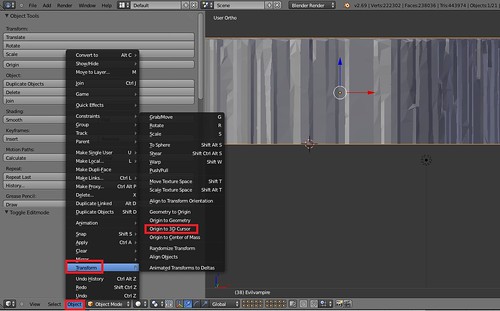
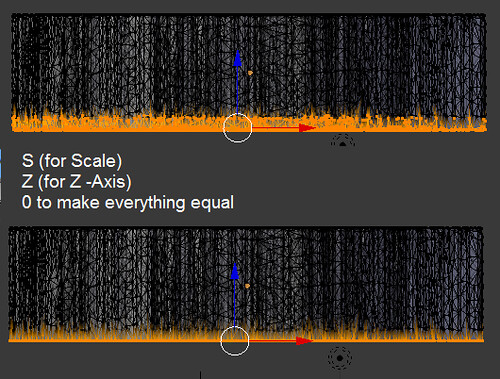
First I import my face (in .STL format) from the File->Import menu option. If necessary, I resize it to fit more appropriately on the pumpkin. Now the fun part– what’s the easiest way for me to make sure my face carving goes all the way to the 2.5mm mark?
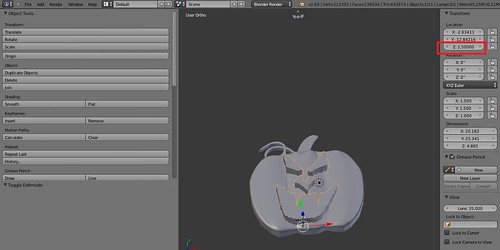
And there you have it— the bottom of my face I wish to carve out of the pumpkin is down at the 2.5mm mark, the top of my GlowFill layer. At this point, I can proceed with going to the Modifiers, adding a Boolean modifier and doing a Difference Operation on my pumpkin template and my face. (The difference allows me to subtract an object from another object).
Just to be sure, I do double check in Simplify3D that my orange process looks we expected. In particular, I don’t want to see a solid layer of orange covering up my GlowFill.
I haven’t had any trouble with ShapeJS and my Black and White PNG images. However, if I were ever to be concerned my pumpkin face did not have an even bottom, I could make sure the bottom was consistent by:
And there you have it— how I carve my pumpkins (for now).