
A faux pas I sometimes make is I value my own designs based on how I perceive their complexity. I am continually surprised at how many people delight in the breastfeeding pendant. Now, it did take me months to make, but that was because I was tending to an infant and learning Blender. : ) It’s probably my simplest design… and the one that is purchased most on Shapeways.
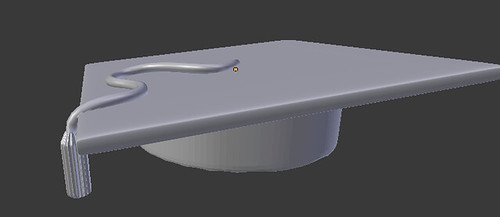
This past May, I may have undervalued another design. With graduation season coming up, my Mom suggested we print some little graduation caps for some family friends. I wasn’t too enthused by the items on Thingiverse, so I spent about an hour one Sunday designing my own. I added a little bit of personalization to each cap by adding the graduate’s name on the top. In my mind– pretty simple. Hey, I did it AND ate a waffle at the same time. I didn’t even consider uploading it anywhere.
But it turned out the little caps were well received, particularly with one high school graduate…whose friends suddenly wanted their own (two days before graduation). I just did not anticipate such a simple design would provoke such interest.
Last week, Shapeways announced a new pilot feature– the CustomMaker. I had set up personalized products before with Shapeways (School Bus Wine Stopper, Cancer Ribbon, Woven Heart Ornament). Previously, it was a fairly involved process where you would set up what variables you wanted to prompt the customer for. The customer would submit those details with the order. You’d manually make the model and upload it back up to fulfill the order.
CustomMaker automates that process– it modifies the model for you. Not only that, it’s much easier to setup and gives the buyer instant previews of how the product will look!
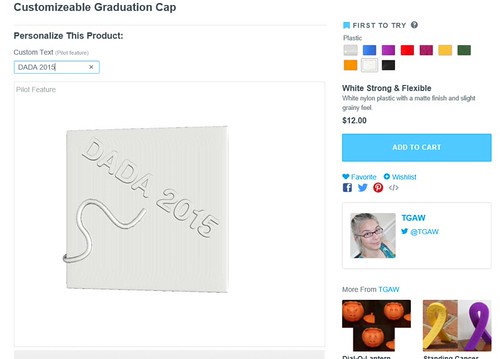
And I had just the model to test out the new feature! So this past Sunday (after eating waffles, it’s our Sunday tradition), I tried my hand at setting it up. It was super easy.
You can add a Text Box and/or an Image Box (where the customer can upload an image) to your model. You get to drag and drop and resize as needed, pick whether you want it engraved or embossed, and you get to pick the size of that detail (I went with 0.5 mm)
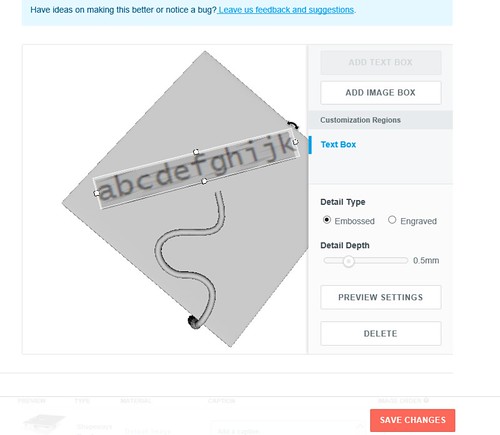
If you have a hard time visualizing or decided between engraving and embossing, you can click on Preview Settings.
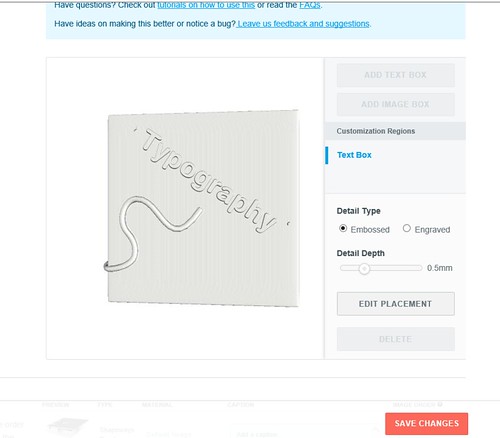
The top of my graduation cap is angled. I was curious to see what the text would do about that. I was delighted to see the feature was smart enough to angle the text so it was flush with the top of the cap.
Then you simply Save Changes are you are ready! When the customer comes to my graduation cap page, he/she can fill in the text and the preview on the screen refreshes right away. With CustomMaker, the guess work is eliminated. The customer has an immediate feel for what he/she is ordering.
I went ahead and ordered one to try it out. It turns out, there was one very special grad I overlooked in June. I owe him a gift card… and a little cap to boot.
Wanna Learn More?
Check out Shapeways’ Getting Started with Custom Maker Tool Tutorial