We’ve done a number of faces now for my Glowing Pumpkin Pendants for the Fall Occoquan Arts and Craft Show. I thought I would go ahead and document my carving process in Blender.
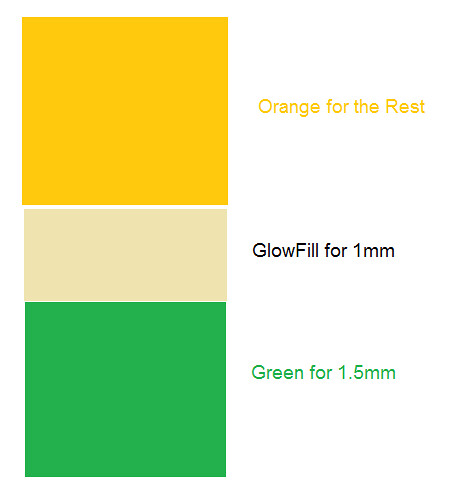
Quick background– with the pumpkins, I print 1.5mm of ColorFabb Green. I next switch over the ColorFabb GlowFill for another 1mm. Finally, I end with Translucent Orange filament from MakerGear.
What this all means is whatever face I’m using to carve out of my pumpkin template (be it through OpenSCAD, Inkscape, ShapeJS, or any other means)– I want the bottom to be right at the 2.5 mm mark. I want the hole to extend all the way down through the orange to the top of my GlowFill.
Although, not intuitive, this is pretty easy in Blender.
First I import my face (in .STL format) from the File->Import menu option. If necessary, I resize it to fit more appropriately on the pumpkin. Now the fun part– what’s the easiest way for me to make sure my face carving goes all the way to the 2.5mm mark?
- I switch to Edit mode.
- I click on one of the vertices that is at the bottom of my face.
- I go to Mesh->Snap->Cursor to Selected
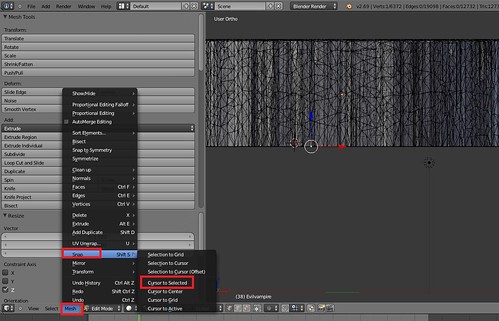
This moves my 3D cursor to that selected vertex. - I switch to Object mode
- I go to Object->Transform->Origin to 3D Cursor
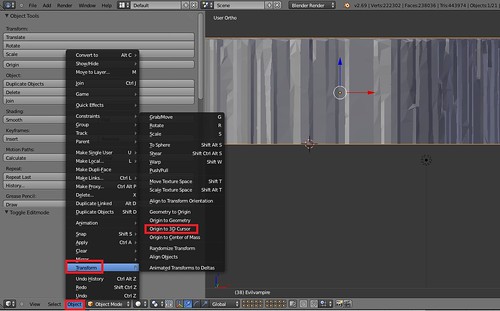
This makes the point of reference for that object that very same vertex. This means when I am filling in coordinates for that object, it is using that vertex for the placement. -
Finally, at this point, I just change the Z position of my object (assuming I’m on Global) to 2.5mm.
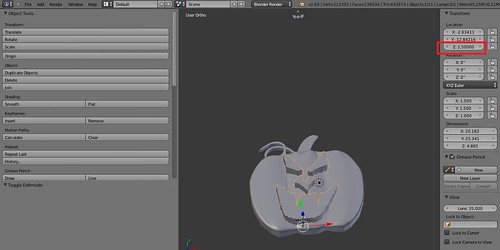
And there you have it— the bottom of my face I wish to carve out of the pumpkin is down at the 2.5mm mark, the top of my GlowFill layer. At this point, I can proceed with going to the Modifiers, adding a Boolean modifier and doing a Difference Operation on my pumpkin template and my face. (The difference allows me to subtract an object from another object).
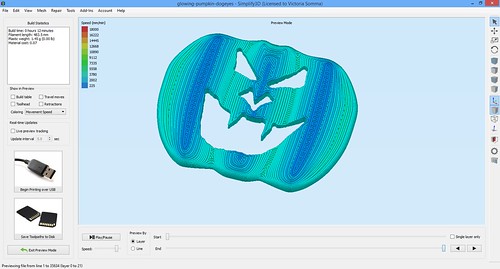
Just to be sure, I do double check in Simplify3D that my orange process looks we expected. In particular, I don’t want to see a solid layer of orange covering up my GlowFill.
I haven’t had any trouble with ShapeJS and my Black and White PNG images. However, if I were ever to be concerned my pumpkin face did not have an even bottom, I could make sure the bottom was consistent by:
- Go into Edit mode
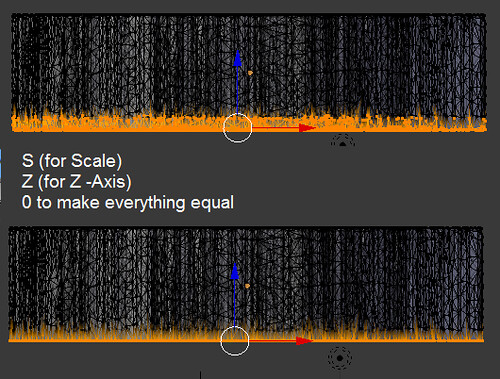
- Select all the vertices on the bottom of my face (I typically take advantage of Select->Border Select)
- Hit S (for Scale) and then Z for the Z-axis and then 0. This sets ALL the selected vertices to the exact same Z height, so I’m thoroughly ensured if one vertex is at 2.5mm, they all are.
And there you have it— how I carve my pumpkins (for now).