
One of my favorite new channels is Clare from Make It And Fake It. I love her courage to fail and her humorous delivery sits very well with me. Today I went to catch up with her latest episode and was delighted and surprised to see her mention me. In this video, she works on embedding rice with Cura to make an Egg Shaker. Enjoy!
Monthly Archives: May 2017
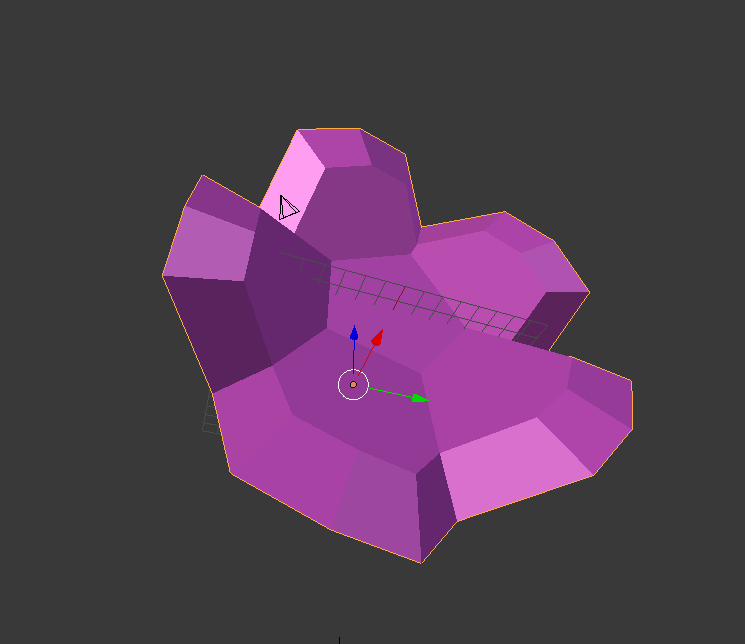
Tom Lum’s Multi-Colored Print
One thing I find absolutely invigorating– helping people out in the community. After my Simplify3D Print of the Week, Twitter user @TomLum1 reached out with some questions. Look how quickly he mastered and applied his new knowledge! Lovely!
@TGAW taught me a new skill. Can't wait to teach my students this next year. @Simplify3D single extruder multi color printing. pic.twitter.com/enSoHopGEx
— Tom Lum (@TomLum1) May 19, 2017
Etsy Shop Cameo on Mailbox Monday
Aww, my Etsy Shop snuck into Abuzz Design’s Mailbox Monday Livestream last night. I love seeing the growing presence of 3D Printing on Etsy. My shop is just one that Lauren covers (all the links stolen from Lauren’s video description are below). Be sure to check out and, if possible, support my fellow creators!
A big thanks to Lauren for always being such a supportive member of our great community! Definitely check out Lauren’s shop at http://etsy.me/2raDpGy
A Pyro Design Etsy – http://etsy.me/2qm4Gop
Improper Engineering Etsy – http://etsy.me/2qpzMtr
3D Central VA – http://etsy.me/2qlZWiy
MaxCrft – http://etsy.me/2pPfoRA
JAT.MN – http://etsy.me/2rjQytB
VickyTGAW (ME!) – http://etsy.me/2qlIjjh
Simplify3D’s Print of the Week!!!
Well now, that was a surprise. I started getting some unexpected Twitter and Facebook notifications. I was surprised to find I was highlighted by Simplify3D for their Print of the Week.
This week's Print of the Week goes to user @TGAW for this huge multicolor print using a single extruder and multiple processes! #S3DPOTW pic.twitter.com/fiSdN3IwtZ
— Simplify3D (@Simplify3D) May 12, 2017
This five color print is for a friend in Crookston, Minnesota. I, of course, use my beloved Simplify3D Multiple Processes. I believe it is my largest multi-colored print– it took up the whole bed of the MakerGear M2.
I’m glad Simplify3D enjoyed the print. I hope my friend does as well!!! 🙂
From Failure Comes Knowledge… Again
One thing I absolutely love about having a Maker Coin celebrating failures is people feel comfortable and free to share their mishaps and failures making the coin. Thingiverse user Waldamore brought me absolute delight this morning with this Make.
I have had nozzle offset mishaps too. : )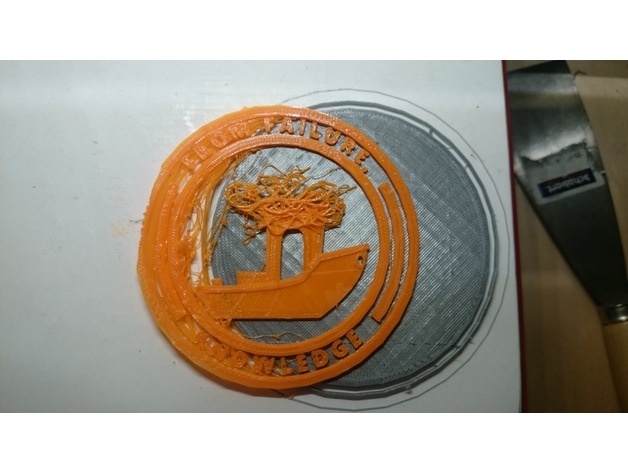 Love it! Viva la Fails!
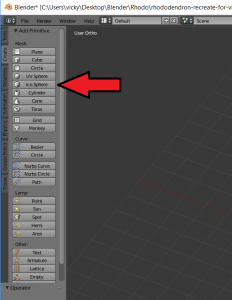
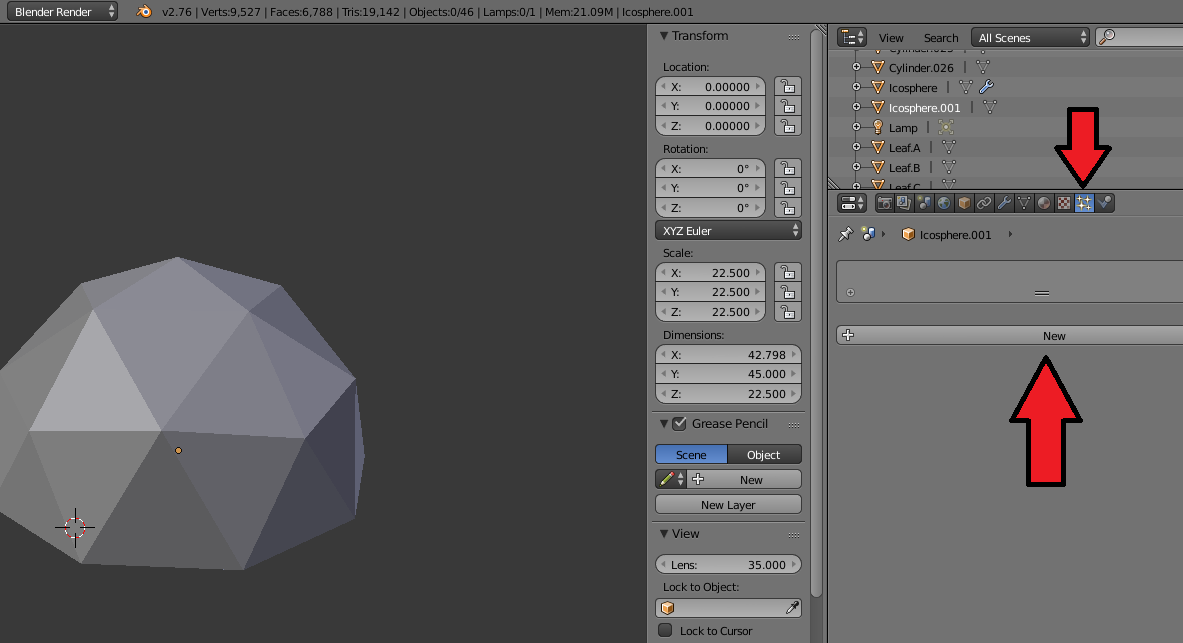
Using Blender’s Particle Systems for 3D Printing
One of the things that gives Blender its reputation of having a large learning curve is it is geared towards animation. It has a lot of extra features or capabilities we don’t use for 3D Printing.
Or do we?
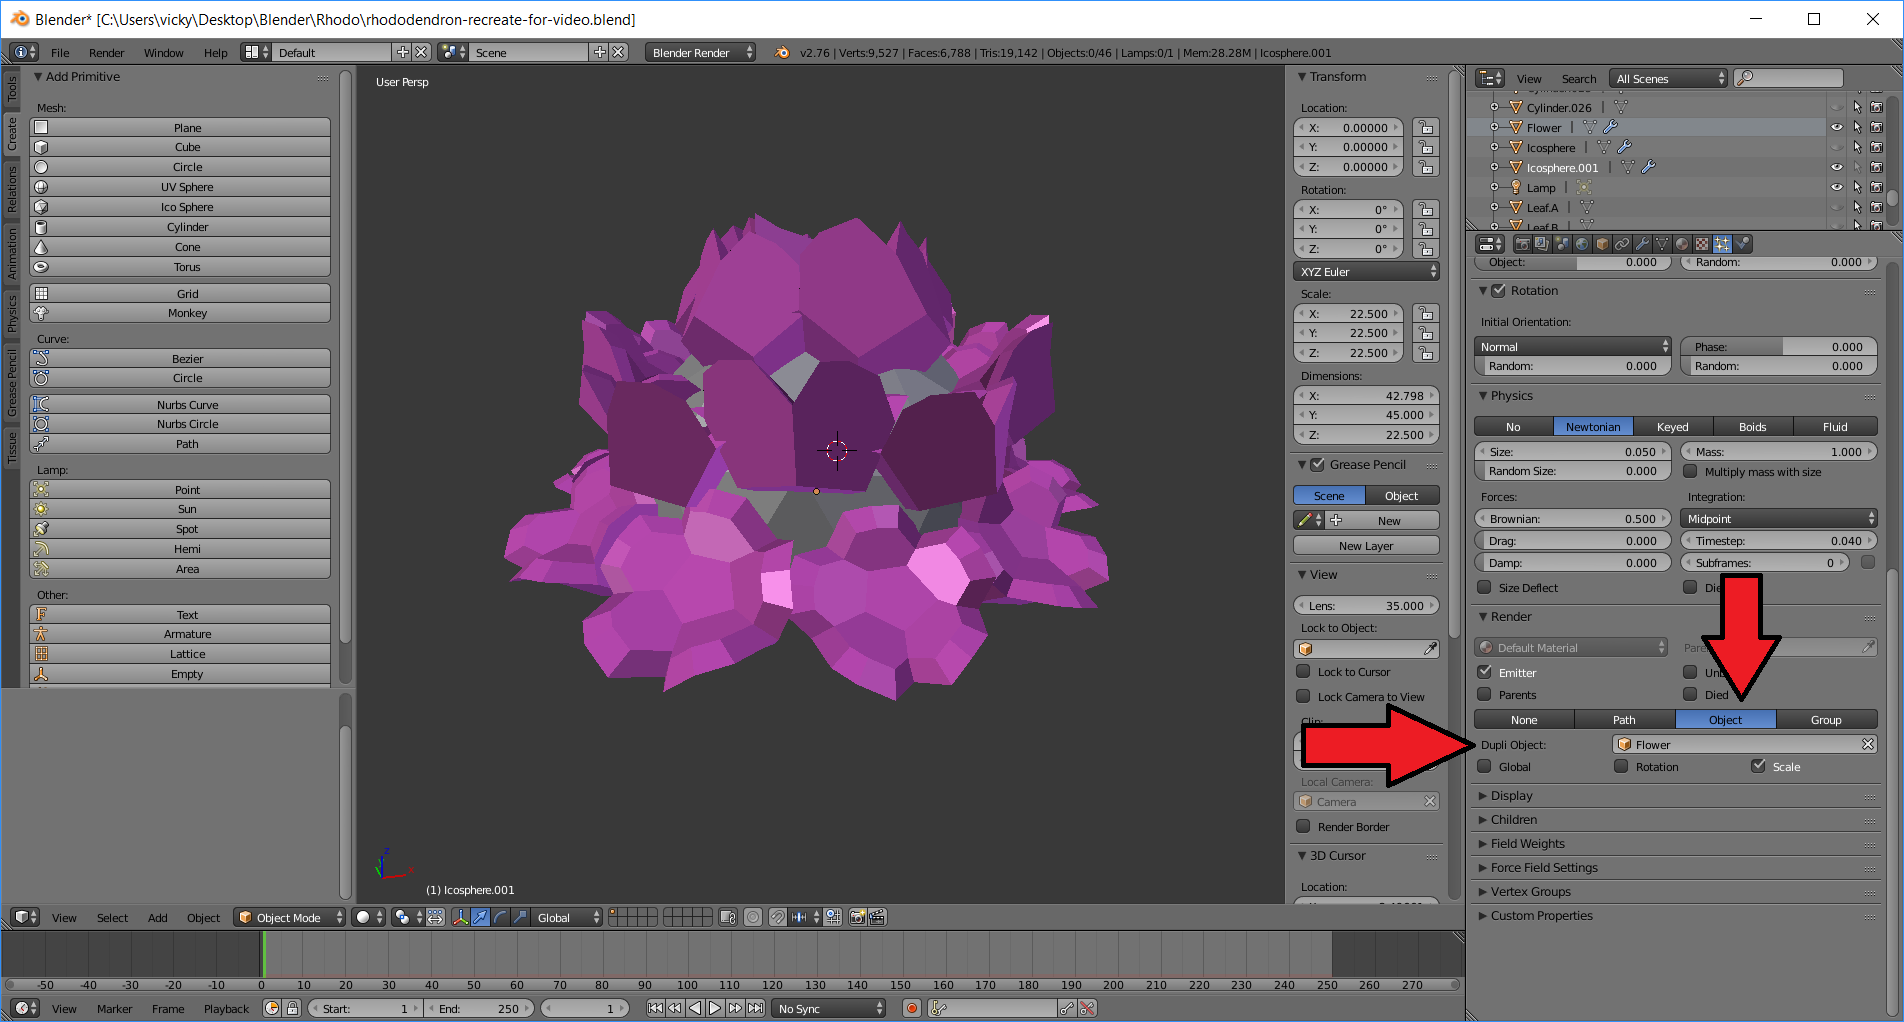
Homesick for the Appalachian Trail, I embarked on making rhododendron themed drawer pulls. It was a Blender animation feature helped me pull off my vision. I had never heard of “Particle Systems” before and with good cause. They are typically used for animating dust, smoke, water, and hair. Thanks to a wonderful tutorial video by Blender Facile, I learned how I could also use this feature to convert a single flower model into the trademark ball of flowers for the rhododendron.
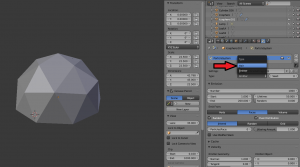
My steps for using the Particular System were:
- First, I made a model of an individual flower. Thinking about how I wanted this to be sturdy for people to grab, I kept the petals thick and shallow.

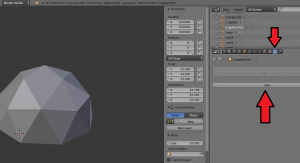
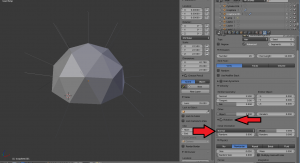
- To convert my single flower into a ball of flowers, the first thing I did was add an Ico Sphere with 2 subdivisions to my Blender project.
- I went ahead and removed the bottom half of my Ico Sphere and gave it a flat bottom.
- Once I was satisfied with my Ico Sphere, I clicked on the Particle Systems icon
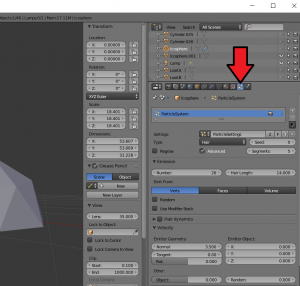
- I clicked on New to create a new Particle System
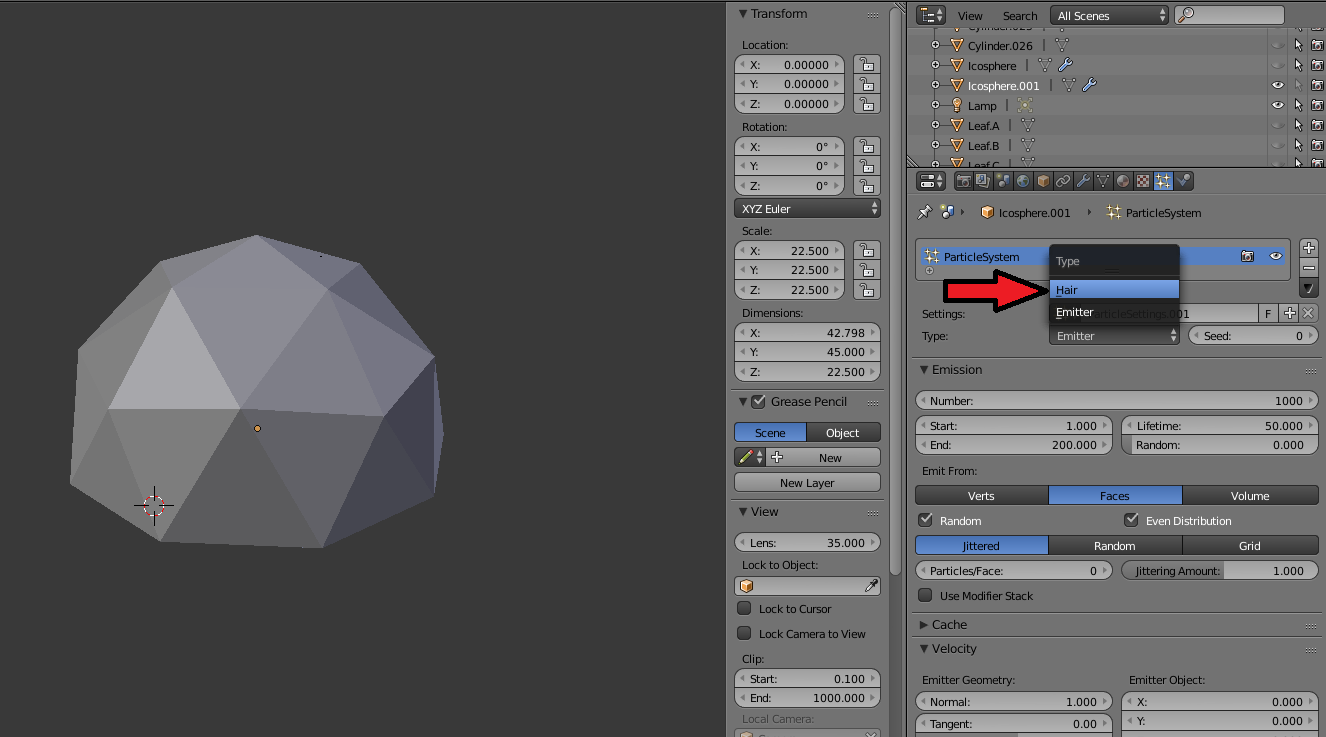
- I changed Type to “Hair”
- I checked the Advanced box which would allow me to change some rotation settings later
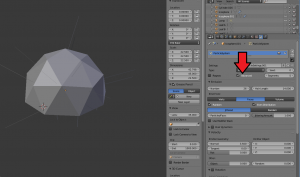
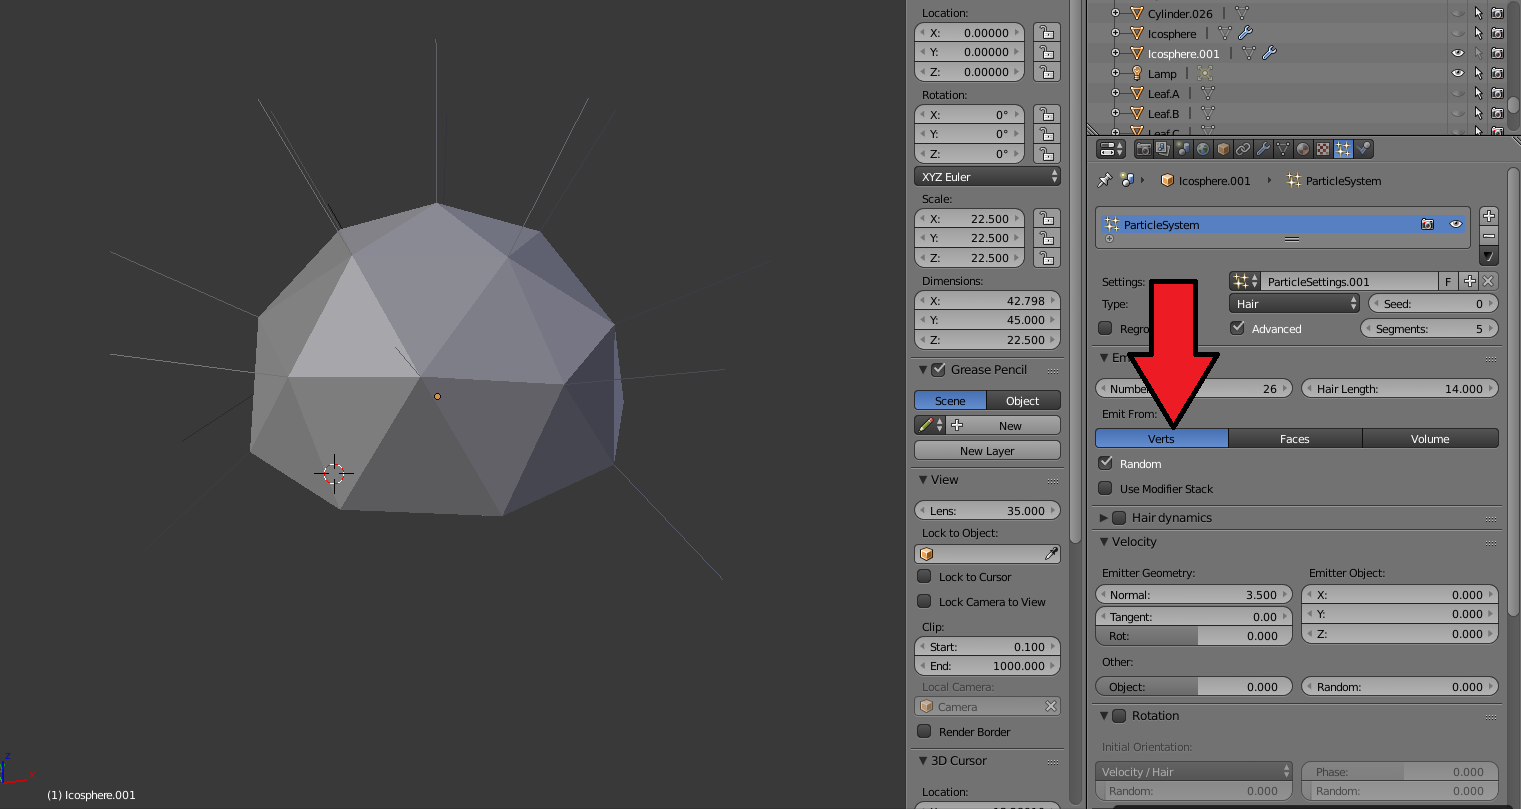
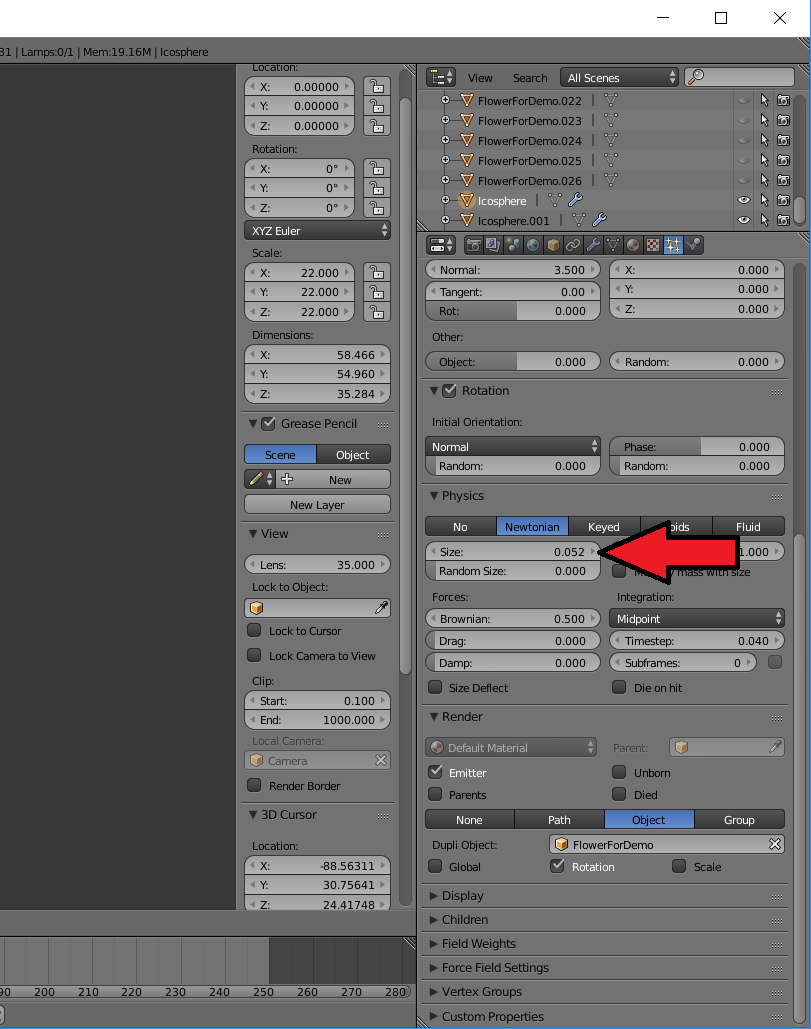
- Under the Emissions section, I clicked Verts. This is telling Blender that each “hair” (aka flower) is going to be associated with a vertex in my model. For Number, I put in 26. This just happens to be the number of vertices in my modified Ico Sphere.
I also unchecked the Random box.
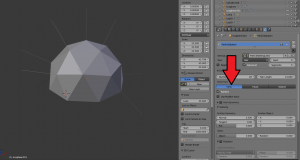
- Under the Rotation section, I first checked Rotation and then for Initial Orientation, I picked Normal. The system is going to rely on my Face normals (the direction my faces are) to determine which way to rotate my “hairs”.
- Under the Render section, I picked Object and for Dupli Object, I selected the single Flower model I made. And then my flowers appeared on my sphere.
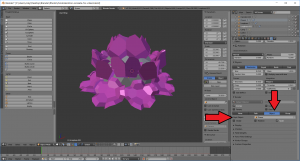
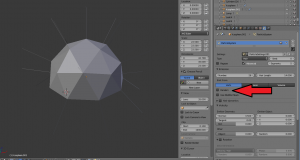
- Under the Render section, I checked Rotate and my flowers oriented themselves accordingly.
- Since this is a feature geared towards animation, there is a large Physics section that really does not apply to my purposes. The one thing I did play with was the Size. By adjusting this setting, I was able to get my flowers to a size that provided some good coverage over the Ico Sphere.

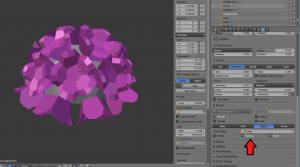
- Once I was satisfied with all my settings, I clicked on the Modifiers icon and clicked on Convert.
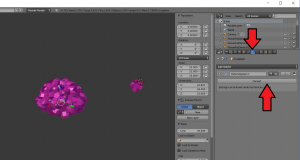
- All of my “hairs” (aka flowers) became official objects in Blender. I was able to click on each one and manipulate it like any other Blender object. For example, I went ahead and rotated my bottom row of flowers to better achieve the look I was going for.


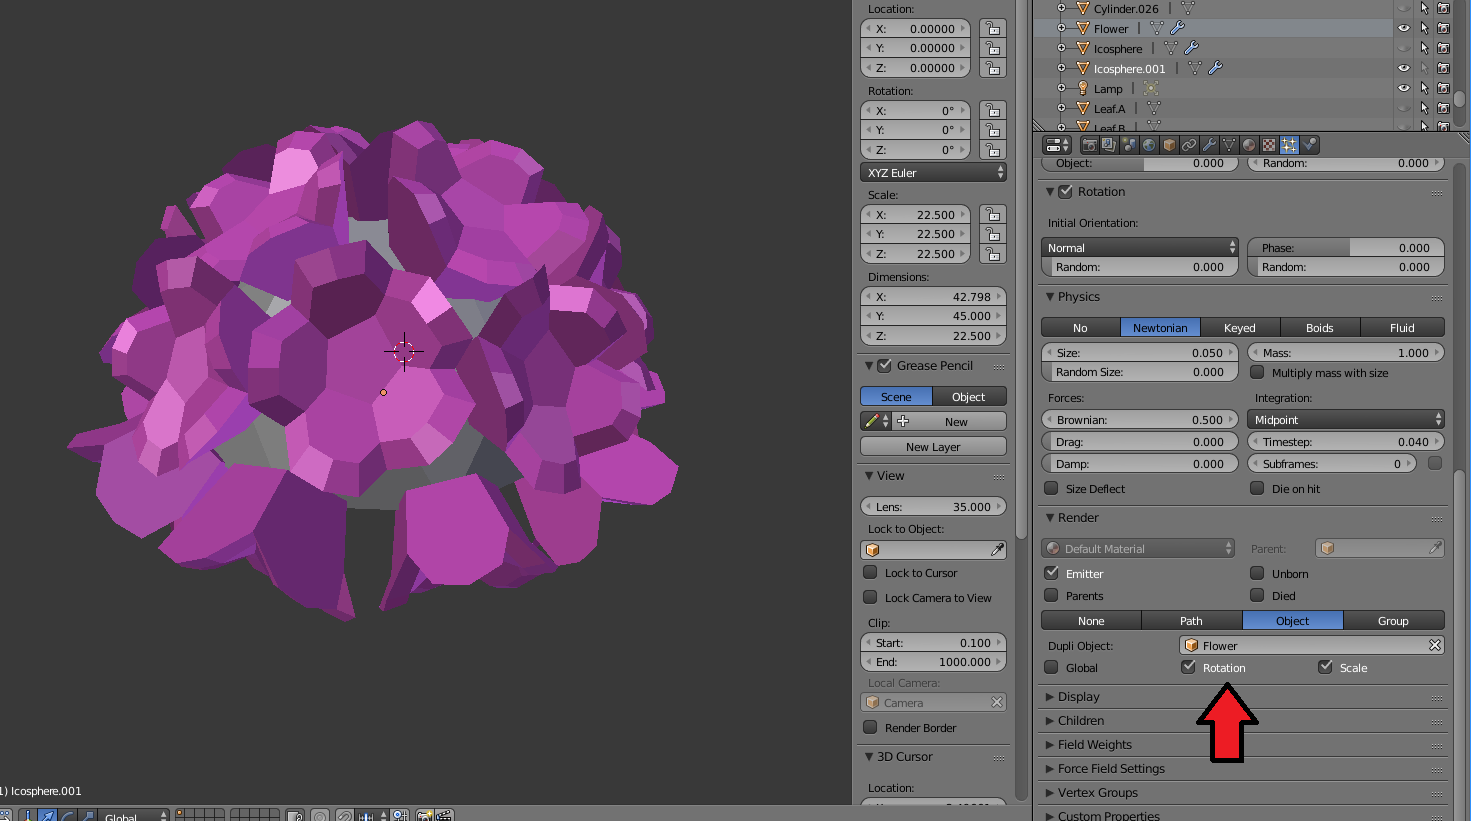


Eureka! I had my ball of flowers! My modeling journey was far from over, but the hardest part about that journey was done, thanks to an animation feature I never thought I would need.
Inaugural 3D Printing Lady Chat
This afternoon I had the delight of joining some of the female YouTube 3D Printing Creators for our very first Lady Livestream.
- Vicky – https://www.youtube.com/channel/UCkKm…
- Lauren –https://www.youtube.com/channel/UCUZ5…
- Cat – https://www.youtube.com/channel/UC3md…
- Heather – https://www.youtube.com/user/alfonsopyro
- Mara – https://www.youtube.com/user/MatterHa…
- Barb – https://twitter.com/barb_3dprintny
- Molli – https://www.youtube.com/neoportnoy3dp…
We all had a blast and hope to do it again next month. In the meantime, you can catch the inaugural episode on Clare’s Make It & Fake It Channel at https://youtu.be/1Csy_5cv9Fs
Community Live Stream – Myths of 3D Printing
I had some Internet woes, but I did join some of the community members for this week’s 3D Printing Friday Night Community Hangout. This week, we were on Zidim’s 3D Printed Trains Channel. The topic was “Myths of 3D Printing”.
You can watch this episode at https://www.youtube.com/watch?v=p747ClxAdw8
Interested in future Friday 3DP Community Hangouts? Be sure to follow @F3DPCH on Twitter for news of upcoming episodes.
English Version of “From Failure, Knowledge” Maker Coin
By request for a community member, there is now an English version of the “From Failure Comes Knowledge” Maker Coin. That version is “maker-coin-english.stl” in the files section on Thingiverse.
