3DPrint.com is doing a wonderful series where they are doing profiles of women in 3D Printing. I am quite honored to be included with the women they spotlighted. My profile published today. It includes an answer to the frequently asked question, “What does TGAW stand for?” 🙂
This week’s Friday Night 3DP Community Hangout was a fun one! Hosted at Joe Mike Terranella’s, we discussed different 3D Modeling programs and took turns doing screen sharing and showing off the programs we are familiar with. I very much enjoyed sharing OpenSCAD and Blender, as well as seeing more of Fusion 360, which definitely has my attention.
Catch the full episode below.
For more details on future Friday Night 3DP Community Hangouts, follow @F3DPCH on Twitter.
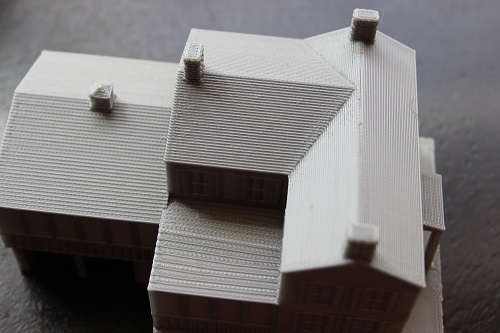
Greetings! I am starting to build up quite a collection of 3D Printed buildings! Today I thought I would give you a little tour of them and my design process and share some of my design guidelines and tips.
I’m from Prince WIlliam County Virginia which is outside of Washington, DC. With the exception one gazebo from New York, all my buildings hail from Prince William County, Virginia and most of those right smack from my town, Occoquan. So far, I have
Mamie Davis Gazebo in Occoquan, Virginia
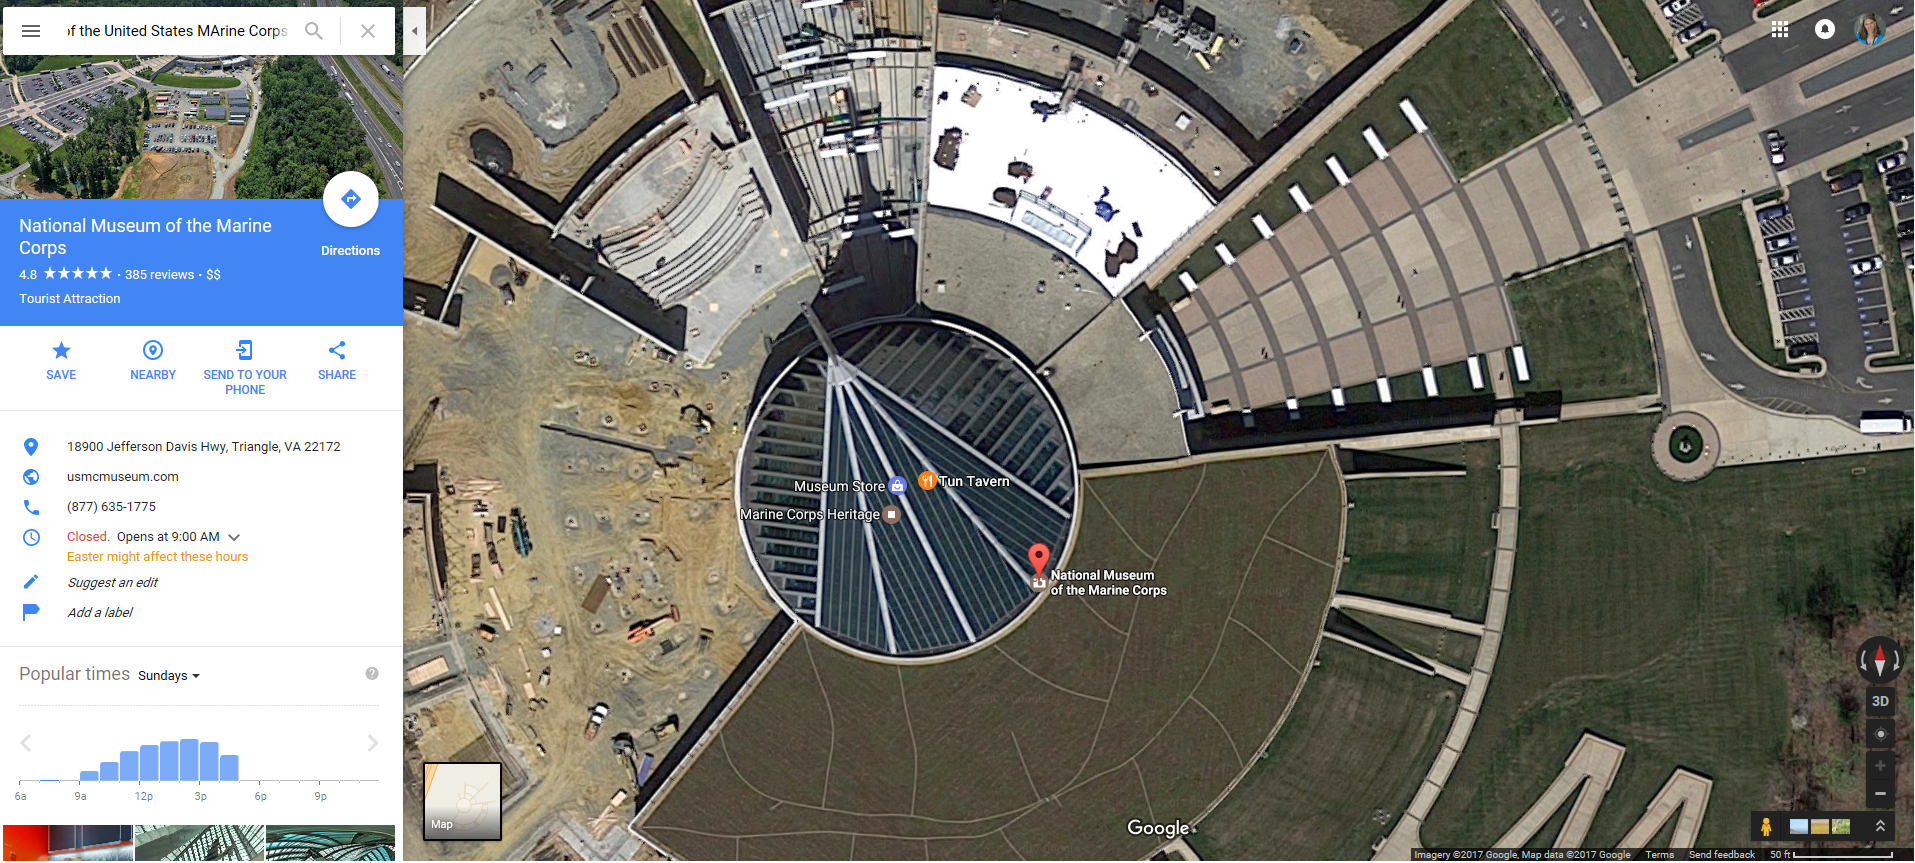
The National Museum of the United States Marine Corps from Quantico
Mill House Museum in Occoquan, Virginia
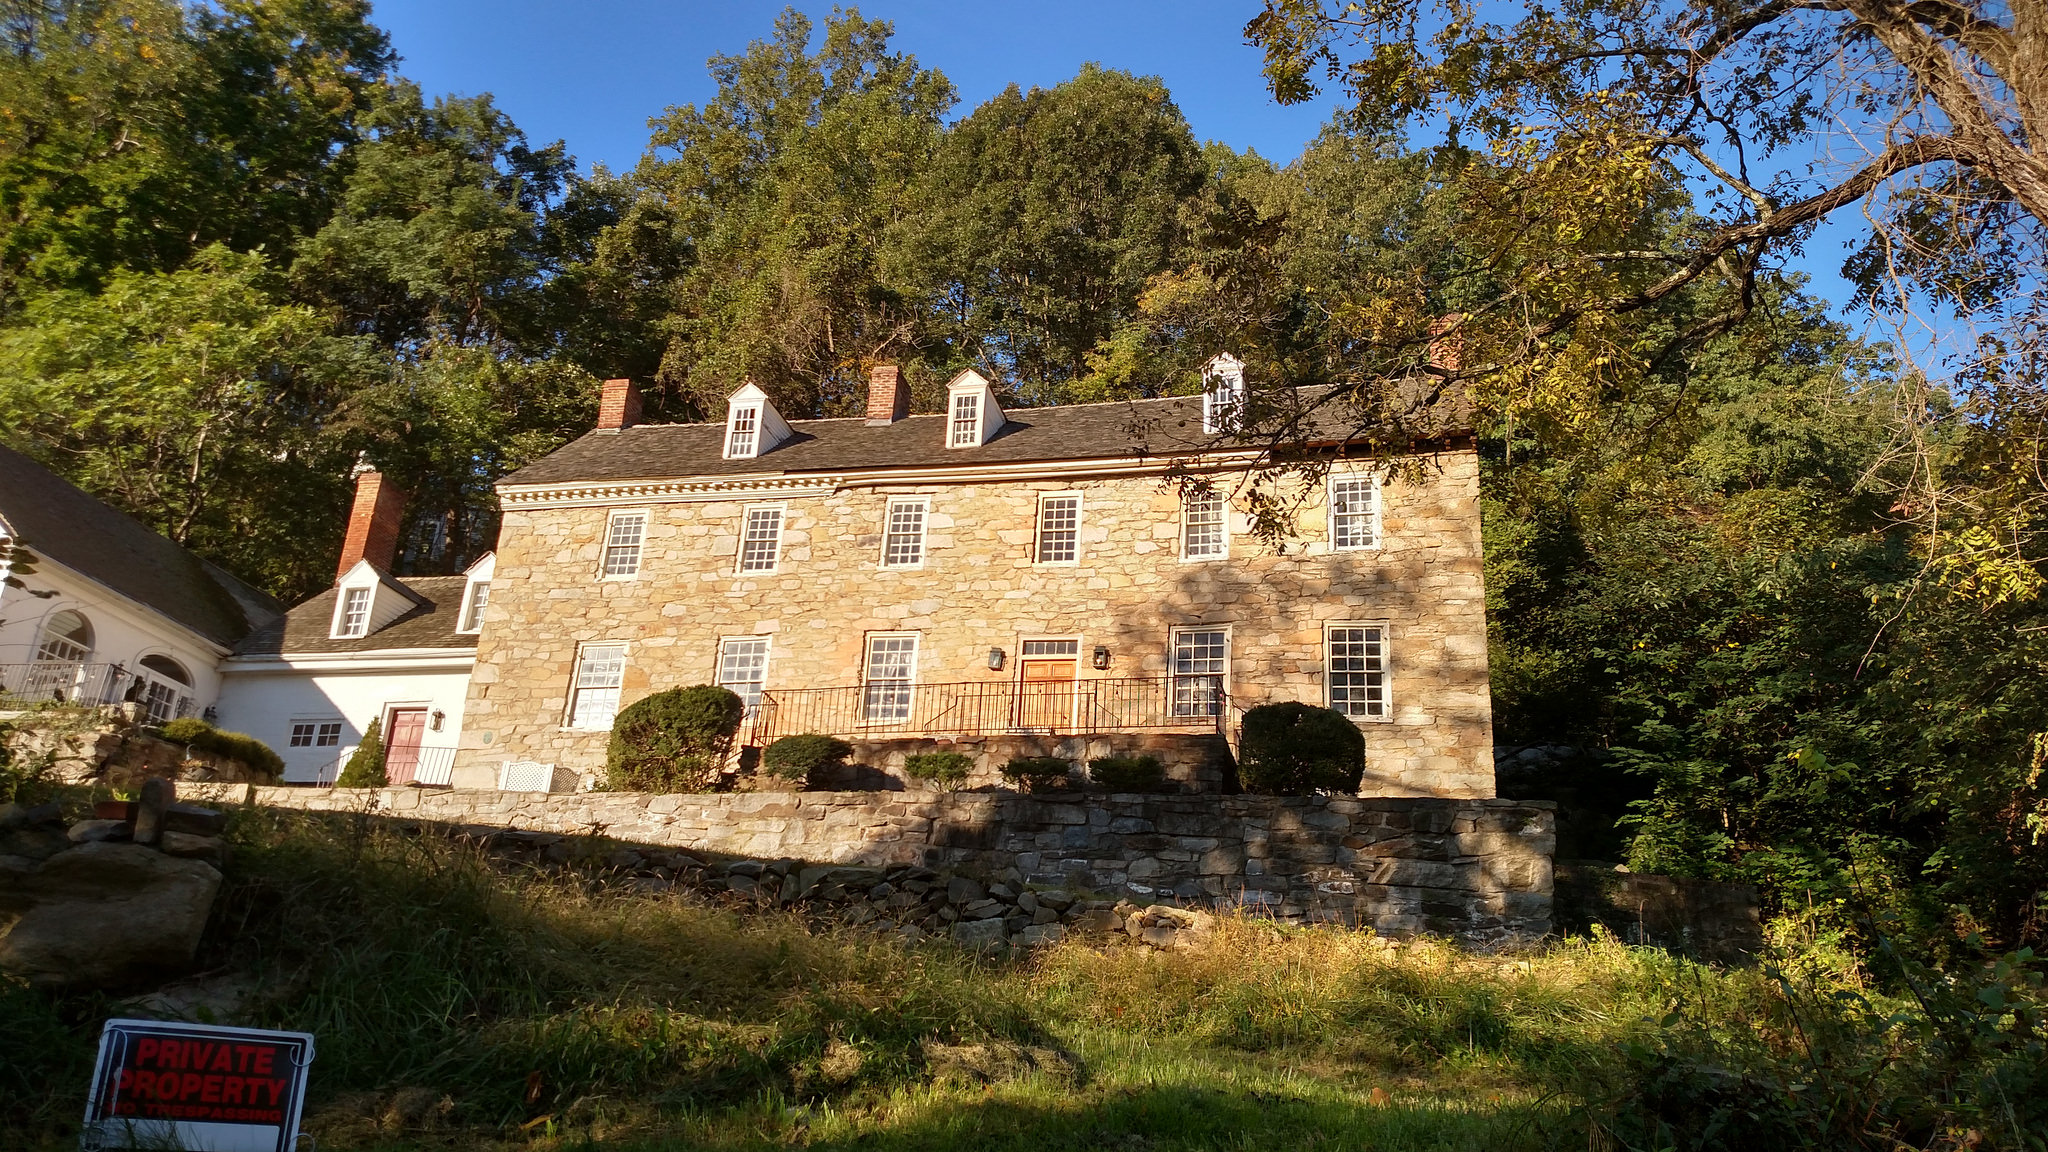
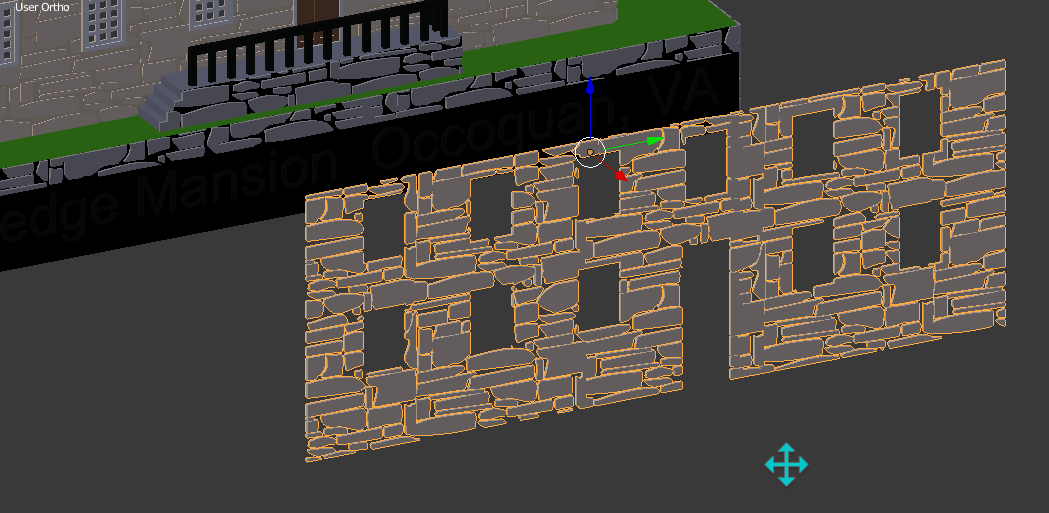
Rockledge Mansion from Occoquan Virginia
And then, a custom piece, My Old Neighbor’s House, Occoquan Virginia.
All of these I modeled in Blender and they all start with one thing.
Reference Images
I go out and take reference images. In the case of my neighbor’s house, the prints were a gift and I needed to exercise stealth, so I actually tromped through the woods to snag some pictures of the back of the house. In the case of the Rockledge Mansion, I emailed the home’s owner which allowed me to open up a dialogue with them and I scored an amazing tour of the outside and the inside on the mansion.
If I needed to supplement my own images, I found Flickr and Google Streetview to be a great resource for finding images of the more famous buildings
And…. there were two cases, where I really needed an aerial view to really get a good grasp of the building. The National Museum of the United States Marine Corps is a great example of that. I had all these side images and I just still could not figure out the geometry of the building. Something wasn’t right. Google Earth to the rescue! The aerial image was the missing piece I needed and suddenly everything clicked together.
Base Model
Blender does have the ability where I can create what’s called an Empty and import in an image. I can rotate these, scale them, make them translucent, so it is very helpful for me as I’m trying to get the proportions of my base shapes right.
Detailing
With the detailing, I have done it a very formal way where my windows and my doors are actually a part of the base model. I used a tool called Loop Cut and Slide to make segments in my house where I’m going to put my windows and doors and then I extrude and subdivide accordingly. What I’ve decided I preferred is do model these details as separate objects. I’ll have Window Model, a Door Model, a Light model, A Railing model. I rather enjoy how easy it is to copy and paste that way.
Tip – When you are doing separate models with your detailing (and you aren’t going to do formal Boolean Unions in Blender), you want to make sure they are exactly flush with the base house. At least in Simplify 3D, if there is overlap, Simplify 3D will leave gaps between the two objects– whereas if you have them lined up exactly, you can be super lazy in Blender and Simplify 3D will recognize them as objects that should be one and slice accordingly.
Detailing Design Guidelines
With my detailing, I tend to keep them 0.3mm – 0.5mm high. With my 0.35mm and 0.40mm nozzles, those “90 degree overhangs” have no trouble on my printers, don’t need supports and still render very well in the final print.
Detailing Tour – Windows
Like most things the window detailing is about 0.3mm – 0.5mm high. In my neighbor’s house, for example, the panes are 0.4mm high and then the shutters are another 0.1mm above that.
Tip – Slice as you go
When I’m working with small details and I want to make sure they translate, one thing I do is slice as I go. A perfect example of this is window panes. My Mill House Museum, the windows came out fine on a Shapeways fancy Sand Stone Printer. When I went and printed it on my FFF printer, I noted the vertical panes were too thin so the printer didn’t bother with them. In subsequent models, I’ll preslice sections to see how it is going to look on my intended printer.
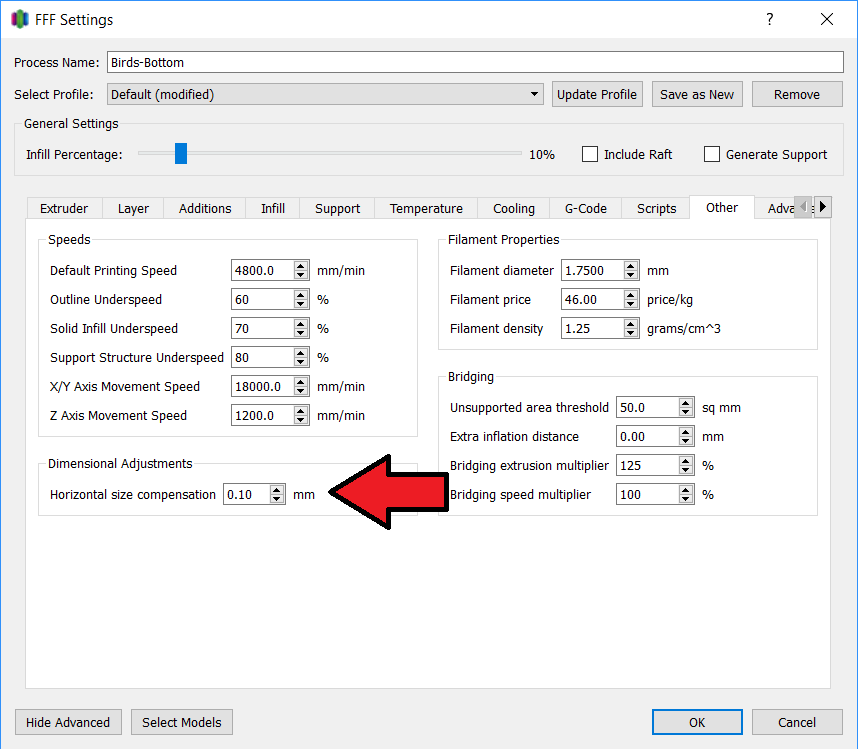
If you don’t slice as you go and you find some missing details, there are options. In Simplify3D, you can try to adjust Horizontal Size Compensation (It’s under the Other tab) to get a better slice.
Detailing Tour – Outdoor Lights, Bay Windows, Garage Overhangs
I modeled the light, but there was deviation from real life— if you look at it from the side, I taper the bottom up– I give it a nice 45 degree angle to help with the overhangs. I did the same thing with the Bay Window and also you’ll see a small triangular wedge between the car port and a screened in porch. This is just to give the printer some solid overhangs to work with.
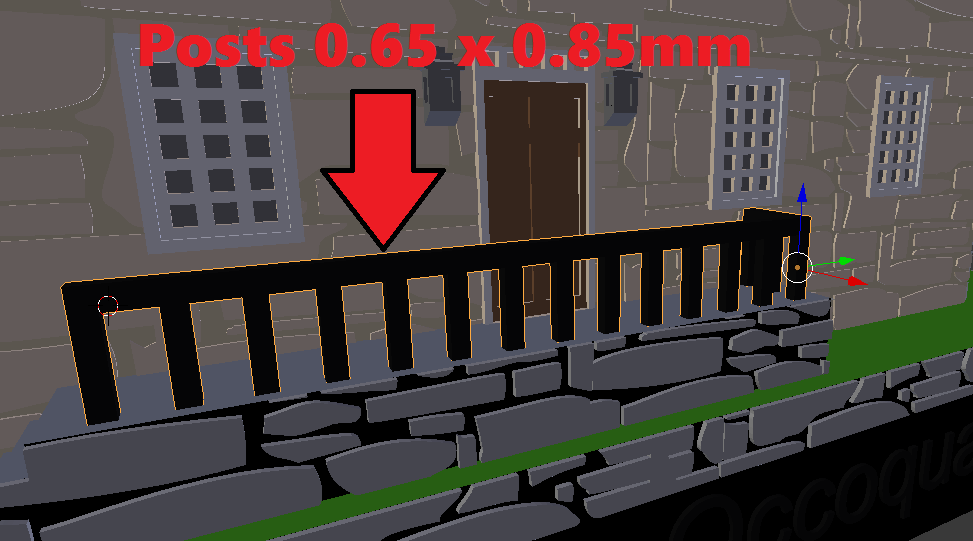
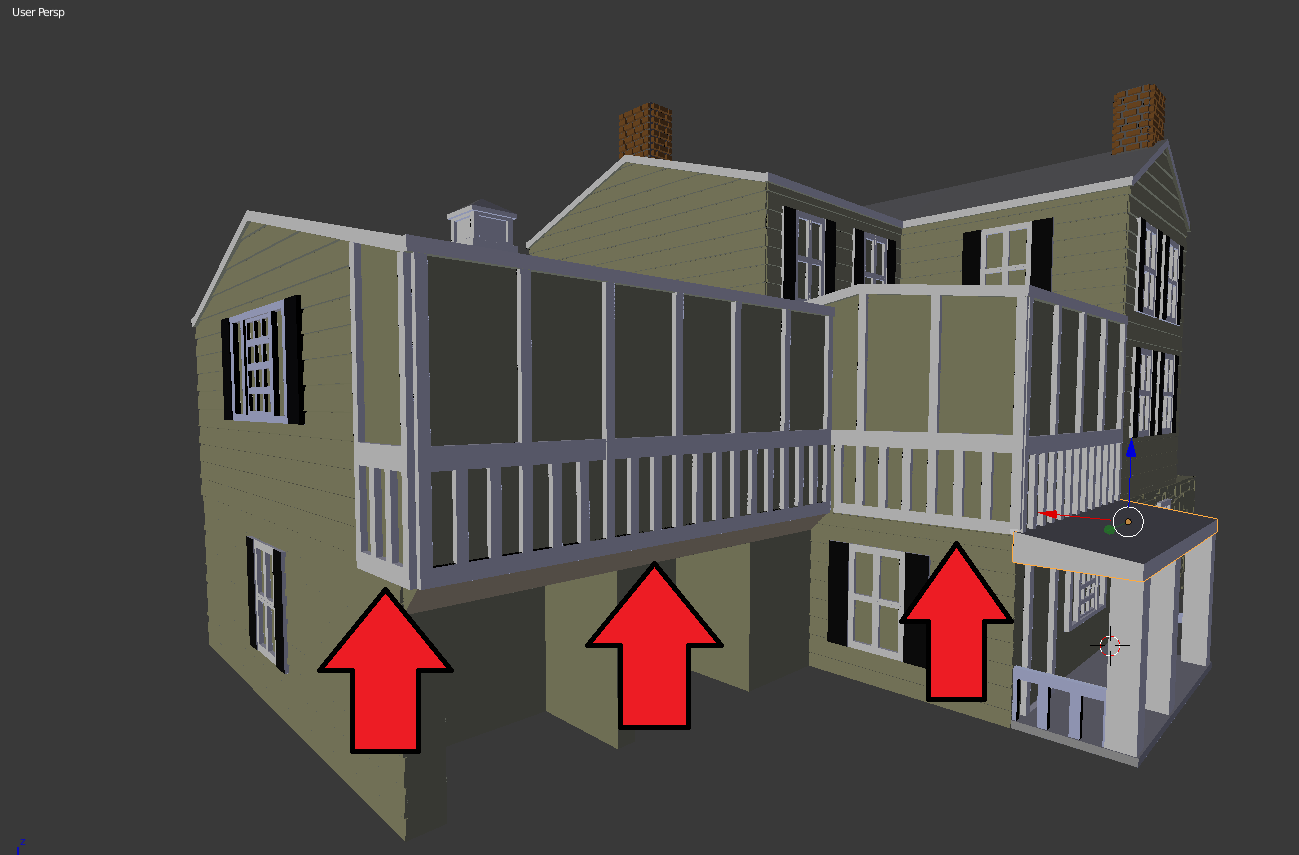
Detailing Tour – Railings
The biggest trick to the railings is coming up with the dimensions with the slats. I didn’t want something too delicate. I have found 0.65 – 0.85mm to work.
And I reused through measurements on my neighbor’s house. I just got and pasted to get their detailing for their screened in porches.
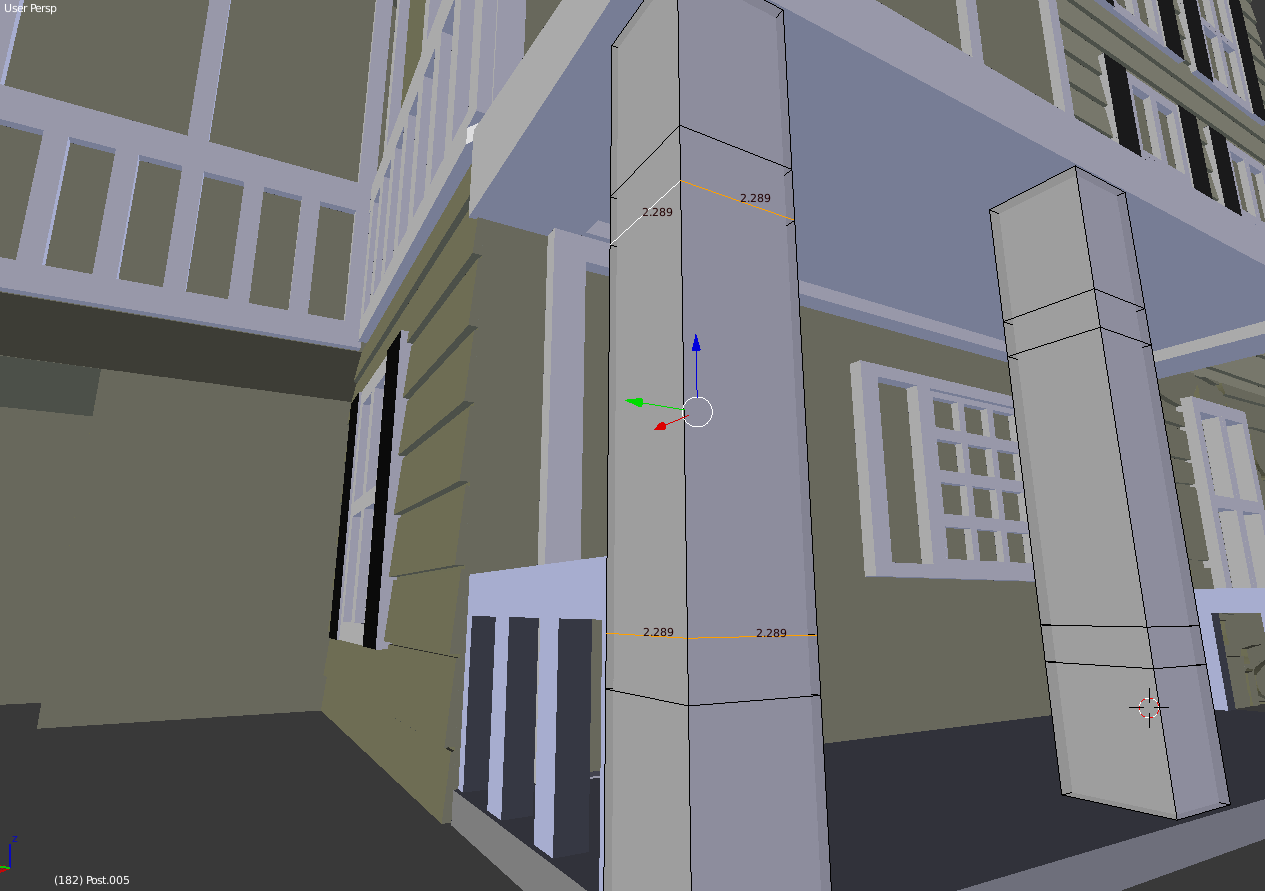
Detailing Tour – Supporting Posts
When I got to my neighbor’s house, I had some posts that would be supporting an awning. I went ahead and increased that to be over 2mm thick on each side so there was more strength and stability.
Detailing Tour – Awning Hack
And with the awnings, I wanted to print those without supports. What I ended up doing there is I had two small layers connecting the main house with the posts. My very own support beams. They were just 0.5mm high which meant my printer would print two layers for it. Then, the rest of the awning came in and bridging settings kicked with ample parts to “bridge to”
Textures
There are other approaches you can do with textures. You can, for example, use a grey scale texture map and use the Distortion modifier. I have found that to be a little intensive on my machine resources and making it difficult to continue to the tweak the model.
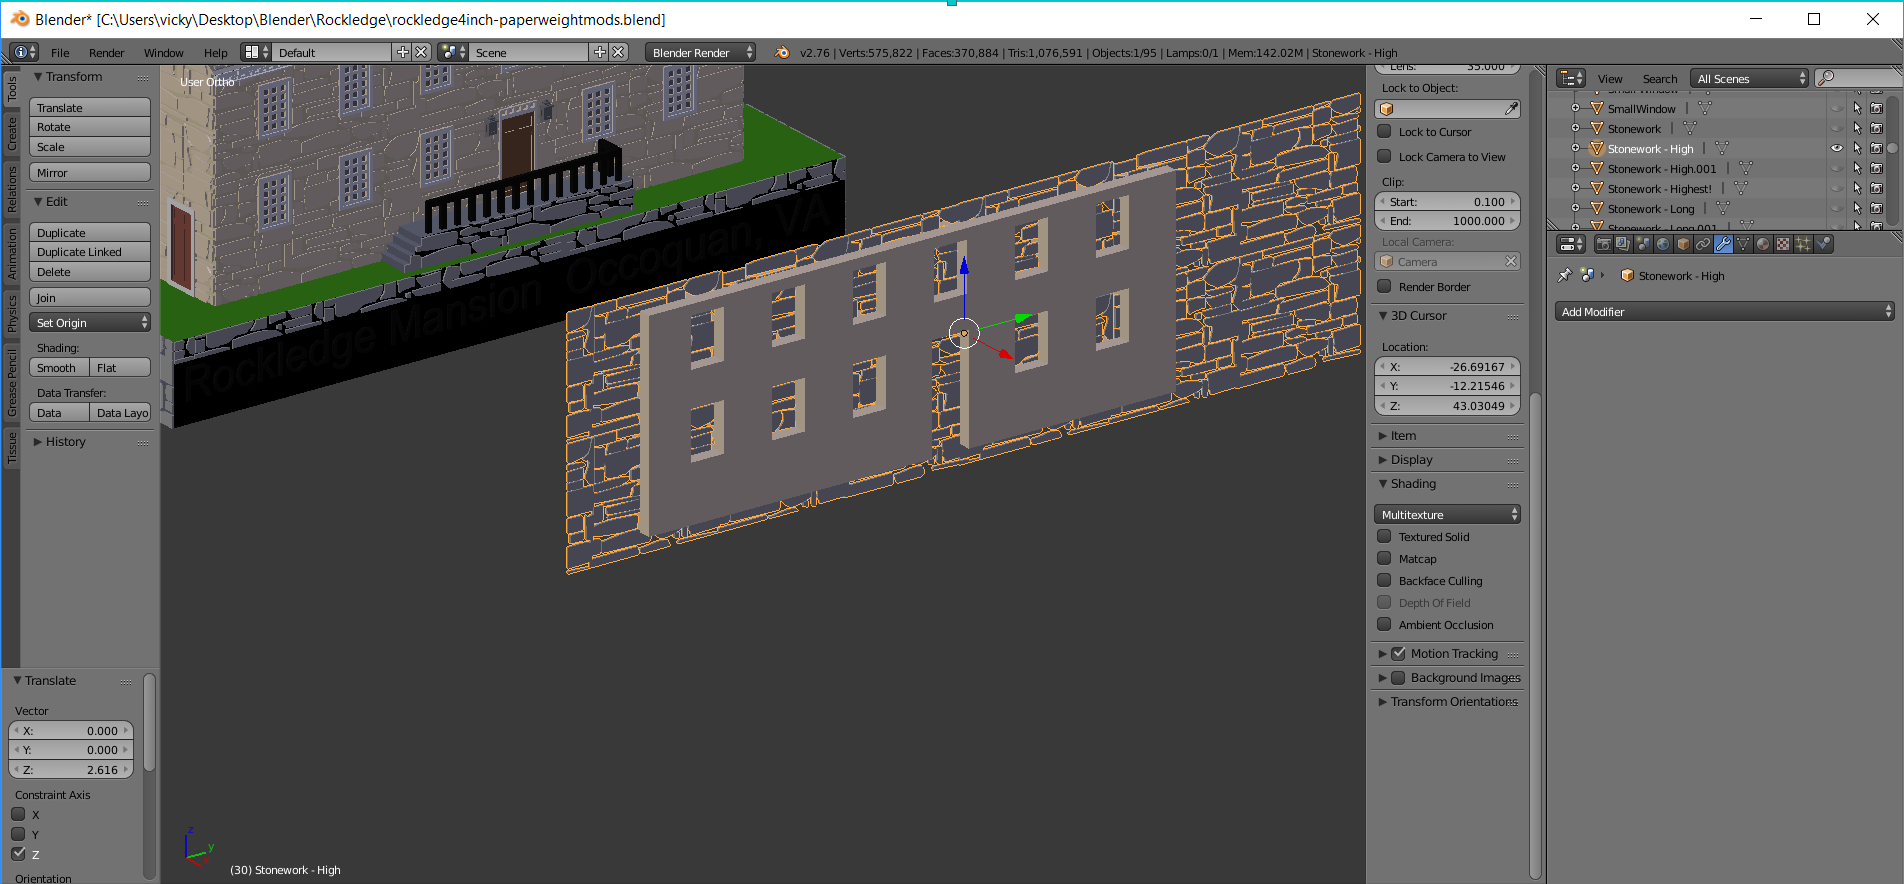
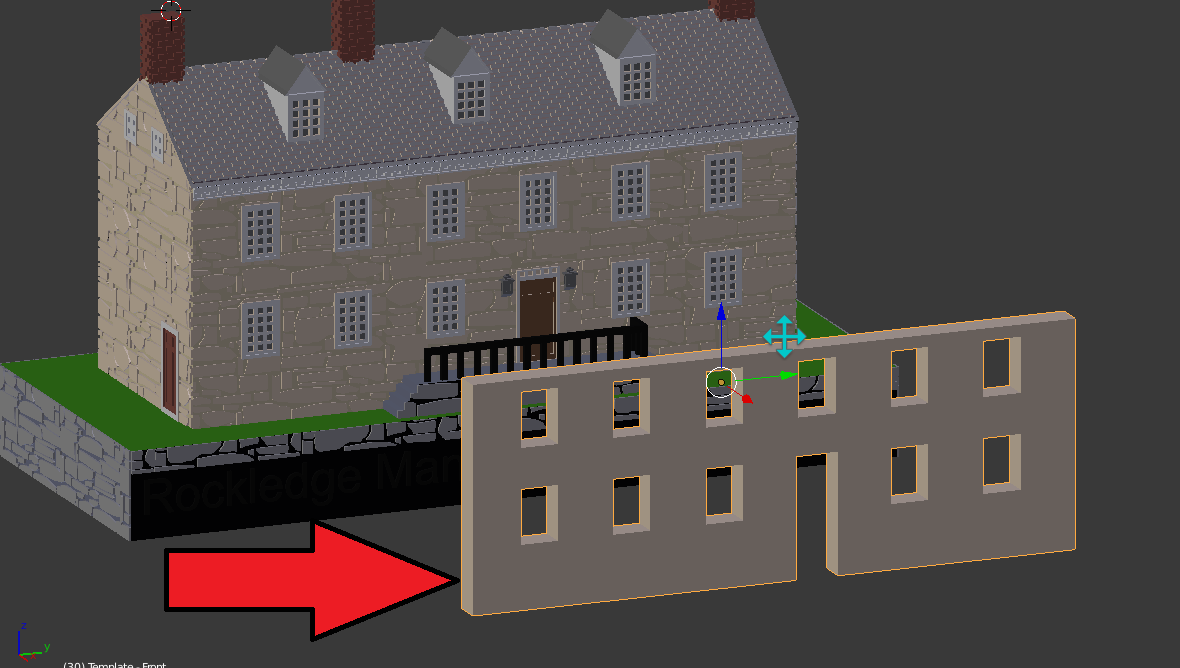
I do have a few “textures” I add to these models — stonework, brickwork, shingles, and finally siding. These I believe are mostly 0.3mm high. The Stonework I did slightly as purist. I actually used Bezier Curves to trace out real stones from one of the historic buildings in my town (Note– there are many ways to skin this cat). For bricks, siding, and shingles, I modeled one piece and then used the Array Feature in Blender to make an entire sheet.
Remember with the Spinning Pokestop, I talked about the Power of Intersection? This is an example of that. By Duplicating key vertices and separating them, I would make a template of the part of the model I wanted texture for. Let’s take the front of my Rockledge Mansion. I wouldn’t want Stonework where the windows and doors were. So I make an object of just want I want textured.
I put my textured piece, in this case, the Stonework in the middle of it and then I take an Intersetion. Viola! Texture.
And just like my other details, I make sure that is flush exactly with my base model, so it slices nice and fine in Simplify 3D.
Hack – Use Layer Lines To Your Advantage
I had been doing shingles for everything… until my very last model, my Neighbor’s House. I was doing a “Slice As You Go” and I noticed, the natural layer lines looked remarkably like shingles, so I rolled with it.
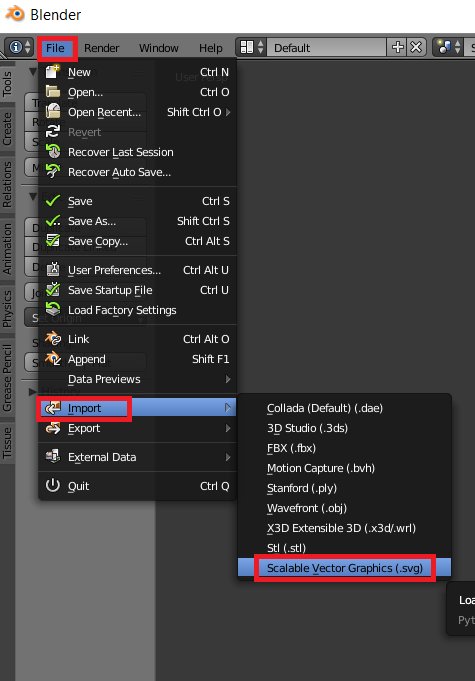
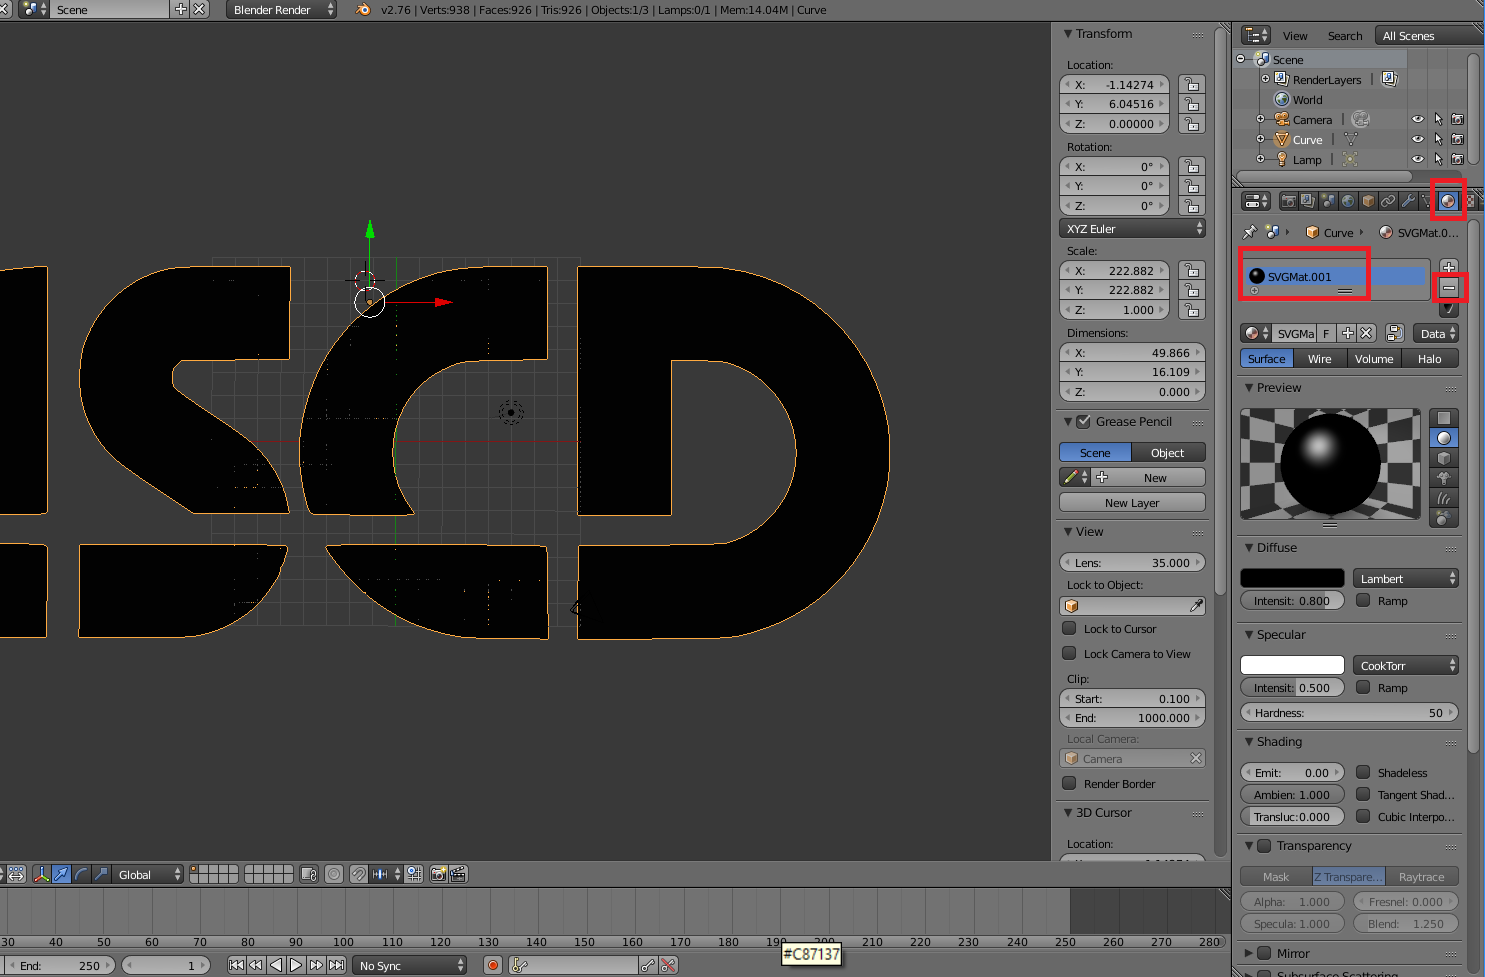
Despite some earlier blog posts on the matter, I have become fond of using Inkscape to make SVG files for my 3D Models. (My breakthrough came when I started saving as a “Plain SVG” format instead of an “Inkscape SVG” format).
I figured I should document my process at pulling and prepping those files in Blender.
Import the SVG file. File->Import->Scalable Vector Graphics (.svg)
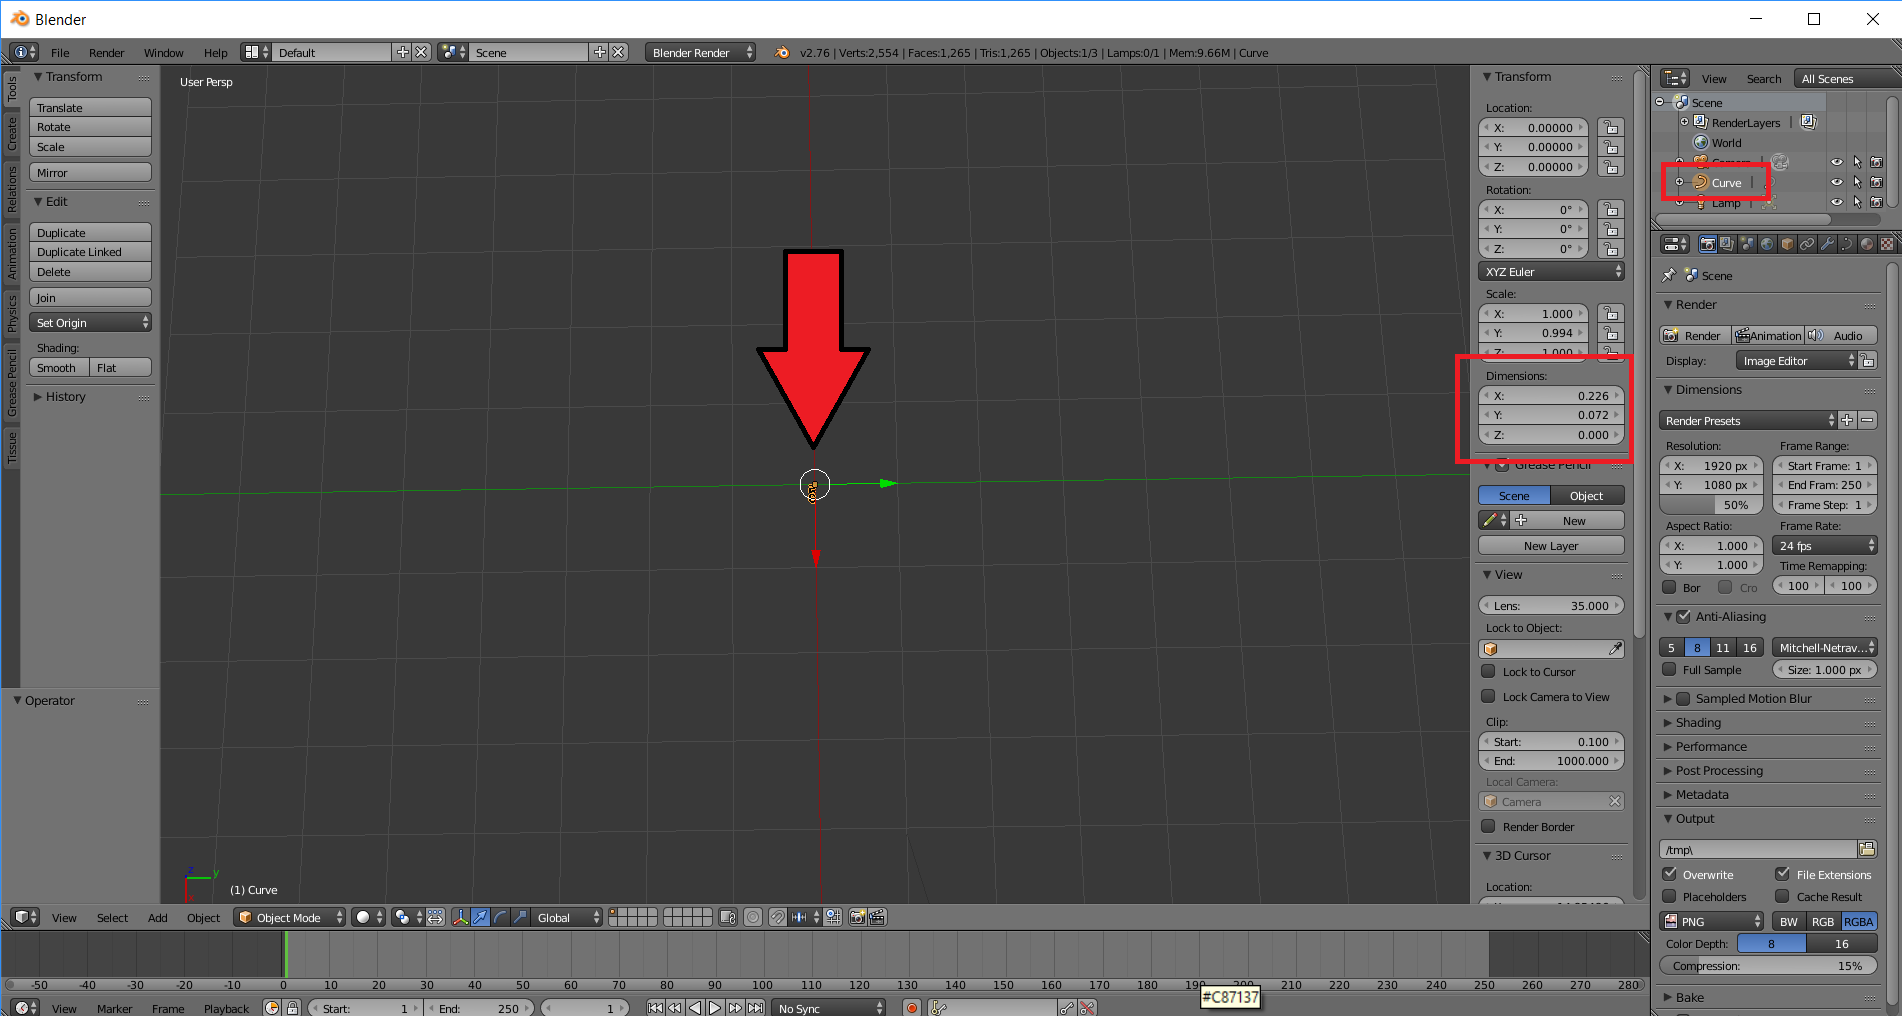
It looks like nothing happened, but your SVG is there. It’s just really really really small. If you look to the right in your Objects listing, you can see a new “Curve” that was not there before.
Resize the object so you can see it better.
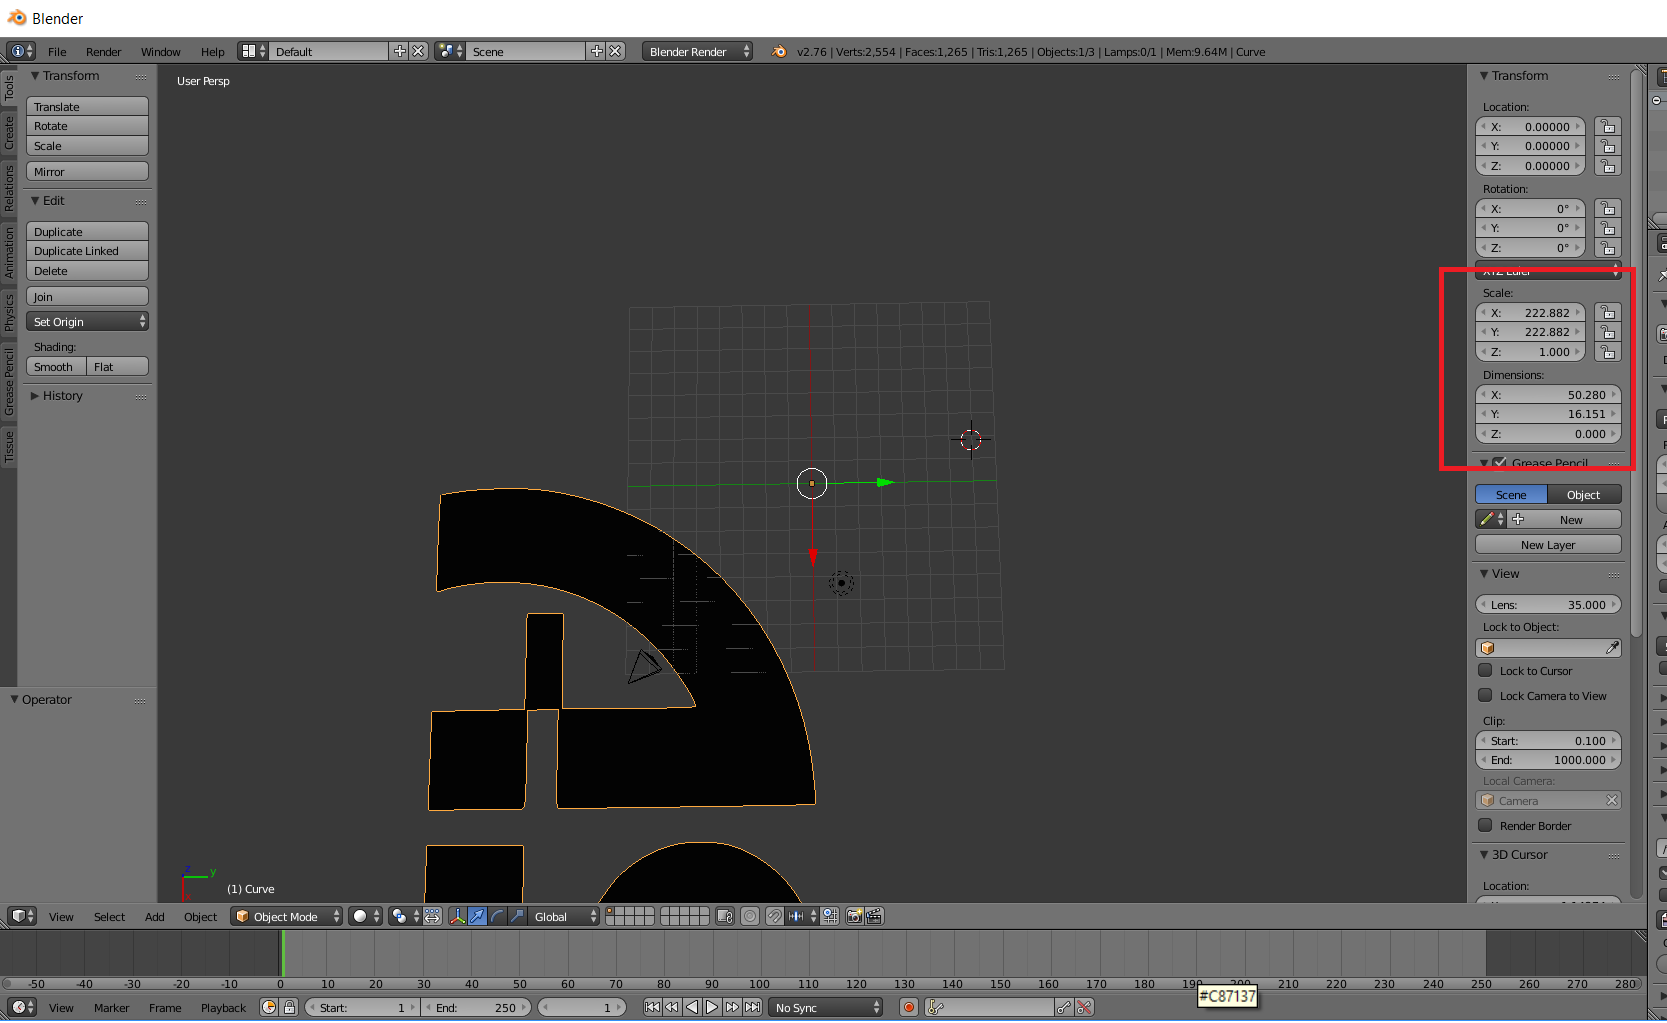
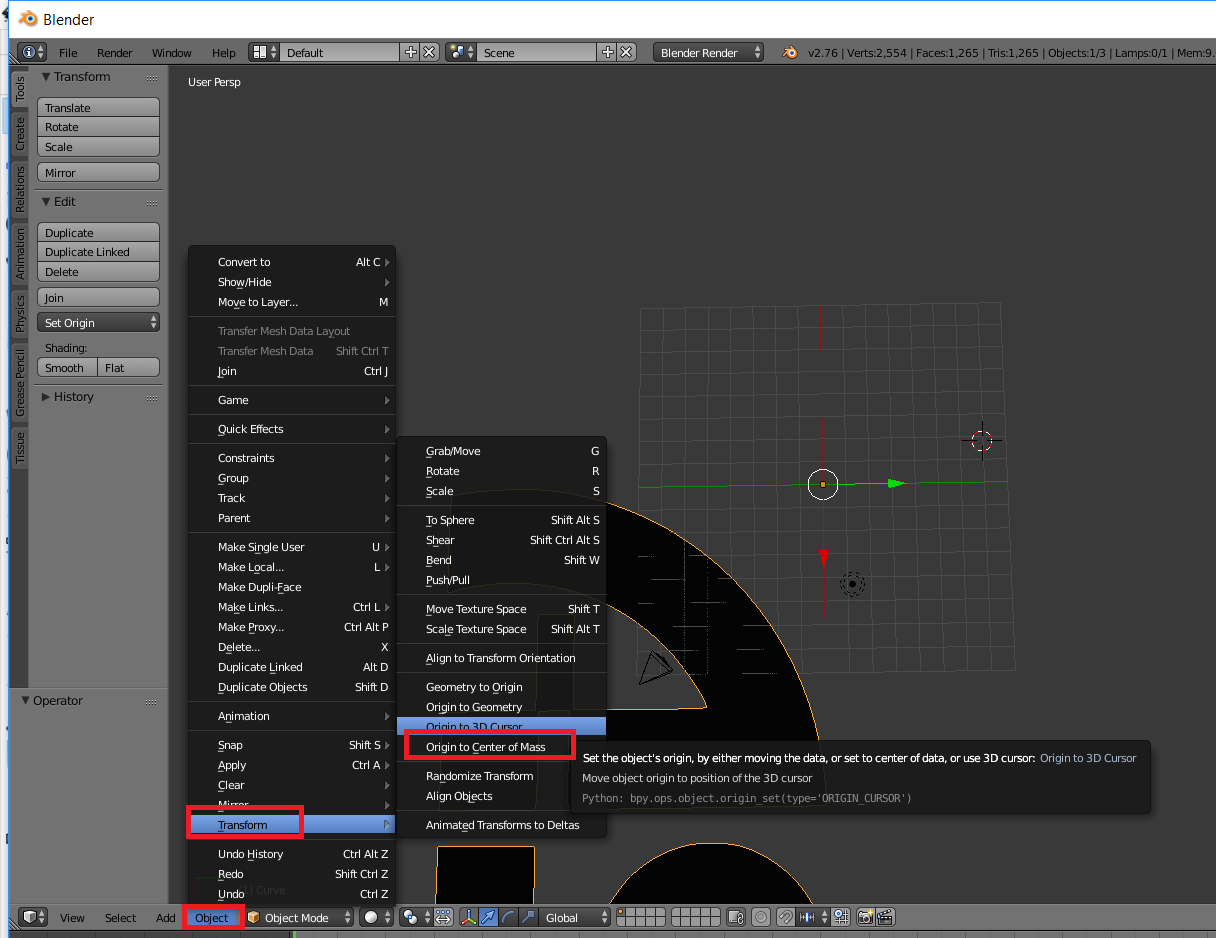
Sometimes resizing it takes it off the screen and the Object’s Origin is not very intuitive For that, I change the Object’s Origin to the Center of the Mass. I do that by going to Object->Transform->Center of Mass
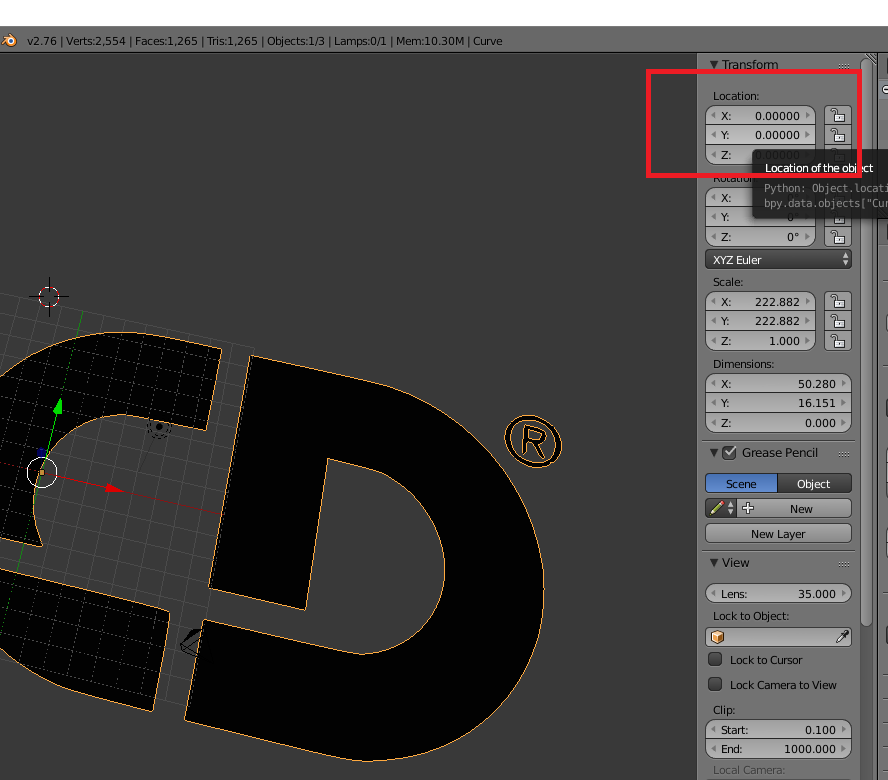
Then I can change all the Transform coordinates to 0,0,0 to center my new SVG
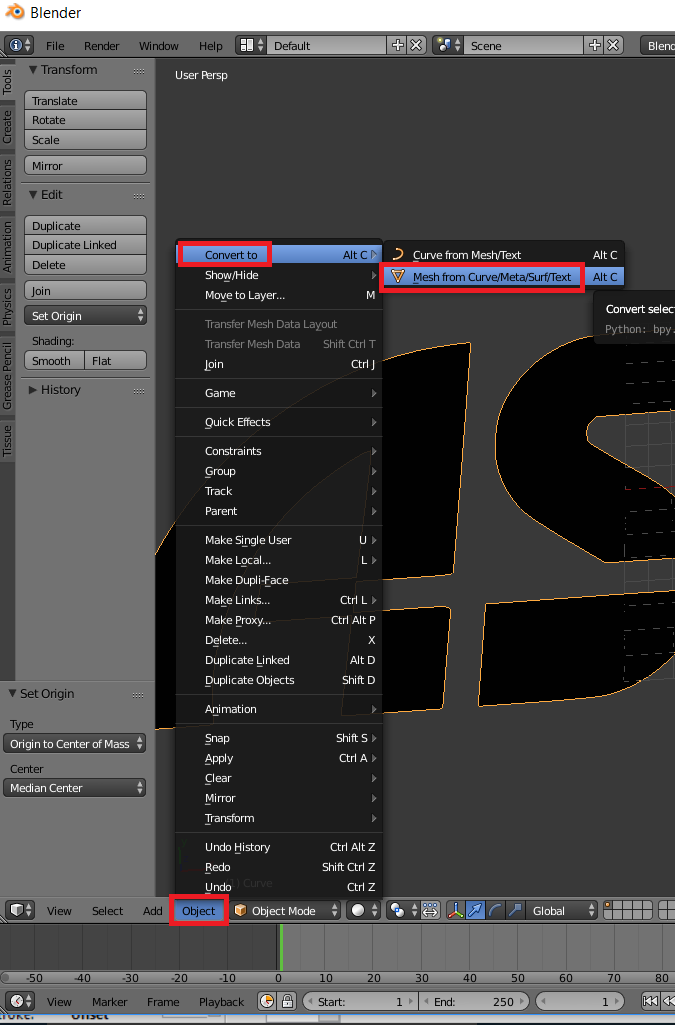
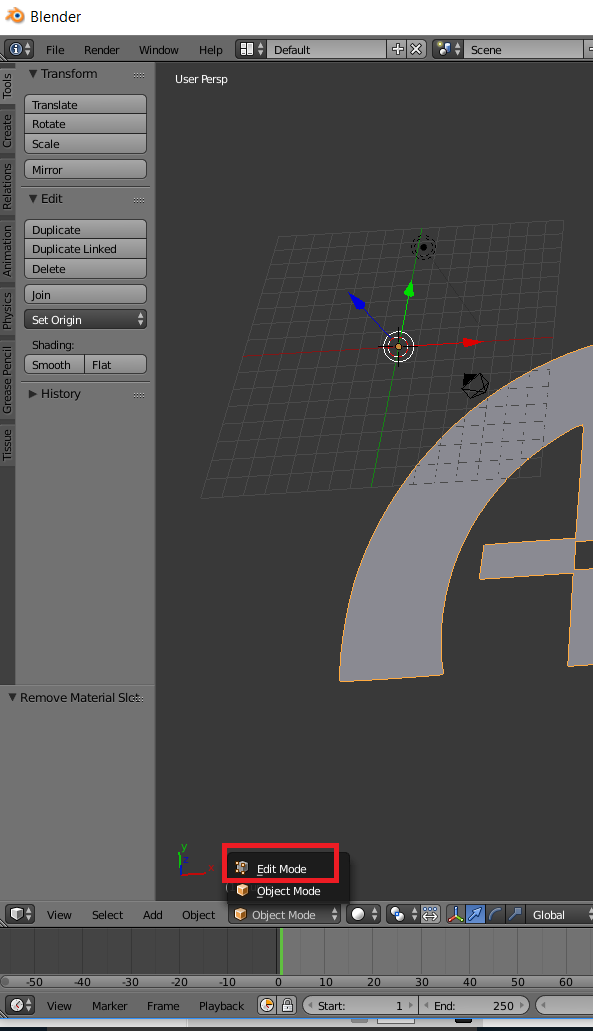
SVGs pull in as Curves. You’ll want to convert it to a Mesh before doing anything with it. You can do that by going to Object->Convert to->Mesh from Curve/Meta/Serf/Text
OPTIONAL – Get Rid of Black Color
When I was new to Blender and Inkscape, I could not figure out why my Inkscape SVGs were all black… and I just did not know enough to find the right keywords to Google. Later when I learned about Materials, it will started to click. The SVGs import in with a Default Material. If you want to get rid of that, click on the Materials icon for your object, click on the black material and hit – to get rid of it.
With your newly converted Mesh selected, switch to Edit mode.
Click A to select all vertices.
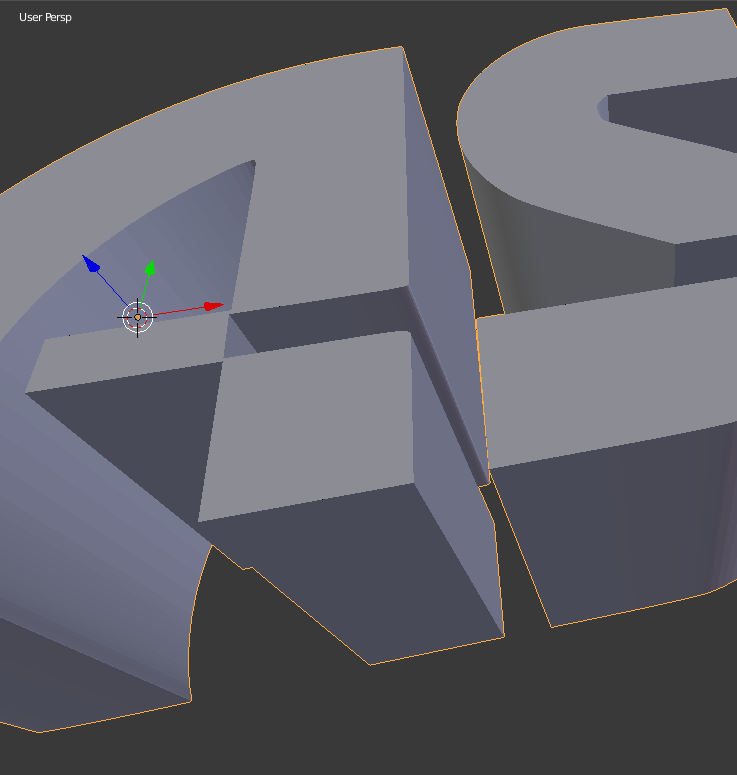
Go to Extrude->Region to give your 2D Object some Depth. If you can you the mouse to size or type in a measurement– for example 0.5 for 0.5mm.
And then you have a 3D Object in Blender from an SVG file.
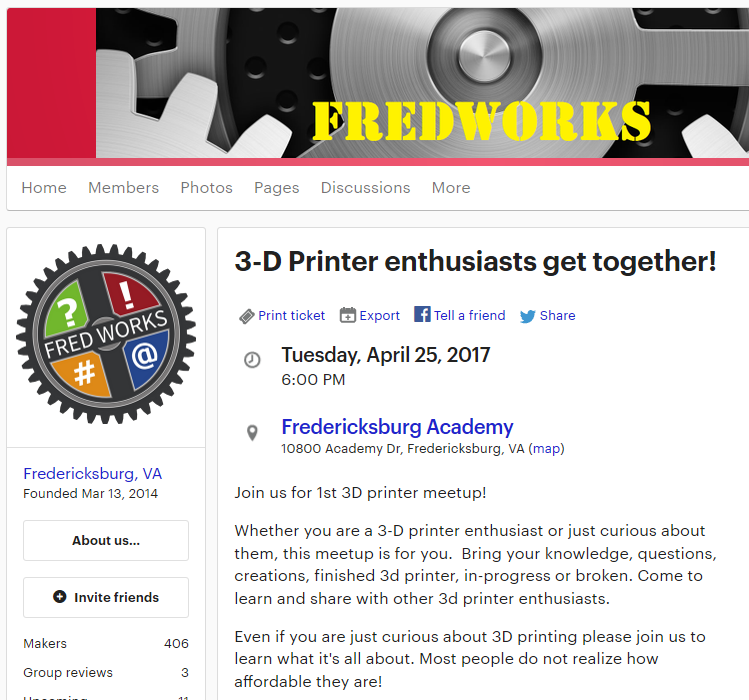
I have another event on my radar. Next Tuesday, April 25th, 2017 at 6 PM, FredWorks in Fredericksburg, Virginia is having a 3D Printing Enthusiast Meet Up. Open to One and All! Come if you are in town!
One of my Maker Faire Nova experiments was filing prints with sand. I am still new to the process, but already had a few tips to pass along.
And since it has been a while since I went into detail about multiple processes in SImplify3D, I decided to do a tour of my slicing settings of the two prints.
Ending Script of my First Print of the Ribbon:
G91 ; relative mode
G1 Z10 ; lift 10mm
G1 X30; move over 30mm
Starting Script of my Second Print to Finish the Ribbon:
G90 ; absolute mode
I have a new content creator I am smitten with. Somehow, Dick from NillaBean 3D was flying under my radar. He does an absolutely great job on his channel. If you haven’t done so already, check it out!
This week, I got to be on his channel as part of the Friday Night 3DP Community LiveStream. Tonight’s episode also feature Clare from the new Make It & Fake It, another channel to watch closely, particularly for her keenly calibrated wit.
It was my pleasure to spend Friday night with my fellow makers. You can catch the full episode below.
To learn more about future episodes of Friday Night 3DP Community Hangouts, be sure to follow @F3DPCH on Twitter.
The ever-supportive and kind folks at 3D Central published a video on Maker Faire Nova. They included footage of (and kind words about) my work. Thanks guys! VA Makers Rule!
I got invited to participate in another live stream last night. This one was hosted by 3D Printed Aspie. There were many new-to-me faces in last night’s stream, so I was thrilled to make even more acquaintances in our great community. The topics of conversation included recaps of two recent events- Maker Faire Nova and MRRF. I got to highlight my Dial-O-Lantern (a pumpkin where you can configure up to 27 difference faces) and a Maker Faire Vase made with the kids at last year’s Maker Faire Nova. In addition, I got to advise my peers at how to watch their young children around rolls of filament. They… uh…might be tempted to roll it down the stairs. : )
A big thanks to Matt from How I Do It for kicking off the Community Live Chats and for Ryan at 3D Printed Aspie for his hospitality at having me at his channel. : )