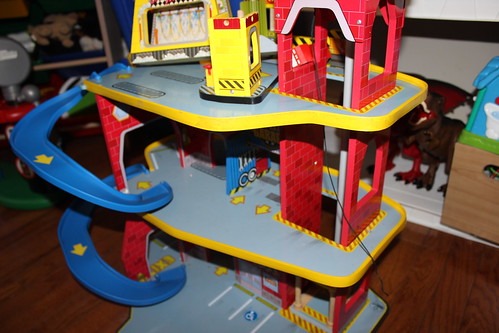
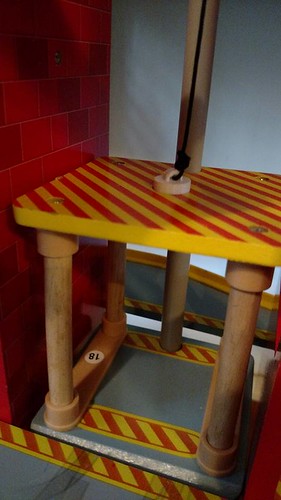
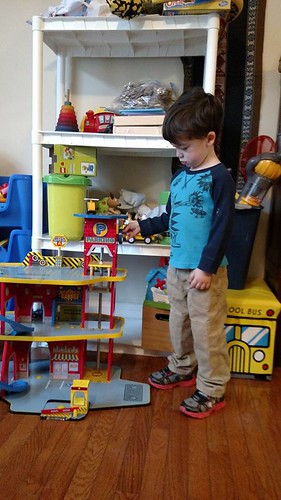
For Christmas, we got a hand-me-down KidKraft Deluxe Garage Playset.
Wonderful! There was only one minor issue– it was missing some kind of piece at the top of the elevator. As a result, the elevator did not go up and down. This caused some discontent for my two year old. At first, I would tie a toothpick at the end of the string and that would allow him to raise and lower the elevator for a while… but it frequently came undone. I thought, “Hey. I have a 3D Printer. I had TinkerCAD. I can do a lot better than a toothpick.”
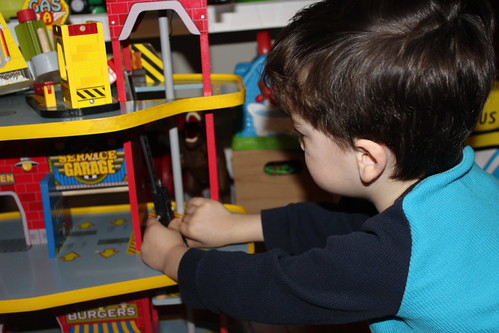
One Saturday morning, the kids and I did just that. Our first step – calipers, which both children love to play with.
I…uh…. I retook all the measurements for myself after they were done.
Then we pulled up the free and web-based TinkerCAD. As you may know, I do a great deal of modeling in Blender. I have found the colorful interface of TinkerCAD to be much more conducive to “keeping the attention of my kids.” In this case, they sat in my lap and we modeled it together.
The Model
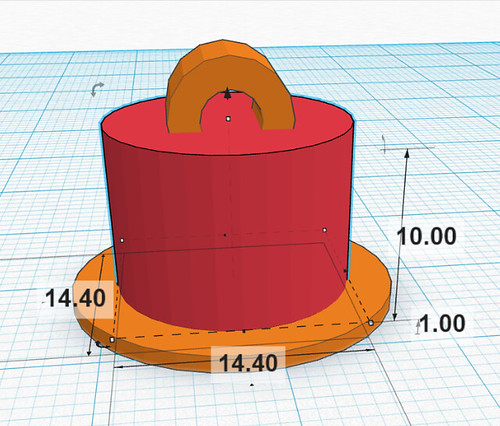
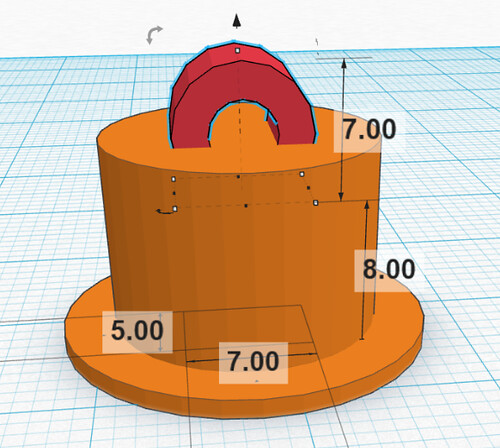
This was a very simple design. We just had three pieces:
A cylinder that I sized to the exact width of the hole we measured in the playset. Usually I put in 0.5mm clearances, but for this, I wanted a snug fit. It would even be okay if I had to force the part in.
There was also a second flat cylinder in the bottom. This was to make sure we couldn’t just pull or push the part all the way through the hole.
At the top, I used a tube. I used the Rotate handles (the little arrow icons) to rotate the tube 90 degrees.
Tip– If you hold down the Shift key while you rotate, you can rotate at 45 degree intervals.
Tip: Since I was working with exact measurements, I dragged a Ruler object to my Workplane which allows me to type in the dimensions of my parts.
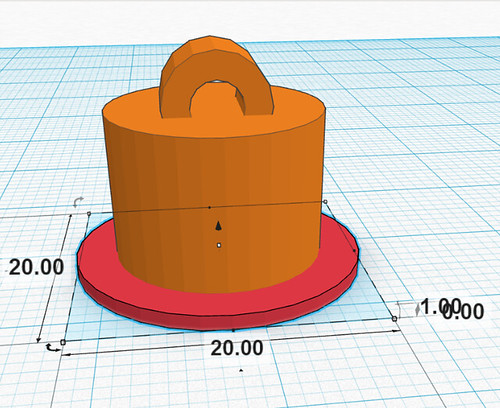
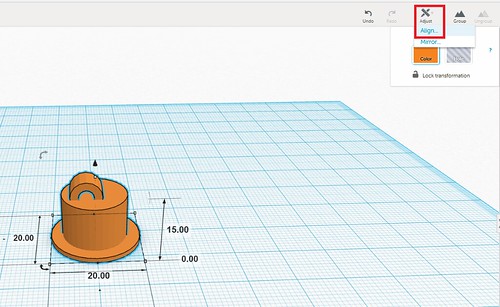
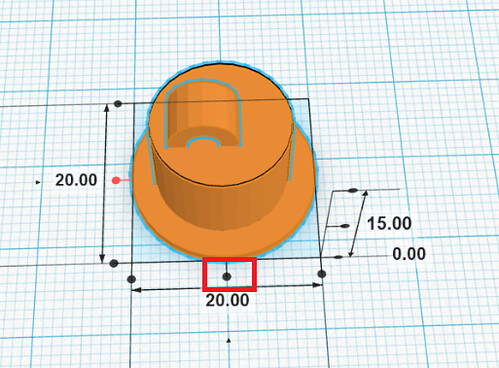
Once I had all the parts on my workplane, I selected them all and went to Adjust->Align…
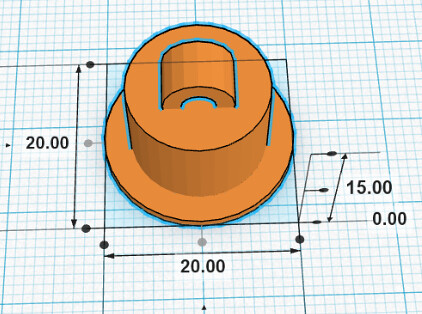
This allowed me to center them all with each other.
Moment of Truth
We made pancakes while the part printed and then we had a moment of truth. I was happy to discover our calipers did not lead us astray, the part fit AND the elevator worked.
Between the pancakes and this toy fix, it was a very productive Saturday morning. My Mom self esteem was at an all time high. Don’t worry– I was back to normal by the afternoon (after unsavory Mom tasks like “saying No” and “wiping butts”). : )
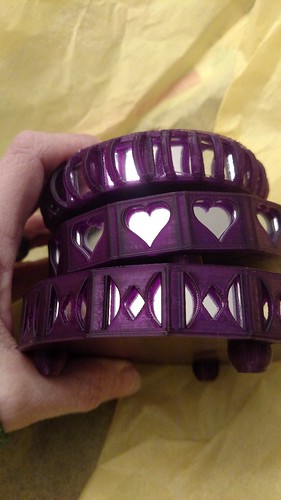
My sister turned 40 this month and get this– I have never, ever, ever printed her anything. I printed something for her husband, but not her. Bad Vicky! That definitely needed to change. Her house is a very visually stimulating house. They have a variety of lighting and effects– think blacklights, giant flatscreens with screensavers dancing to the music, lasers making patterns on the walls, lava lamps. I wanted my design to fit in and interact with the lighting in her house. I wanted something with mirrors.
Designing
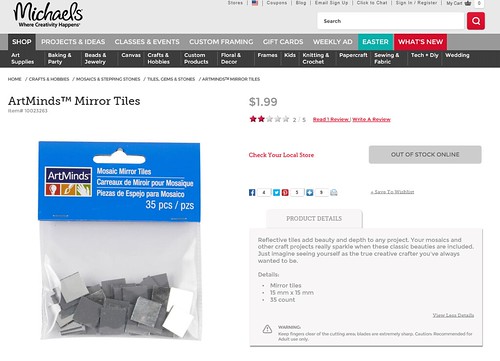
At Michael’s I bought little mosaic mirrors– 35 of them for $1.99.
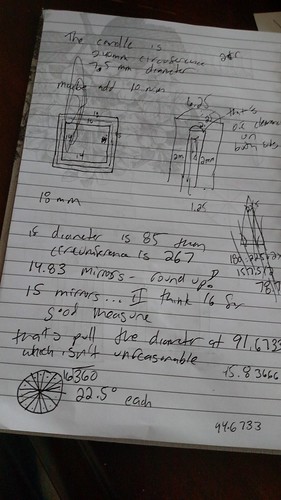
Then I got out the trusty calipers. There was some variance in the measurements, but the mirrors were pretty much 15 millimeters by 15 millimeters and 1.75 thick. I designed in cavities into my model for the placement of the mirrors. I used 0.5 millimeter clearance– which meant my “hole” came out to 16 x 16 millimeters and 2.25 thick.
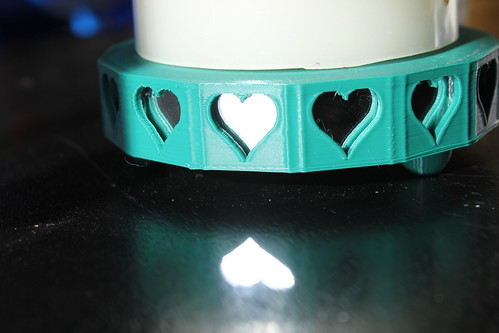
All my design work was in Blender. I decided my design was going to built out of a series of 18 x 18 millimeters squares– each ready to hold a mirror. I used some simple math to figure out how many mirrors I would need to be a good stand for a 3″ pillar LED candle and the ultimate radius of my final product.
I made one template square and put in the proper placement of where it would be in the final holder. Another simple math equation told me how many degrees I would have to angle each piece.
360 degrees / # of Mirrors
So for example, in a design with 15 mirrors, each piece would be angled 24 degrees from the previous one. If I did 14 mirrors, each piece would be angled 25.714 from each other.
In Blender, when you rotate items, you are rotating around the Point of Origin of that object (where the little yellow dot appears when you select the Object).
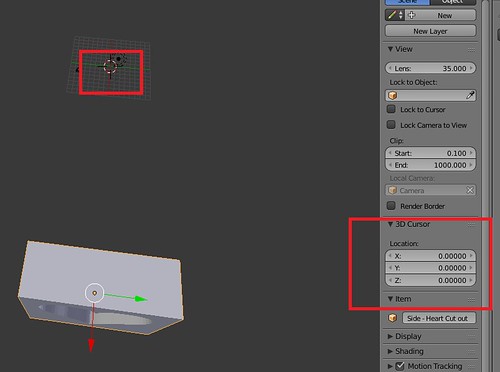
Usually this is the Center of Mass of the object, but guess what! You can control it and the origin doesn’t have to be in the object itself. Once I had my template square in its proper position in the final candle holder, I placed my 3D Cursor at 0,0,0.
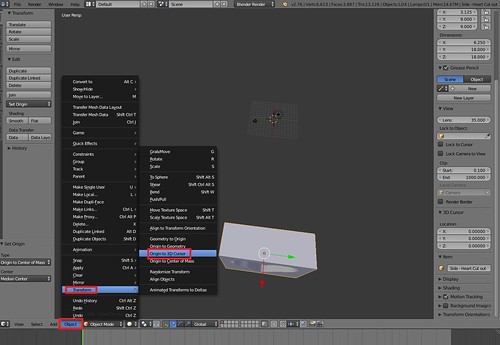
I went to Object->Transform->Origin to 3D Cursor.
This meant the origin was right smack in the middle of my candle holder. It also meant, when I rotate, I rotate around that point.
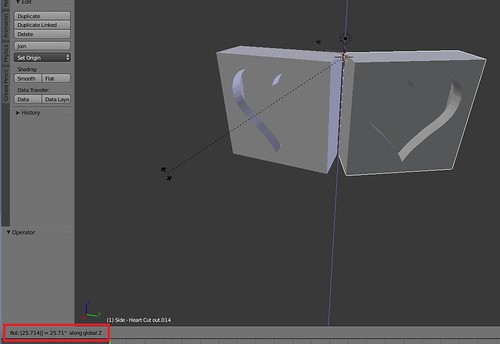
So I proceeded to Duplicate the square, hit R (for Rotate), hit Z (for around the Z axis) and then type in my angle (25.714).
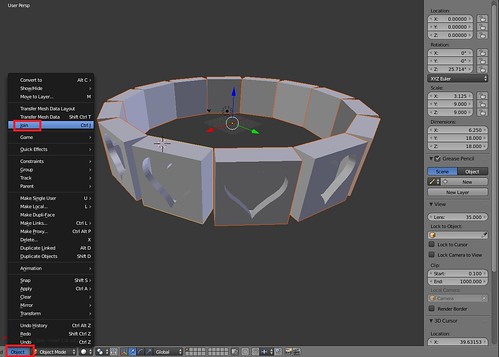
I would then Duplicate that square and Rotate it and so on until I had my entire ring. I did Object->Join to merge all my panel pieces into a single object.
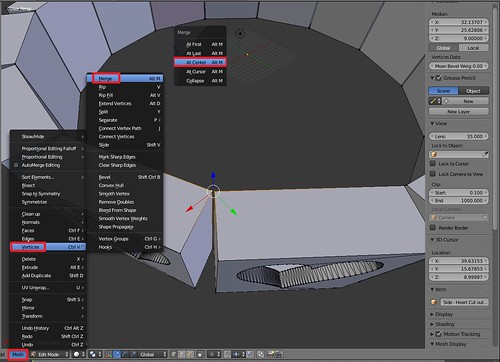
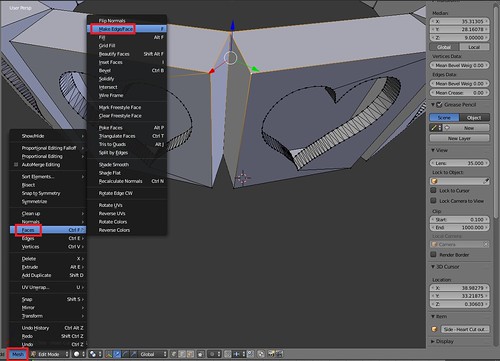
I switched to Edit mode and did some cleanup. I Merged Vertices that were close together and then added in new Faces to fill in the gap.
The inside of the candle holder is a 14-sided Cylinder. When you add a new Cylinder, you can specify the Number of Sides. I made it match the number of mirrors.
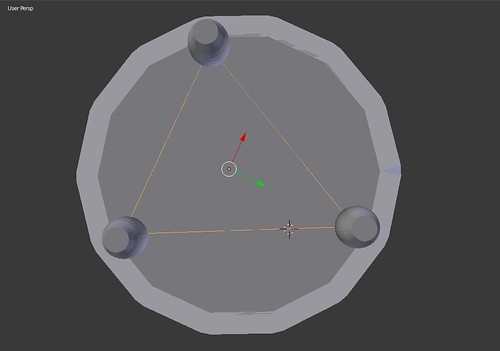
I cheated with the placement of the three feet. I added a 3-sided Circle and used that to help me determine where the place my feet.
Under Modifiers I did a Boolean Union on my panel piece, my inside cylinder and my feet and voila– I had a model!
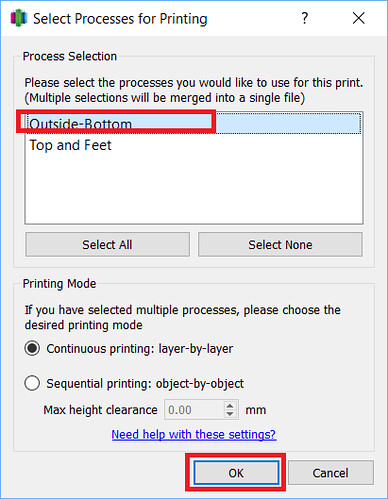
Slicing – Simplify3D
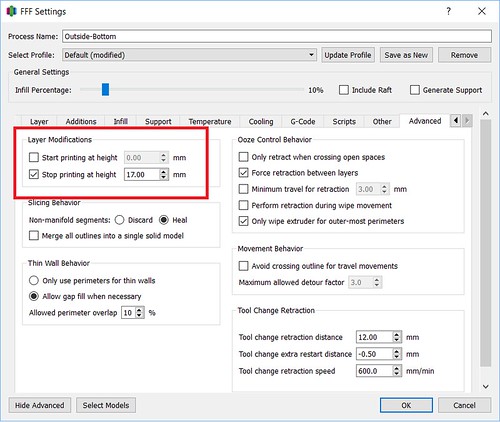
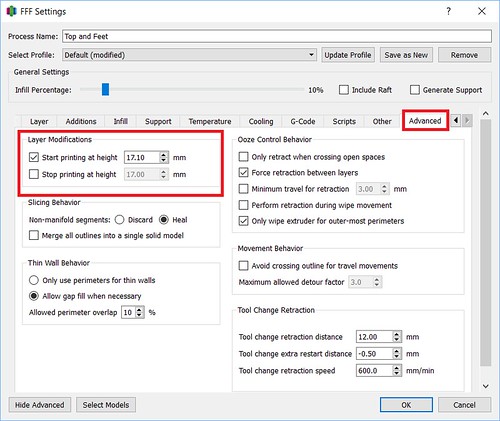
In Simplify3D, I set up two separate processes. The first process ran from the 0.00mm – 17.00mm (You can set that up in the Advanced tab under Layer Modifications). That is the point right before my mirror cavities would get sealed up.
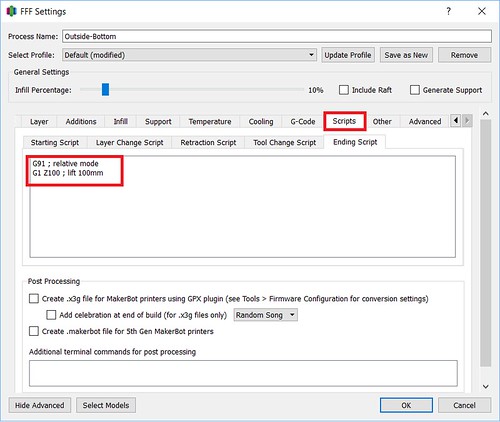
Usually when a process finishes, it’ll run a default ending process– turning off the extruder and disabling the motors, completely dropping the bed. I didn’t want that to happen. In this case, I just wanted the bed to drop down enough for me to put those mirrors in without burning myself and more importantly, get that hot nozzle off my print so it isn’t melting and deforming it and making it hard for me to slide my mirrors in. I went under Scripts and customized my Ending Script. Instead of the usual process, I did two simple steps:
1) I changed it to Relative mode, so my next instruction would use the nozzle’s current position as it’s starting point
2) I told it to move the nozzle up 100mm.
G91 ; relative mode
G1 Z100 ; lift 100mm
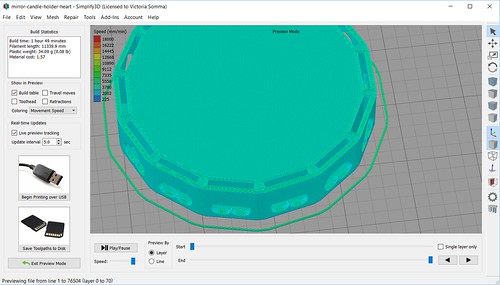
When I prepared just that process for printing, you could see how it was going to stop while I still had openings for my mirrors.
My second process was set up to run from 17.10mm on (again under the Advanced tab)
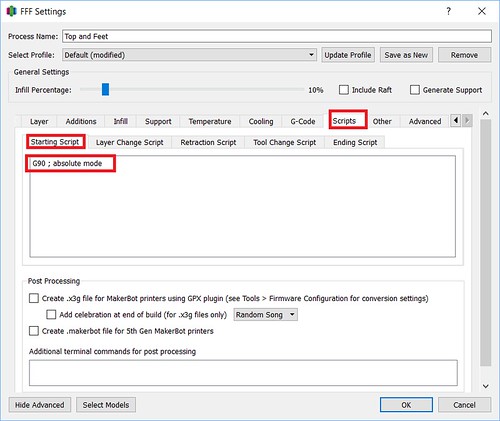
When a process begins, there are a number of things the printer typically does at the beginning such as turning on the extruder, turning on the fans, homing the axis’s, running off the side of the bed and oozing some filament. I didn’t want to do this for my second process. My axis’s are already homed, my extruder is already heated up, my filament is already flowing. All I had to do was set my printer back to Absolute mode and go. So for this second process, I went under Scripts and customized the Starting Script.
G90 ; absolute mode
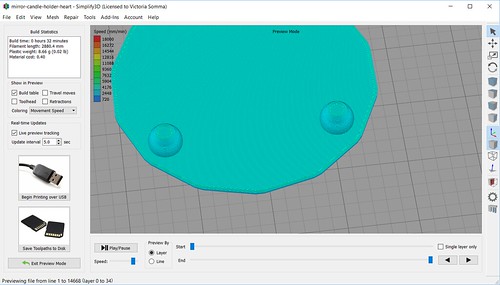
A preview of the second process, illustrates how the mirrors will get sealed in by the print.