Print Diary – Anglerfish in colorFabb BronzeFill and GlowFill

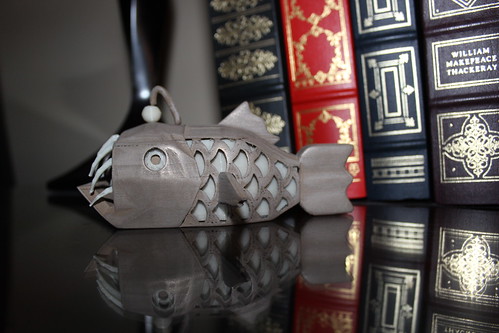
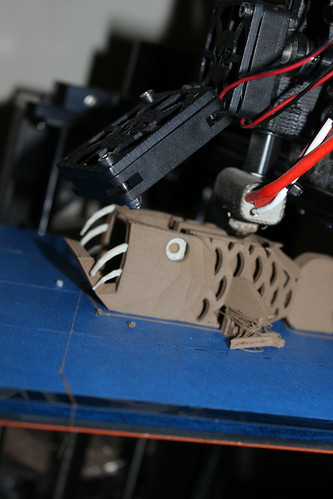
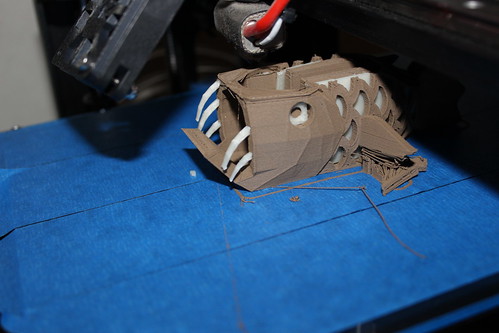
After months of craft shows and custom orders, my very last design and print for 2015 was something for me! As soon as I received my first spool of ColorFabb GlowFill, I wanted to do an anglerfish. I’m almost done with that roll, so this seemed to be the time. And as luck would have it, PrintedSolid and reddit were running a mixed material use contest. Destiny! I designed and printed my anglerfish in BronzeFill and GlowFill on my MakerGear M2. The GlowFill parts were actually inserted into the fish and sealed in as the BronzeFill printed.

3D Printing - Anglerfish - From Side By Books
Tada! Anglerfish!

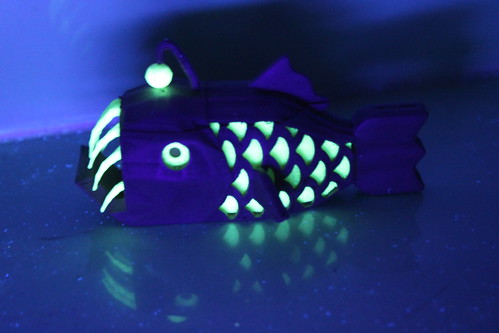
As you may expect, the GlowFill parts glow in the dark and the blacklight.

3D Printing - Anglerfish - Glowing in Blacklight 2
Glowing Anglerfish

Material Choices
I chose two materials for my anglerfish, both were mainly selected for aesthetic reasons:

  • colorFabb BronzeFill – The bulk of my print was in bronzeFill. To me, bronzeFill elevates designs. It’s heavy, so it feels expensive. It gets a sheen with sanding so it also looks expensive. I have found it to be a forgiving material as it is so easy to sand afterwards and redeem. I only had time for one print of my design before leaving for vacation. I needed a forgiving material. : ) I’ve also seen it bridge and do overhangs well, so I knew it was a good fit for my fish.

    Semantics also play a little bit of a role. Bronze pulls with it connotations of the Bronze Age– gladiators and warriors. Bronze is a material of badasses. Anglerfish withstand immense pressures down there at the bottom of the ocean. They warrant a badass material.

  • colorFabb GlowFill – And GlowFill was a no brainer. To really do justice to an anglerfish, I needed him to glow. : )

Design
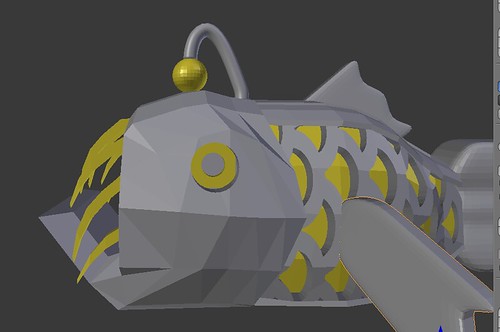
I designed my angerfish in Blender. I designed cavities and supports inside the fish to hold our GlowFill pieces. That way, I could insert the pieces and let the rest of the print seal them in.
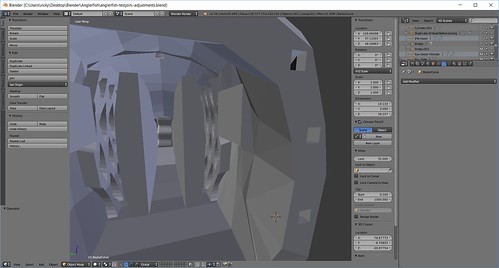
3D Printing - Anglerfish - Laying Out Both Colors in Blender
Model in Blender

3D Printing - Anglerfish - Visual of the Innards in Blender
Cavities Inside the Fish to Hold GlowFill Details.

So for example, the glowing eye detail. Inside the head of the fish, I have a little rectangular holder to keep that detail in place. I wanted the pupil of the eyes to remain dark, however, so that glowing eye detail had a circle cut out so the BronzeFill behind it could show through.
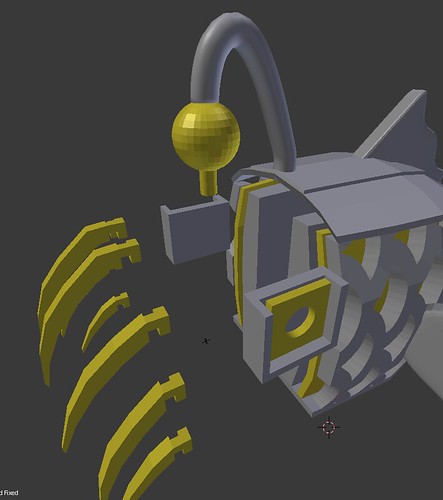
3D Printing - Anglerfish - Illustration of the Glowfill Part Placement in Blender
A View To Show the Relationship of How the GlowFill Eye Would Be Supported

Printing – GlowFill
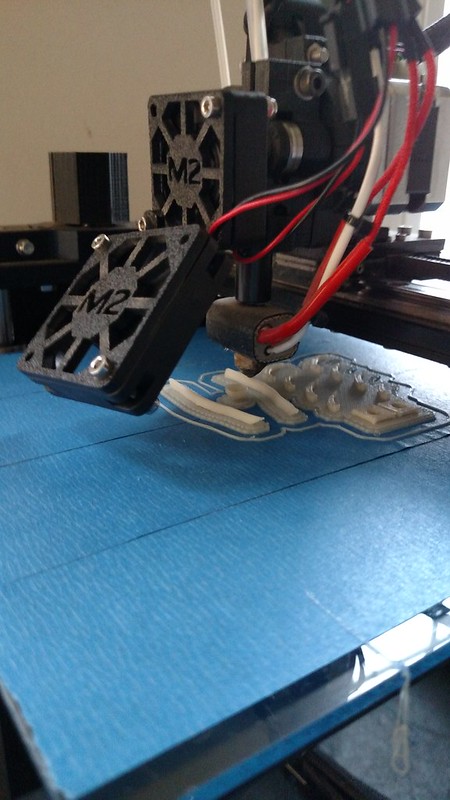
I printed all the GlowFill pieces first. Very straight forward– 0.25mm layers, nothing super special.

Anglerfish - GlowFill Parts

Printing – BronzeFill
BronzeFill is where the thinking came in. I still printed at 0.25mm layers. Using Simplify3D, I set up nine separate processes for the BronzeFill. At the end of each process, the print would stop, the Z bed would drop 100mm allowing me to insert in the appropriate GlowFill piece(s) before starting the next process.
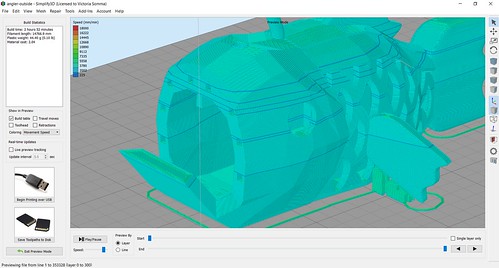
3D Printing - Anglerfish - Different Starting Points in Simplify3d
Preview in Simplify3D, the Blue Lines Illustrate Stopping Points
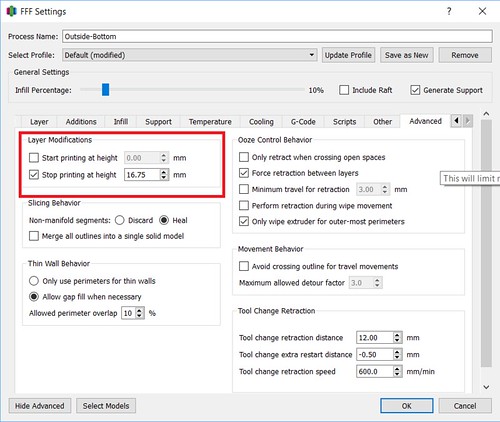
3D Printing - Anglerfish - Layer Modifications in Simplify3d
Using Layer Modifications in Simplify3D
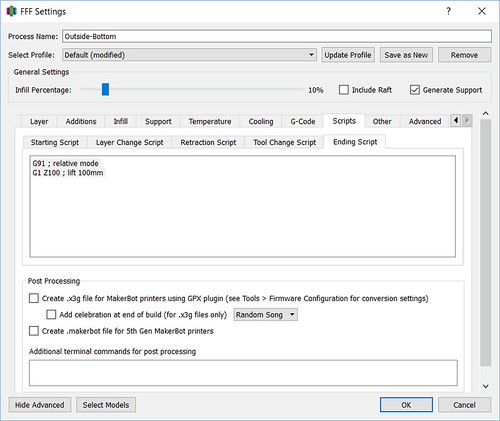
3D Printing - Anglerfish - Custom Ending Script in Simplify3D
Custom Ending Script in Simplify3D to Just Drop My Bed At the End of the Process

3D Printing - Anglerfish - Printing After Eye Inserts
After Eye Detail Was Inserted

I did have a bobble. When I inserted my side panels, I noticed they were a little higher than the BronzeFill layers around it. I thought it would be safe… but it knocked my nozzle and offset the X a bit. The seam you see in the pictures is the product of that shift. Lesson learned — better safe than sorry. : )

3D Printing - Anglerfish - Side Inserts
The Bobble

I did also end up printing the little dangly do-dad on the top of the fish separately. That was unplanned, but serendipitous as the fish would have been a pain to sand with that delicate detail in the way.

Finishing
I sanded the fish with three separate grades of sand paper and I finished him off with super fine steel wool.

Lessons
I only had time for one print and I do have adjustments I would make for my next run. First off– the teeth are not worth installing during the print. It was a lot of stops in the print to insert the teeth and the sanding. My gawd, the sanding. Those teeth were just a nuisance during sanding. I did get a little thrill each time I installed a tooth and had the print seal it in, but it wasn’t worth it. Next time, I’m just going to glue the teeth in after the fact.

Secondly, I learned to decrease the height of those side GlowFill panels slightly so I don’t get my nozzle knocked. : )

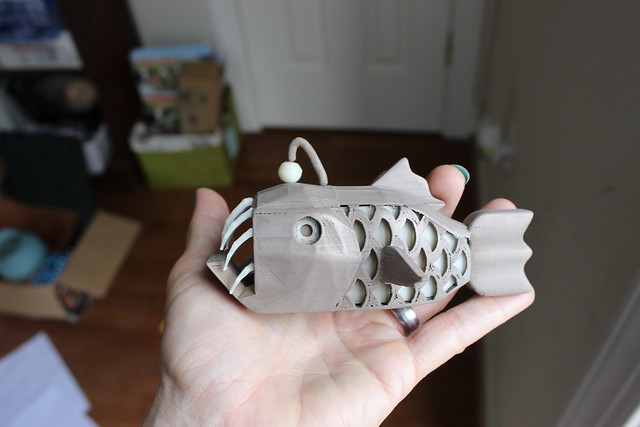
Even with my little bobble, I am thrilled with my anglerfish. Love!

3D Printing - Anglerfish - In Hand
I Did It!

More photos of my Anglerfish and its process can be found on my Flickr site.

Event Recap – Occoquan River Communities’ Winterfest

Greetings All! It’s been a busy fall, full of custom design orders and events. My last event for 2015 was the Holiday Arts Market at Tackett’s Mill. It was part of a large Winterfest organized by the Occoquan River Communities.

Lesson: It Doesn’t Hurt to Ask
By the time I heard about the Holiday Arts Market, it was well past their submission date. I went ahead and sent an email to the organizer to see if they still happened to have openings and guess what– they did. Not only that, the booth fee was free. And on top of that, the Holiday Arts Market was in the same building as Santa Claus would be after the parade. I am very thankful they let me into the show so late.

IMG_20151212_114422224_HDR
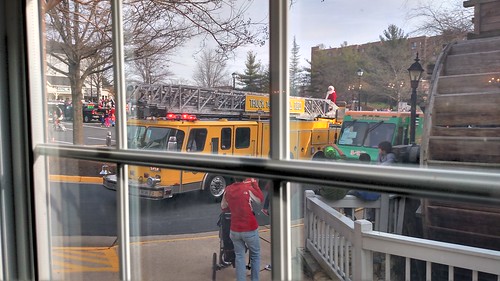
Santa Arrives

Setup
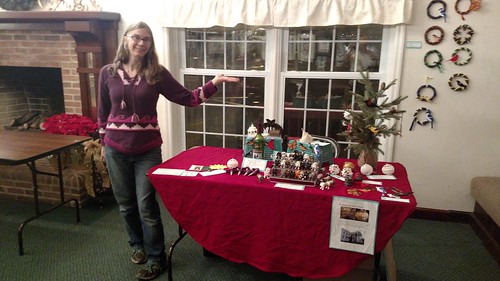
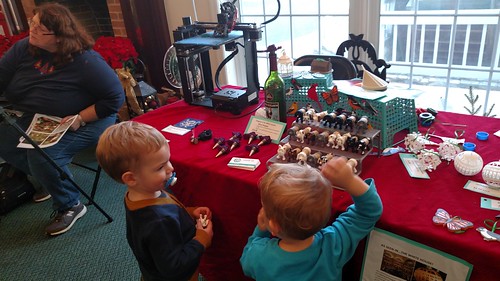
For this show, they did have electricity, so I brought the printer along. They also allowed people to hang things on the wall, so I put all my wreaths and magnets on the wall behind me, allowing me to squish everything else into a single table. I did not show any of my jewelry this show for two reasons– 1) Lack of space and 2) I sold all out of my Helix Heart Pendants the weekend before.

It was refreshing to be in an indoor venue for a change and I didn’t have to tack all my signs down.

The other artists were amazing. I loved their work and even though they have been doing this for so much longer than I, they were all very supportive of me and my work. They made me feel very welcome.

IMG_20151211_172227841
My Setup the Night Before

Big Start
The first half hour of the show was crazy busy. Crazy busy. 67% of all my sales occurred in the first 30 minutes of the show. At one point in time, there was a queue of people lined up waiting to pay.

After that, it did slow down immensely. It gave me a chance to visit with the other artists and my children. As a bonus surprise, my two year old nephew and his parents stopped by for a visit.

IMG_20151212_135056884
My Nephew and My Youngest Son At The Booth

Winners
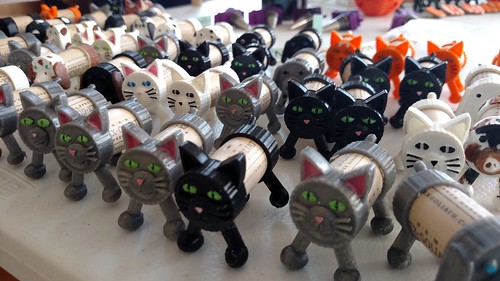
For this show, the biggest winner was the Cork Kitty! All but one lonely white cat sold.

3D Printing - Amry of Cork Kitties
Cork Kitties – SOLD!

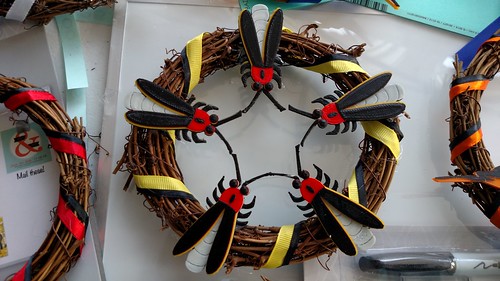
The five Firefly wreath that I secretly hoped no one would buy did get purchased. The fireflies butts glow in the dark and the way they were positioned on the wreath, the glowing makes a star. I will have to make another one.

3D Printing - Firefly Wreath
Firefly Wreath – SOLD!

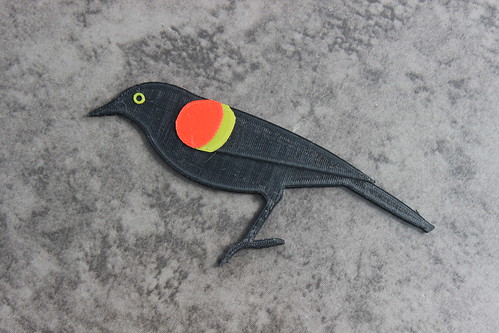
Cardinals continued to have a strong showing. Hummingbirds and Goldfinches made sales and a big congratulations to the Red-Winged Blackbird who got his real first sale!

3D Printing - Redwing Blackbird
First Sale! Red-Winged Blackbird

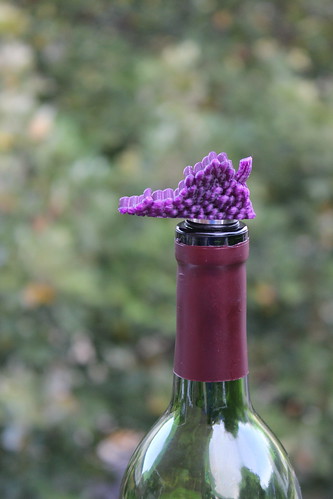
Virginia is for Wine Lovers bottle stoppers did well as usual as did that Glowing Cthulhu Coaster. Every single show– I sell Glowing Cthulhu Coasters (often to the point of selling out). It still amazes me how well they do.

3D Printing - Virginia is for Wine Lovers Stopper

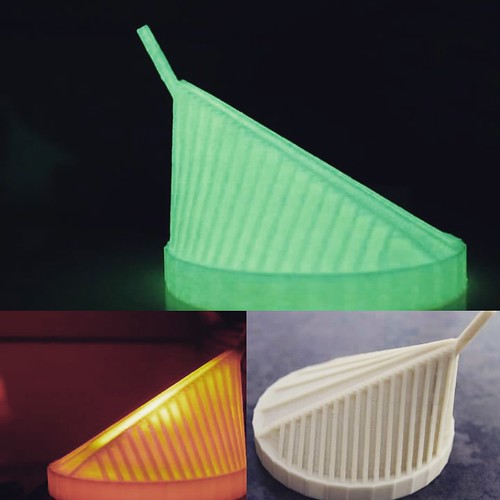
The Glowing Marine Corps Museum (which I have yet to blog about) did well. The great thing about that product is just two sales covers an entire roll of GlowFill!

3D Printing - Glowing Museum of the Marine Corps
My Glowing Ode to The National Museum of the Marine Corps

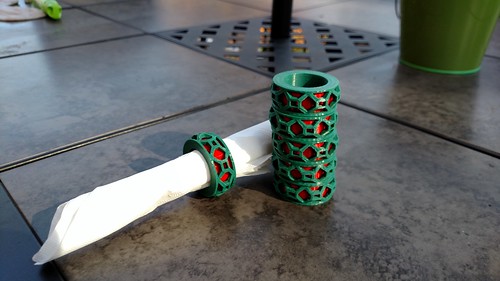
My two-color holiday napkin rings (another thing I need to blog about) got their first “Craft Show” sell as well.

IMG_20151108_103416835
Napkin Rings – SOLD!

Phew. It was a good day, but at the end of it, I was thankful that was my last show in 2015. The next show on my docket right now isn’t until March. I’m hoping to catch up on my blogging in Q1 2016… and launch my 3D Printing YouTube Channel!