Category Archives: Filament

Princess Vicky Does a Cold Pull [on the MakerGear M2]

I’ve led a bit of a charmed 3D Printing life.  I’ve had my bobbles and frustrations, but overall, I have been floating by with relatively few worries, a happy little 3D Printing Princess without a care in the world.  La la la la la.

And so it happens I have never ever done a cold-pull.  Well, until recently.

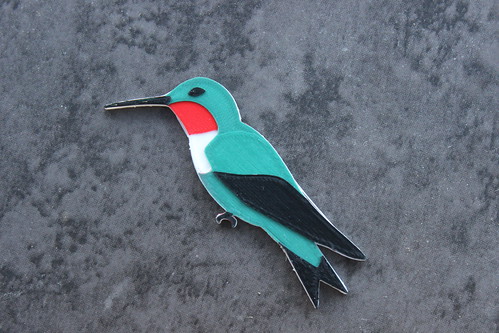
I purchased a bag of used extruder/hot ends from another MakerGear owner.  They arrived with eSUN Cleaner Filament in them and a note to do a cold pull when I was ready to use them.

Now, I know roughly what a cold pull is… and the term is a little self explanatory.  Though one could also argue the term “sweet tea”  is self explanatory as well and I thoroughly baffled a waitress in upper Michigan once with that beverage order.

When it was time to use my “new” nozzles, vaguely knowing the concept of a cold pull wasn’t going to cut it.  I needed some specifics.

For that, Google and this comment from user insta on the MakerGear User Forum helped guide my way.   Here are my steps on the MakerGear M2:

  1. I unplugged the power to everything on the extruder I wanted to remove– my thermistor, the heating block, my 40mm fan, my 50mm fan.
  2. I got out my Allen wrench and removed the fans and the filament drive.
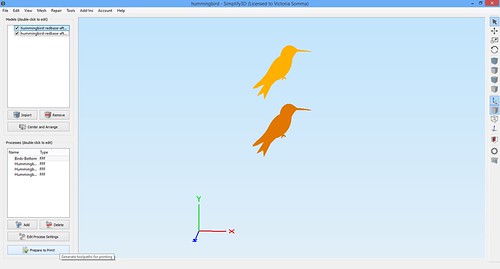
  3. I plugged in the thermistor and the heating block of the new nozzle.  Holding it by the groove mount (I couldn’t get it in the Filament Drive until I removed the eSun filament), I used Simplify3D to heat the nozzle to 240 degrees.
  4. Once there, I pushed the eSun filament with my hand and confirmed it was coming out of the nozzle.
  5. Then I turned off the heat and watched the stats in Simplify3D.
  6. I watched, waited (and regretted not having a better way to hold the nozzle) until the temperature hit 90 and then I tried to pull the filament out by hand.  I actually did not succeed until the temperature hit 80 and I had some help with pliers.  Then the filament pulled out and was the most lovely little, clean whisker.
  7. Once the nozzle finished cooling, I slipped the groove mount into the filament drive and assembled everything back together (Being careful to make sure the 50mm fan goes into Fan 0 and the 40 mm fan goes into Fan 2)
  8. And after that I checked my Z-End Stop calibration by Homing the Z-Axis and checking with a business card.

What I’ll Do Differently Next Time

So…. I had the foresight to grab a pair of needle nosed plyers with the intent of holding my hot end by the groove mount while it was hot.  Know what I didn’t do?  Test those plyers to make sure they’d be able to get a good grip on that rounded surface.  So I ended up holding that thing with my bare hands.  It was do-able.. but did get uncomfortable at times.  Next time I will be better prepared.  If not better plyers, then gloves.  : )


Print Diary – August 11 – Archilochus colubris

Ruby-throated Hummingbird
On Tuesday, I welcomed Archilochus colubris (Ruby-throated Hummingbird) to my 3D printed aviary. He was designed in Blender (based off a Creative Commons photo by my husband) and printed in the MakerGear M2. I used four different Simplify3D processes to print four colors– White, Traffic Red, Mint Turquoise, and Black.

3D Printing - Birds - Ruby-Throated Hummingbird

Overthinking the Color Order
Originally, I was printing Red, White, Green and then Black. My thought process was I wanted that White directly underneath the green, so it could be as bright as possible. I was worried if I printed green right on top of the red, it would appear brown.

So I did Red, White, Green and Black…. and I found myself very distracted by the Red outlines to the whole bird.

I switched them up. I printed White, Red, Green and then Black. With the first layer, it does look like my worse fears are realized– the bird is a pretty icky brown.

3D Printing - Birds - Green on Red Doesn't Look So Good...At First

But I have four layers of green (at 0.10mm each) and by the time it finishes all those layers, the green layer looks just as green as it does over the white. It made no difference whatsoever… for my ColorFabb Mint Turquoise. It is possible my translucent filaments from MakerGear (Grey and Orange) may be a different story.

Multi-processes to the Rescue!
I discovered that running Simplify3D’s multiprocesses one at a time are good for more than changing colors. It does give you an opportunity to recover should a mishap occur. In this case, one of my hummingbirds came unstuck to my bed. My attempts to glue stick him back on failed, so every time my extruder hit that blank spot it was making a nice spaghetti mess of filament (Side note– it is impressive to see how little filament actually goes on a layer– no wonder why my filament spools last forever).

3D Printing - Birds - Lost Hummingbird

Luckily, since I was running multi-processes, once my base layer of White finished, I had the opportunity to go into Simplify3D and remove the troublesome hummingbird (being VERY careful not to hit that Center and Arrange button). I exported my new processes to my SD card and that allowed me to not have to waste any more time on the MIA hummingbird.

Simplify3D - Saving Filament

Occoquan Craft Fair Preparation
I also got my application in for the Fall Occoquan Arts and Crafts Show on September 26th and 27th! I’m hoping to be their inaugural 3D Printing booth. Although I have no reason to worry about my acceptance into the show, meh, I still do worry a little bit, so I’ll be happy to hear back from the show director.

In the meantime, we are still preparing. My entire family is pitching in. Ryan is locating a tent and table and getting us a credit card processing solution. My brother, a small business owner, has been helpful in the business side of things. My Mom, as always, is a huge asset. Even my children are helping! They help with “Market Research” and young Sagan has mastered preparing my filament for color switches. : )

3D Printing - Sagan Preps Filament

3D Printing - Birds - Dyson Plays with Birds

3D Printing - Glowing Pumpkin Pendant - Sagan Helping Me Decide

On my end, an entire wall of my office is covered in Post In Notes of ideas and action items. My evenings are spent modeling and slicing, so I can make sure the MakerGear M2 has stuff to do while I work during the day.

3D Printing - Craft Show Planning Wall

And our dining room table is currently a staging area of potential products.

3D Printing - Craft Fair Inventory

It’s going to be a busy fall. 🙂

This is How I Become A Hoarder

So I’m not much of a shopper. I rarely buy clothes. I’m typically at the mercy of whatever garments various relatives give me as gifts. Luckily, I have found they tend to have better taste than I. All my nice clothes come from other people.

When I started 3D modeling and 3D printing, there was a bit of a paradigm shift. Suddenly I had things I coveted– prints from Shapeways… of my own design. And now that we have the MakerGear M2, there is a new phylum of purchases in the mix.

Filament.

I’m really into filament at the moment. At the National Maker Faire, I was helping out the Shapeways booth and it just so happened Printed Solid was nearby with the bronzeFill I had been coveting…on sale…with no shipping fees. I bought it, just in time to print a bust of my father-in-law for Father’s Day. I was instantly in love with the material.

My fate was further sealed when I learned to do two colored prints on our single extruder machine.

Well now I wanted MORE colors for the ideas brewing in my head. And as luck would have it, Printed Solid had a big sale to celebrate their new website. Well I couldn’t just let that pass me by. “Oh I’ll just order one,” I thought to myself. I decided to get the GlowFill my son and I had tried out the week before. Just like bronzeFill. Instant love.

3D Printing - Fun with GlowFill
I placed an order for GlowFill. And then like five minutes later, I placed another order. That’s how fast I found more things (4 more things to be exact) that I coveted. That shipment has arrived, but I still yearn for NinjaFlex, WoodFill, a wider nozzle to better work with WoodFill, hdGlass, green PLA, purple PLA, on and on. I Still Want MORE!

The comedian Amy Schumer aptly described how she eats popcorn— the progression from “oh, I’ll just have a little” to “Gah!” and shoveling it in your mouth en masse.

That can easily become me and filament. : )

Future Experiment – Filament Coloring

I seem to have a never-ending supply of things I want to print and try. Here’s another one for my formidable list!

Today I read a Make magazine article entitled “Automating a Filament Colorizer to a 3D Printer” (via the 3D Printing reddit). As soon as the article loads, you see a lovely piece of 3D Printed art by Tom Burtonwood that is sporting gradients of multiple colors.

Make Screenshot - Automating a Filament Colorizer to a 3D Printer

I marveled at the piece, scrolled down and was shocked to see how he did it. He used Sharpies! We have a ton of Sharpies in the house! I’m quite familiar with their vast array of colors as I have to routinely confiscate them from my four year old (and try my best to convince him he wants to use “kid markers” instead).

And although I once doodled with a Sharpie on a 3D Benchy print, it never occurred to me to take that Sharpie to the filament before it goes through the printer. It’s an interesting notion. I might have to give it a whirl one day.

One day. : )